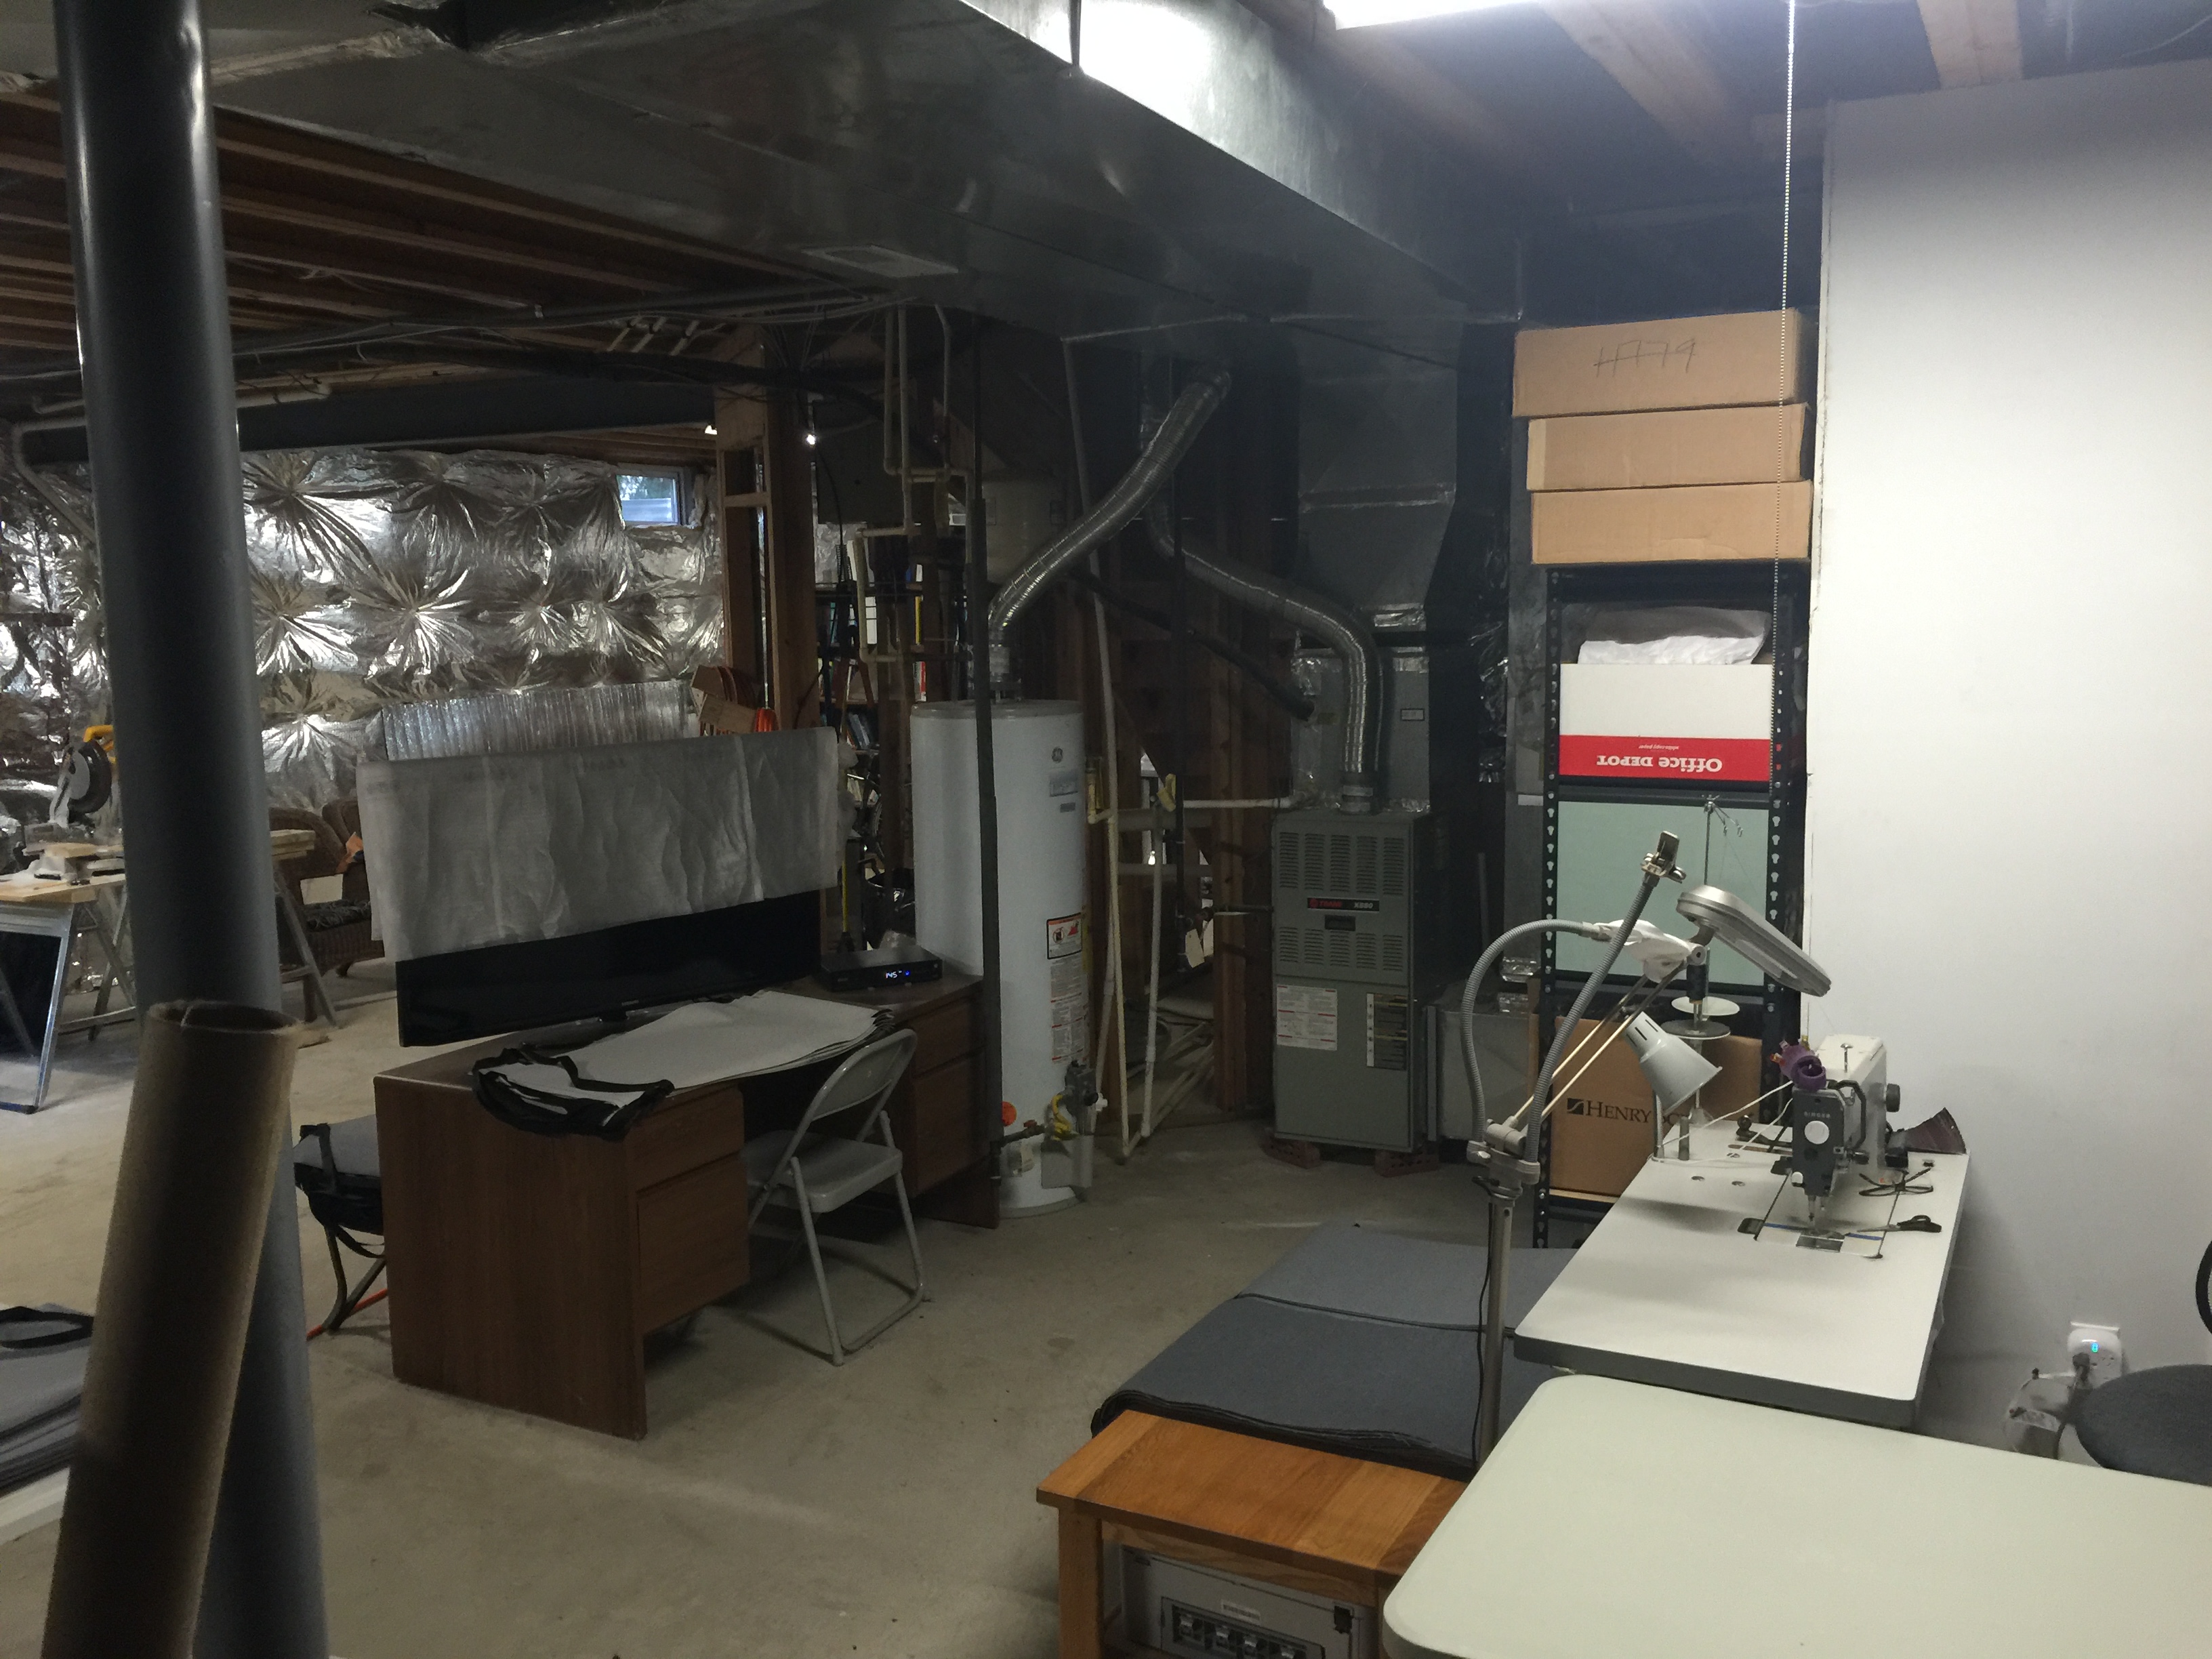
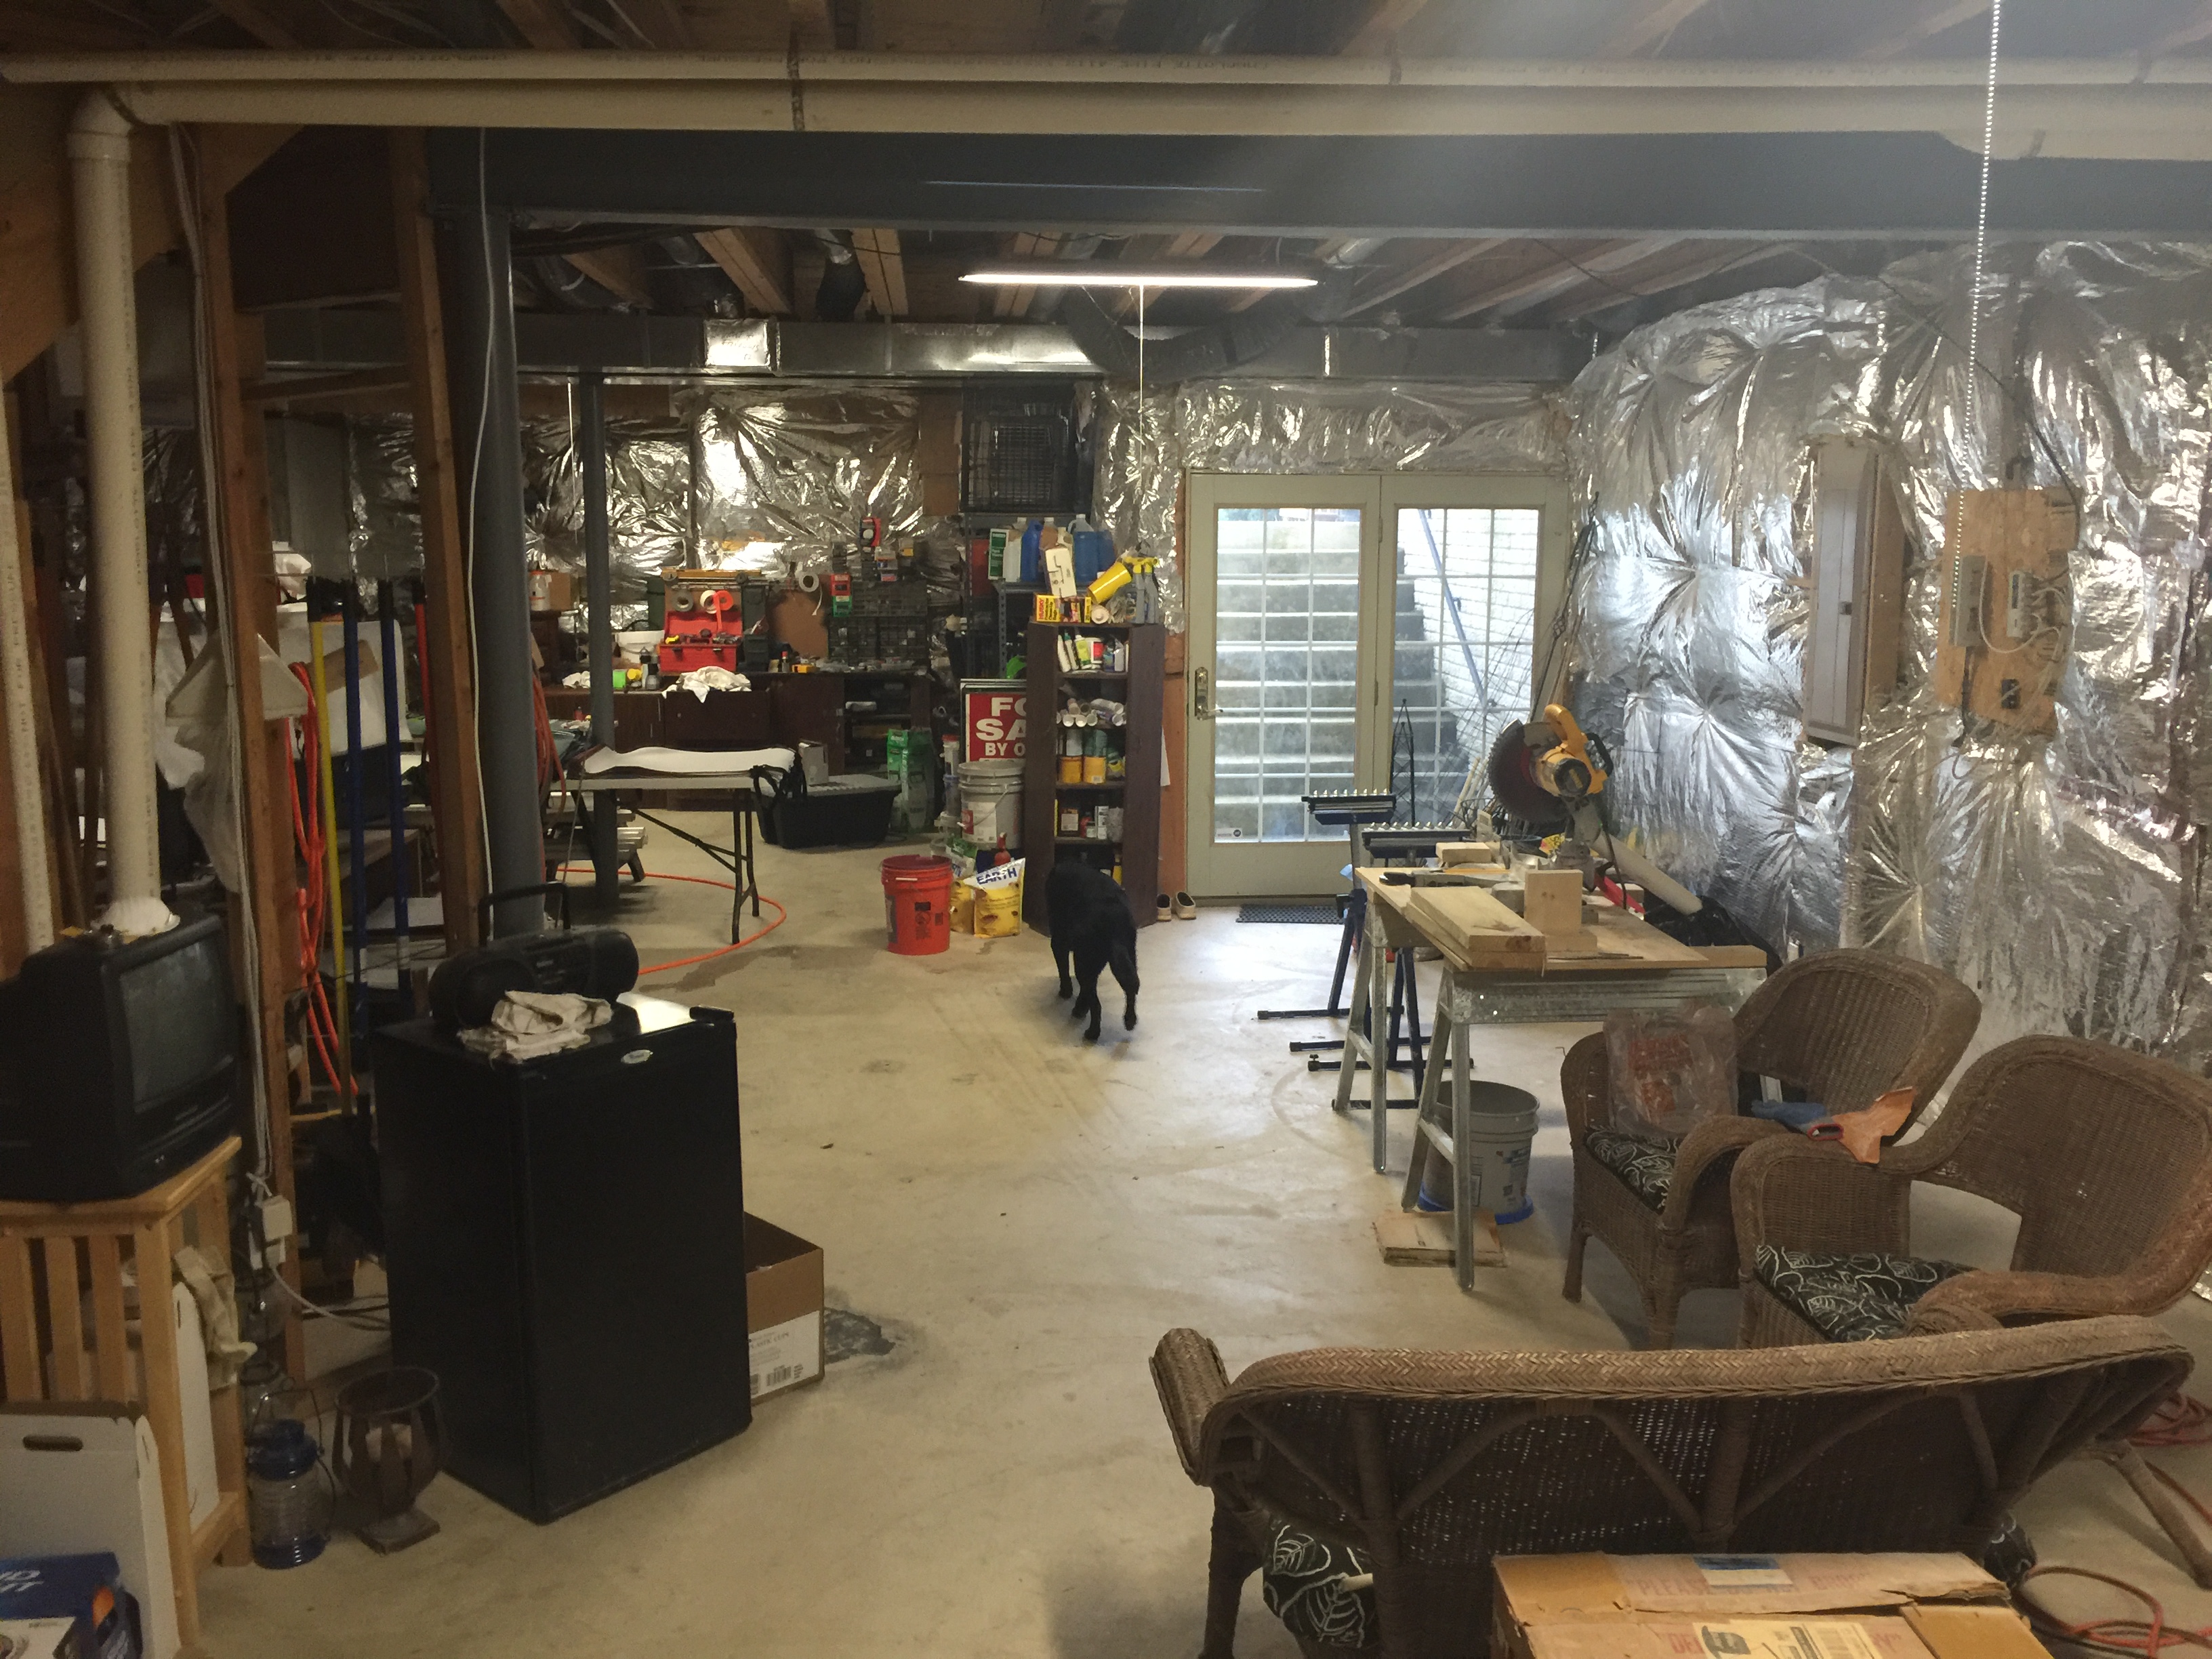
With no options for bumping out a wall or utilizing a garage, Cheryl S. See was trapped in the unfinished and unispiring basement of her home to do the heavy duty work of creating and assembling her Quilt Scrolls. A smaller studio inside the house is her primary space for creating quilts, but needed a dedicated space that would allow her to run electric sanders, circular saws and other power tools.
Here's the basement studio before the remodel. A bathroom is behind the white wall on the right side. A TV, covered for protection, is across from her work table.
Surrounded by lawn furniture, walls of silver insulation and terrible lighting, not to mention a less than desirable floor, it was time to find a better solution. Two years ago, she and her mother's boyfriend added a bathroom in hopes that one day they would finish the entire downstairs space. He did all of the electrical, plumbing and framing, while together they worked on the mudding, sanding, painting, and tile. "The photo shows the finished white box which was the bathroom. I now had a second outlet on the outside of the wall and a little more lighting was added. My commercial machine sat just outside the bathroom door where the plug was and slightly better lighting. A TV was added last Christmas to help me forget that I was spending countless hours in a basement making the Quilt Scrolls and the fact that I couldn't even write off the space on my taxes."
It was time for a change.
How did you approach the project?
"I have never been afraid of hard work and oversaw the entire project along with the help of a General Contractor who had previously built a deck for us. I did a great deal of research on Pinterest, especially when it came to finding ideas for how to open up the stairs. I was especially drawn to the barnwood and iron look and decided to make this a feature of the entire downstairs space."
What were the 'must have elements' of the studio?
"I wanted to change the opening of the stairs, expand the one window in the space to add more light, and add a large cutting table. I work for long stretches at a time, so good lighitng was very important. I also needed an easy to clean and attractive hard wearing floor. My large hand quilting frame would not fit in the upstairs studio, so that also needed a permanent home."
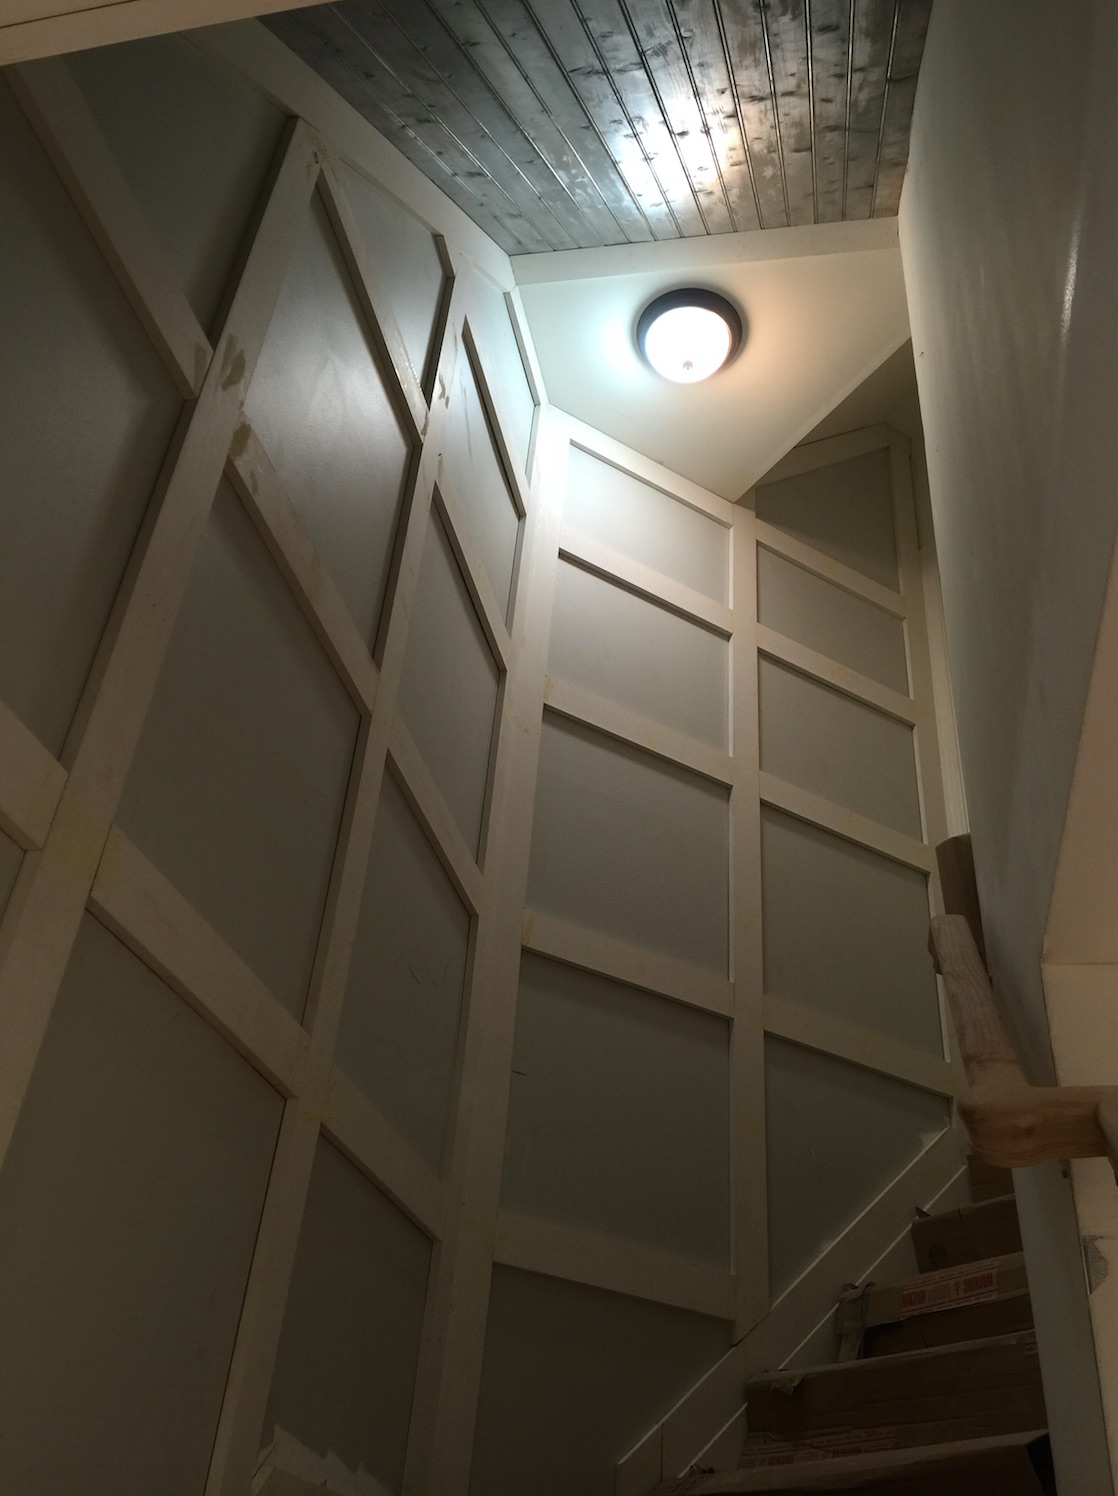
Stairs leading upstairs to the main portion of the house.
Did you use an architect or designer? What was your budget?
"The General Contractor and I worked together to plan a design. He suggested including a barn door that would hide my storage space. He also suggested hanging a 1/2 barn door on the wall to hide the electrical panel while unifying the look. We also decided to enclose the area were the one small window was located, so that I could use the room for the circular saw and other 'messy stuff'. The window was enlarged to let in more light and allow this space to be considered an additional bedroom (if desired by future owners of the home). With a budget of $40,000, Mom and I got to work doing many of the projects ourselves, including painting all of the walls, tiling, and working on the custom drapery cutting table. We love tackling a project together. We got matching electric sanders. I also discovered that I like tiling. I love tiling so much, that I spent two weeks leveling and tiling the entire 800 sq. foot space by myself."

Cheryl tiling the floor. Notice the 1/2 barn door that hides the electrical panel.
Tell us about the process and what features you included. How long did the project take?
"Recessed LED lights were added throughout the space to improve the poor lighting situation. A tray ceiling with batten board was used to tie everything together. The walls are a light gray while the ceiling was a one shade darker grey. The batten boards are painted white. My mother's boyfriend increased the amperage of all plugs as well as adding many more than usual along the walls. Some outlets were placed higher along the walls as well. The floor tile is porcelain and has the barn wood look I desired, and wears like iron. The bulk of the project took seven weeks. Having to wait a few more weeks for the stair railing extended the process to twelve weeks."

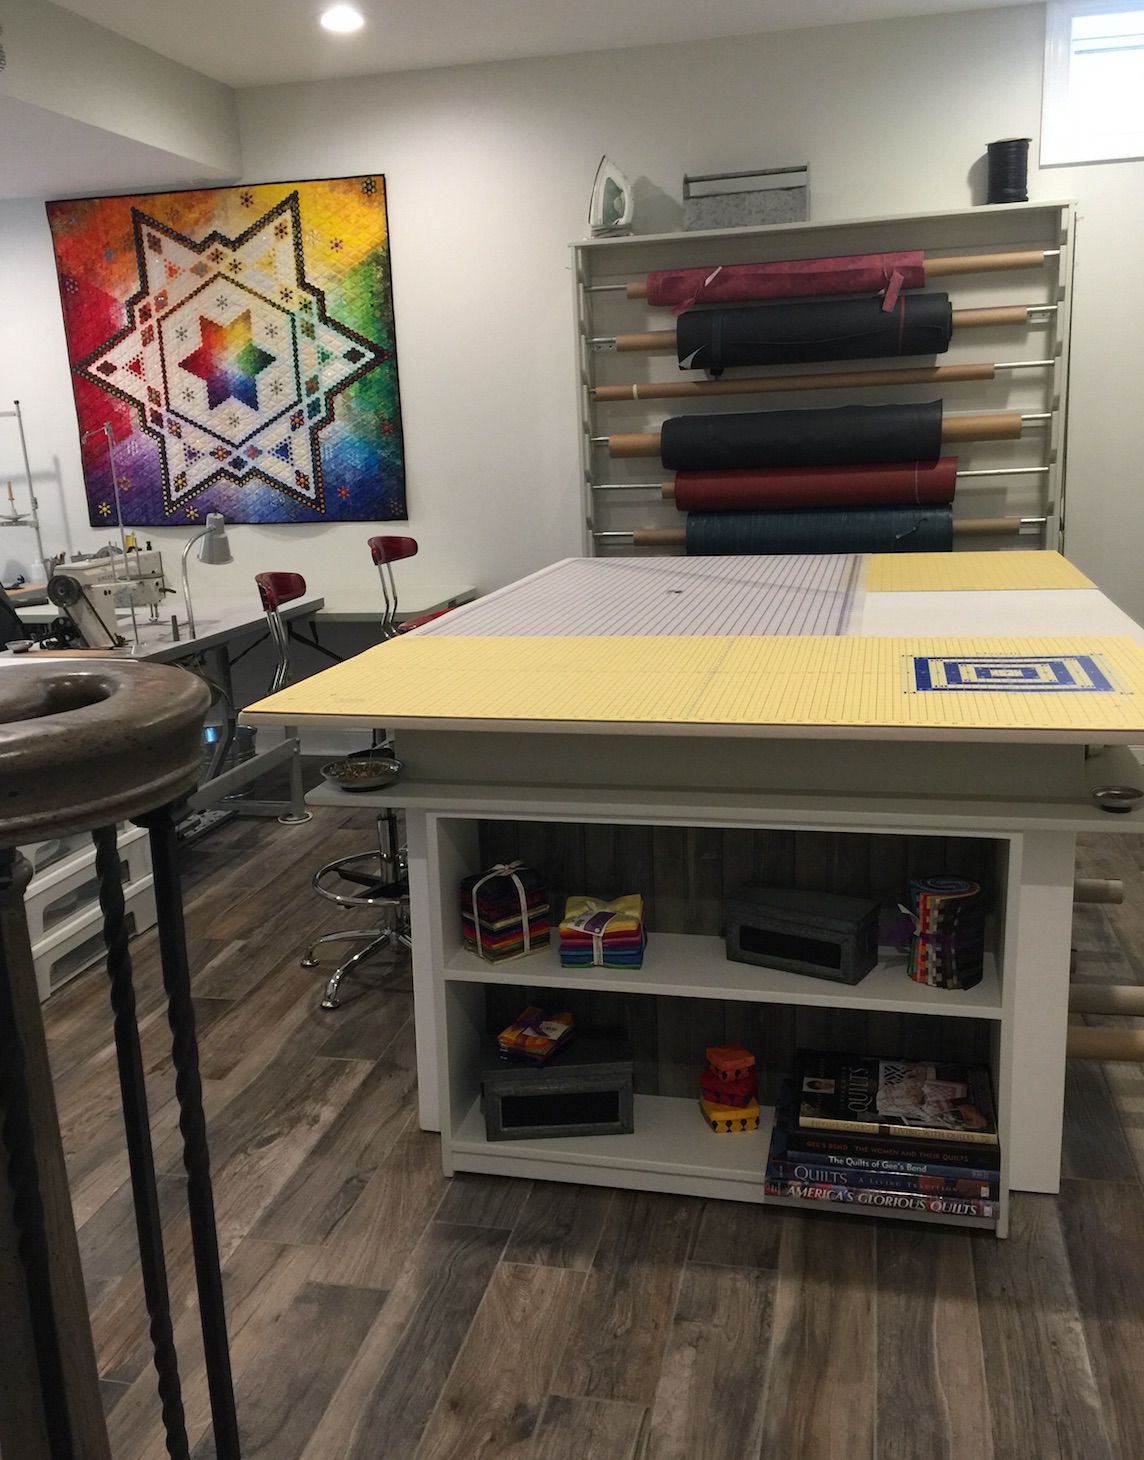
Mom working on the custom drapery table.
"Mom made custom drapery for a living, so with her design, based on a drapery cutting table, we built a huge table (81" x 62") that includes a shelf underneath. The table's design allows a seamstress to clamp fabric to the table for extremely accurate cuts. I store scissors or other small items on the shelf when not needed. We also built what mom calls a Fabric Dispenser. It holds my bolts of vinyls."
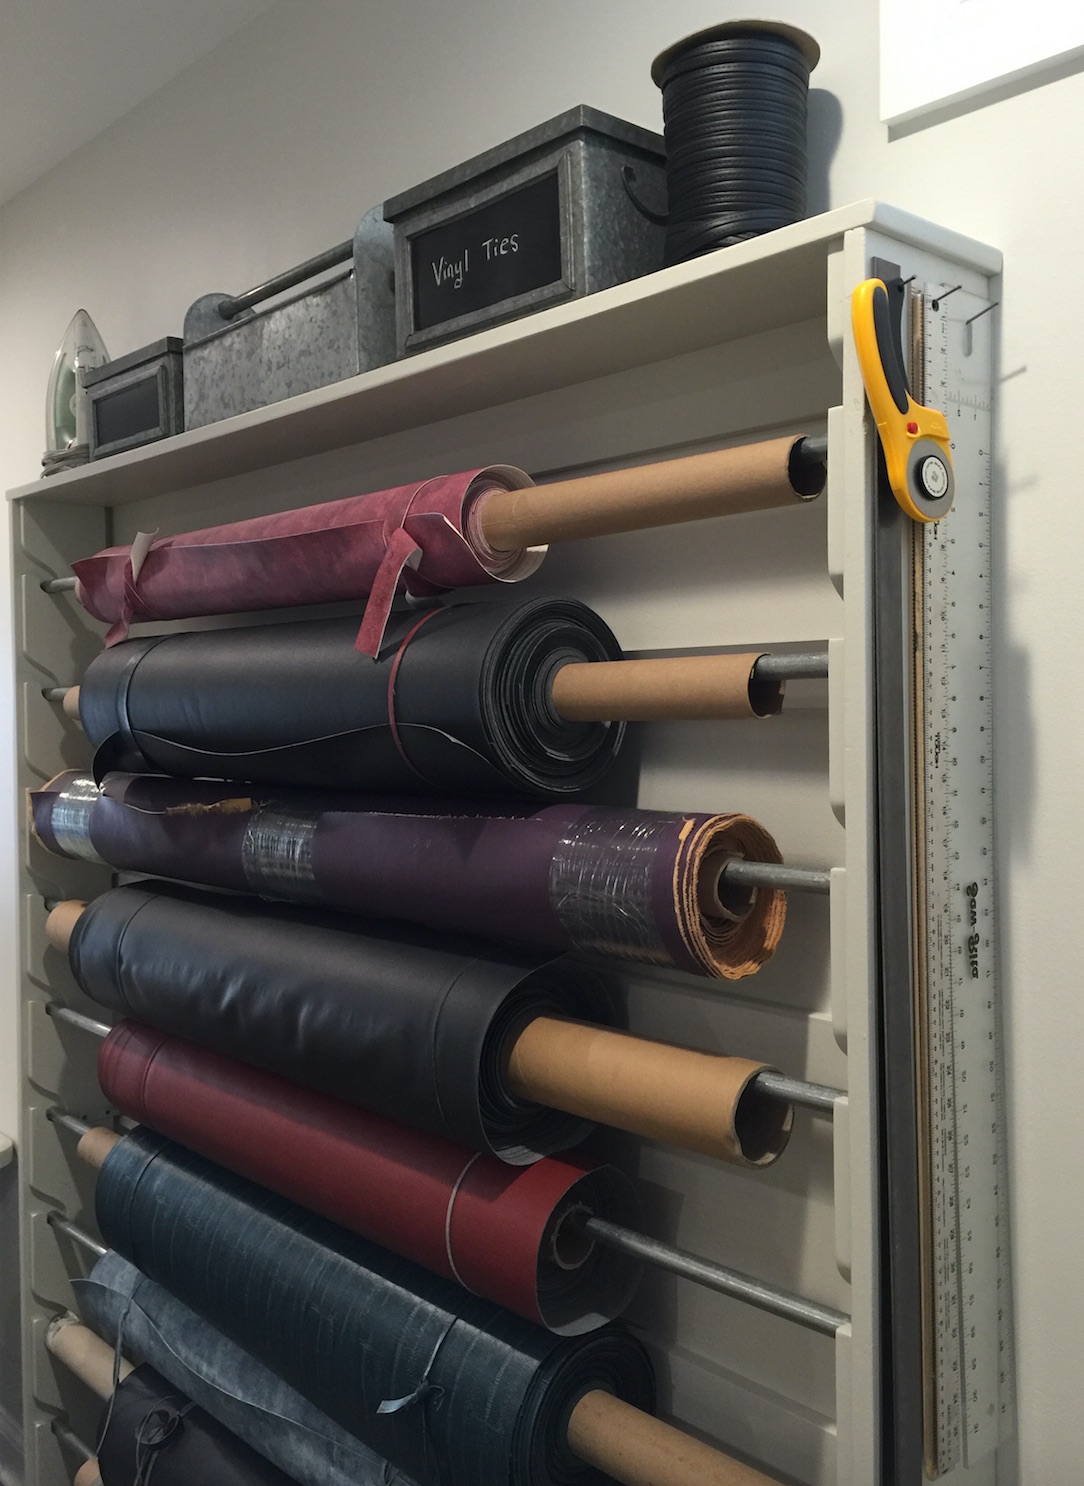
The Fabric Dispenser
Describe the completed studio and how you feel about the space?
"I love the space. It makes me feel spoiled rotten. So many people helped to make this possible. It has that little bit of an urban barn feel. It was so satisfying seeing the entire project come together. The little shelf with candy and dog biscuits was made using extra stair tread. To continue the urban feel, tool boxes and other galvanized items have found their way into the space. The L-shaped studio space means that I now have rooms to sit and hand quilt while keeping up with my favorite TV programs. There is even a small kitchenette area with a microwave and a mini fridge. I could almost move down into the space."



.jpg)

Barb
I have considered trading my bedroom and having more room,but have not convinced my self enough to move all the furniture! I am not a professional, so I don't "need" the space so much. I just need enough for cuting table,machine cabinet AND ironing board! Good luck to you.
Could we please have advise for those of us who work in tiny rooms (or parts of rooms)?
Presently I work partly in a corner of the living room and partly in a tiny guest room. I do think I'm alone in that.
I did have more lighting put in than code. The electrician put in on a dimmer as he was worried that there would be too much light. As quilters we know this is never true! I wish I knew exactly how I was going to place everything prior as my quilt frame ended up in the place with the poorest light and I may have more light added.
Final layout did not get decided until my Mom came to assemble the table and fabric dispenser. She is a master of organization and also designed my design wall. Only the table, fabric dispenser and workroom (table saw, etc.) ended up exactly how I originally planned.
I am a hand quilter. The table came in very handy to block my newest quilt which you can see a glimpse of on facebook. I just finished it two days ago and plan to show it in 2017.
www.Facebook.com/CSeesQuilts
RSS feed for comments to this post