5

It's Fixed!!! The Free Shipping choice should be available now. Please try again if you couldn't find a free shipping choice.

NOTE: These stamp sets will be mailed free to anywhere in the world. International IS included. You must make the stamps a separate order to make the Free Shipping work. 

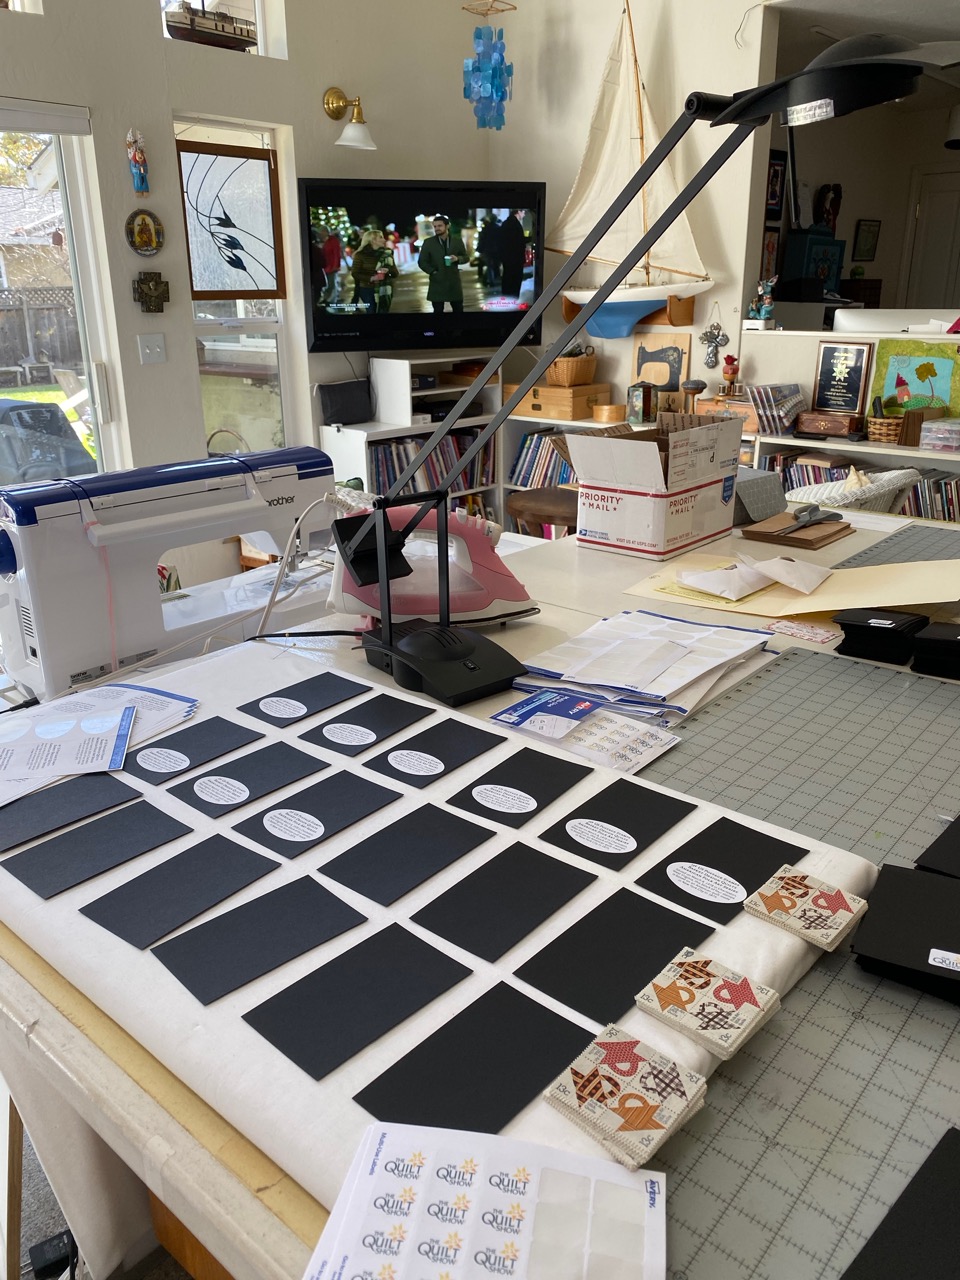
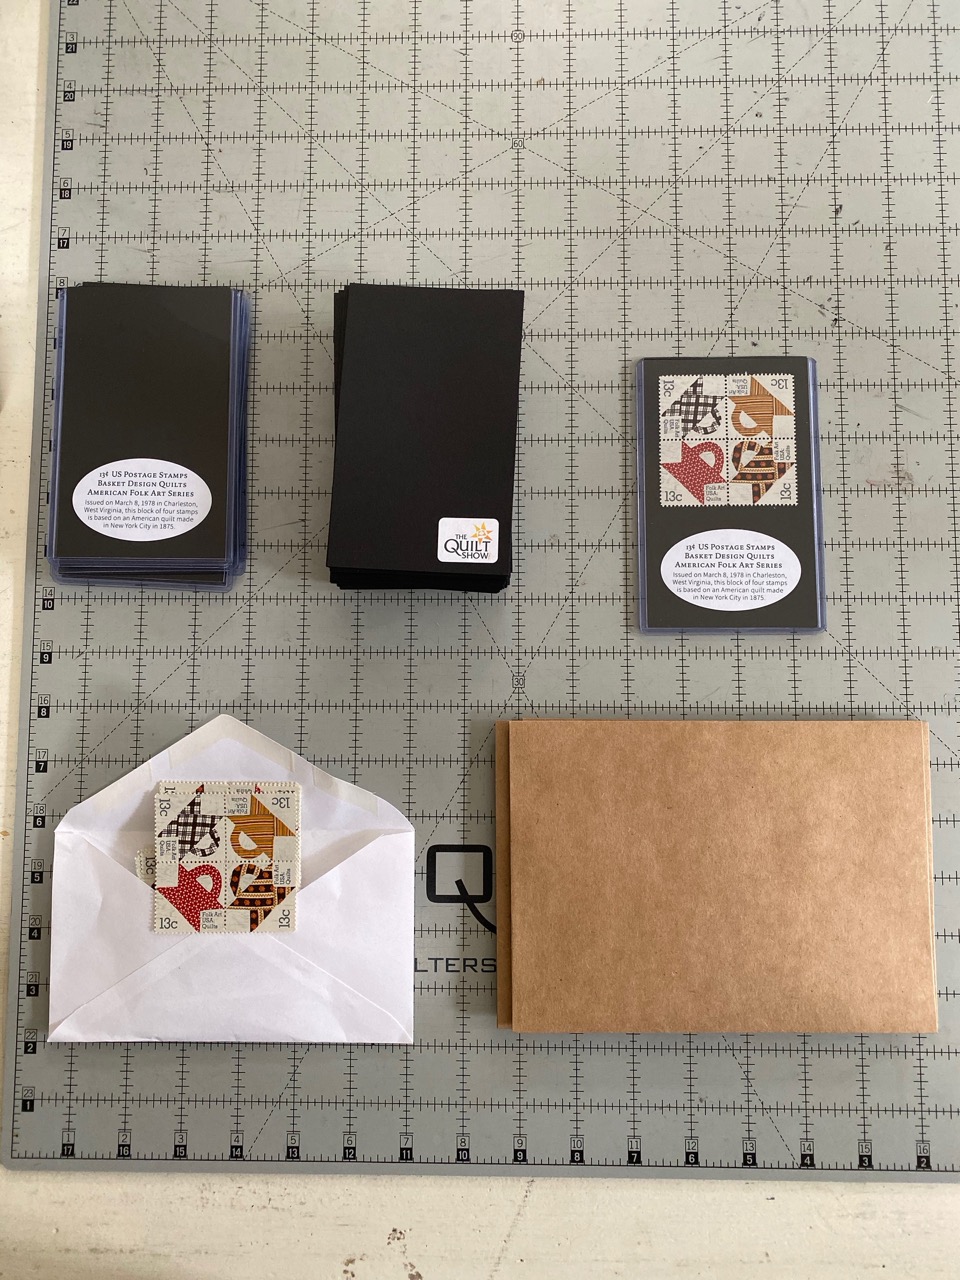
The vintage Quilt Basket Stamps are wonderful. They are a part of quilting history.  I (Capt'n John) was just going to put them in an envelope and send them out to customers that bought or renewed a 1-Yr Membership. My office staff said, "Not good enough for Star Members". So they bought some supplies and we are working to put them in a fun package. This is why many of you have not gotten your stamps yet. The supplies are in and the stamps are being sent. The picture shows me creating these packages while watching the Hallmark channel. Spoiler Alert: the movie had a happy ending.

Be sure to order your stamps (and choose free Shipping anywhere in the world). Also, make sure to use the coupon code sent to you after your purchase to get the stamps for free. (Plus you get patterns from Ricky and Alex and 2 BOMs and DVD streaming classes...)
  19

We decided to add some cheer to the office with holiday trees made from festive fabric scraps.
You can make them too!

Here is what you will need:

Before you begin, prepare your fabric with the Terial Magic Fabric Stiffener following the instructions on the bottle. Once your fabric has been stiffened move to step 1.

Step 1: Cut the fabric
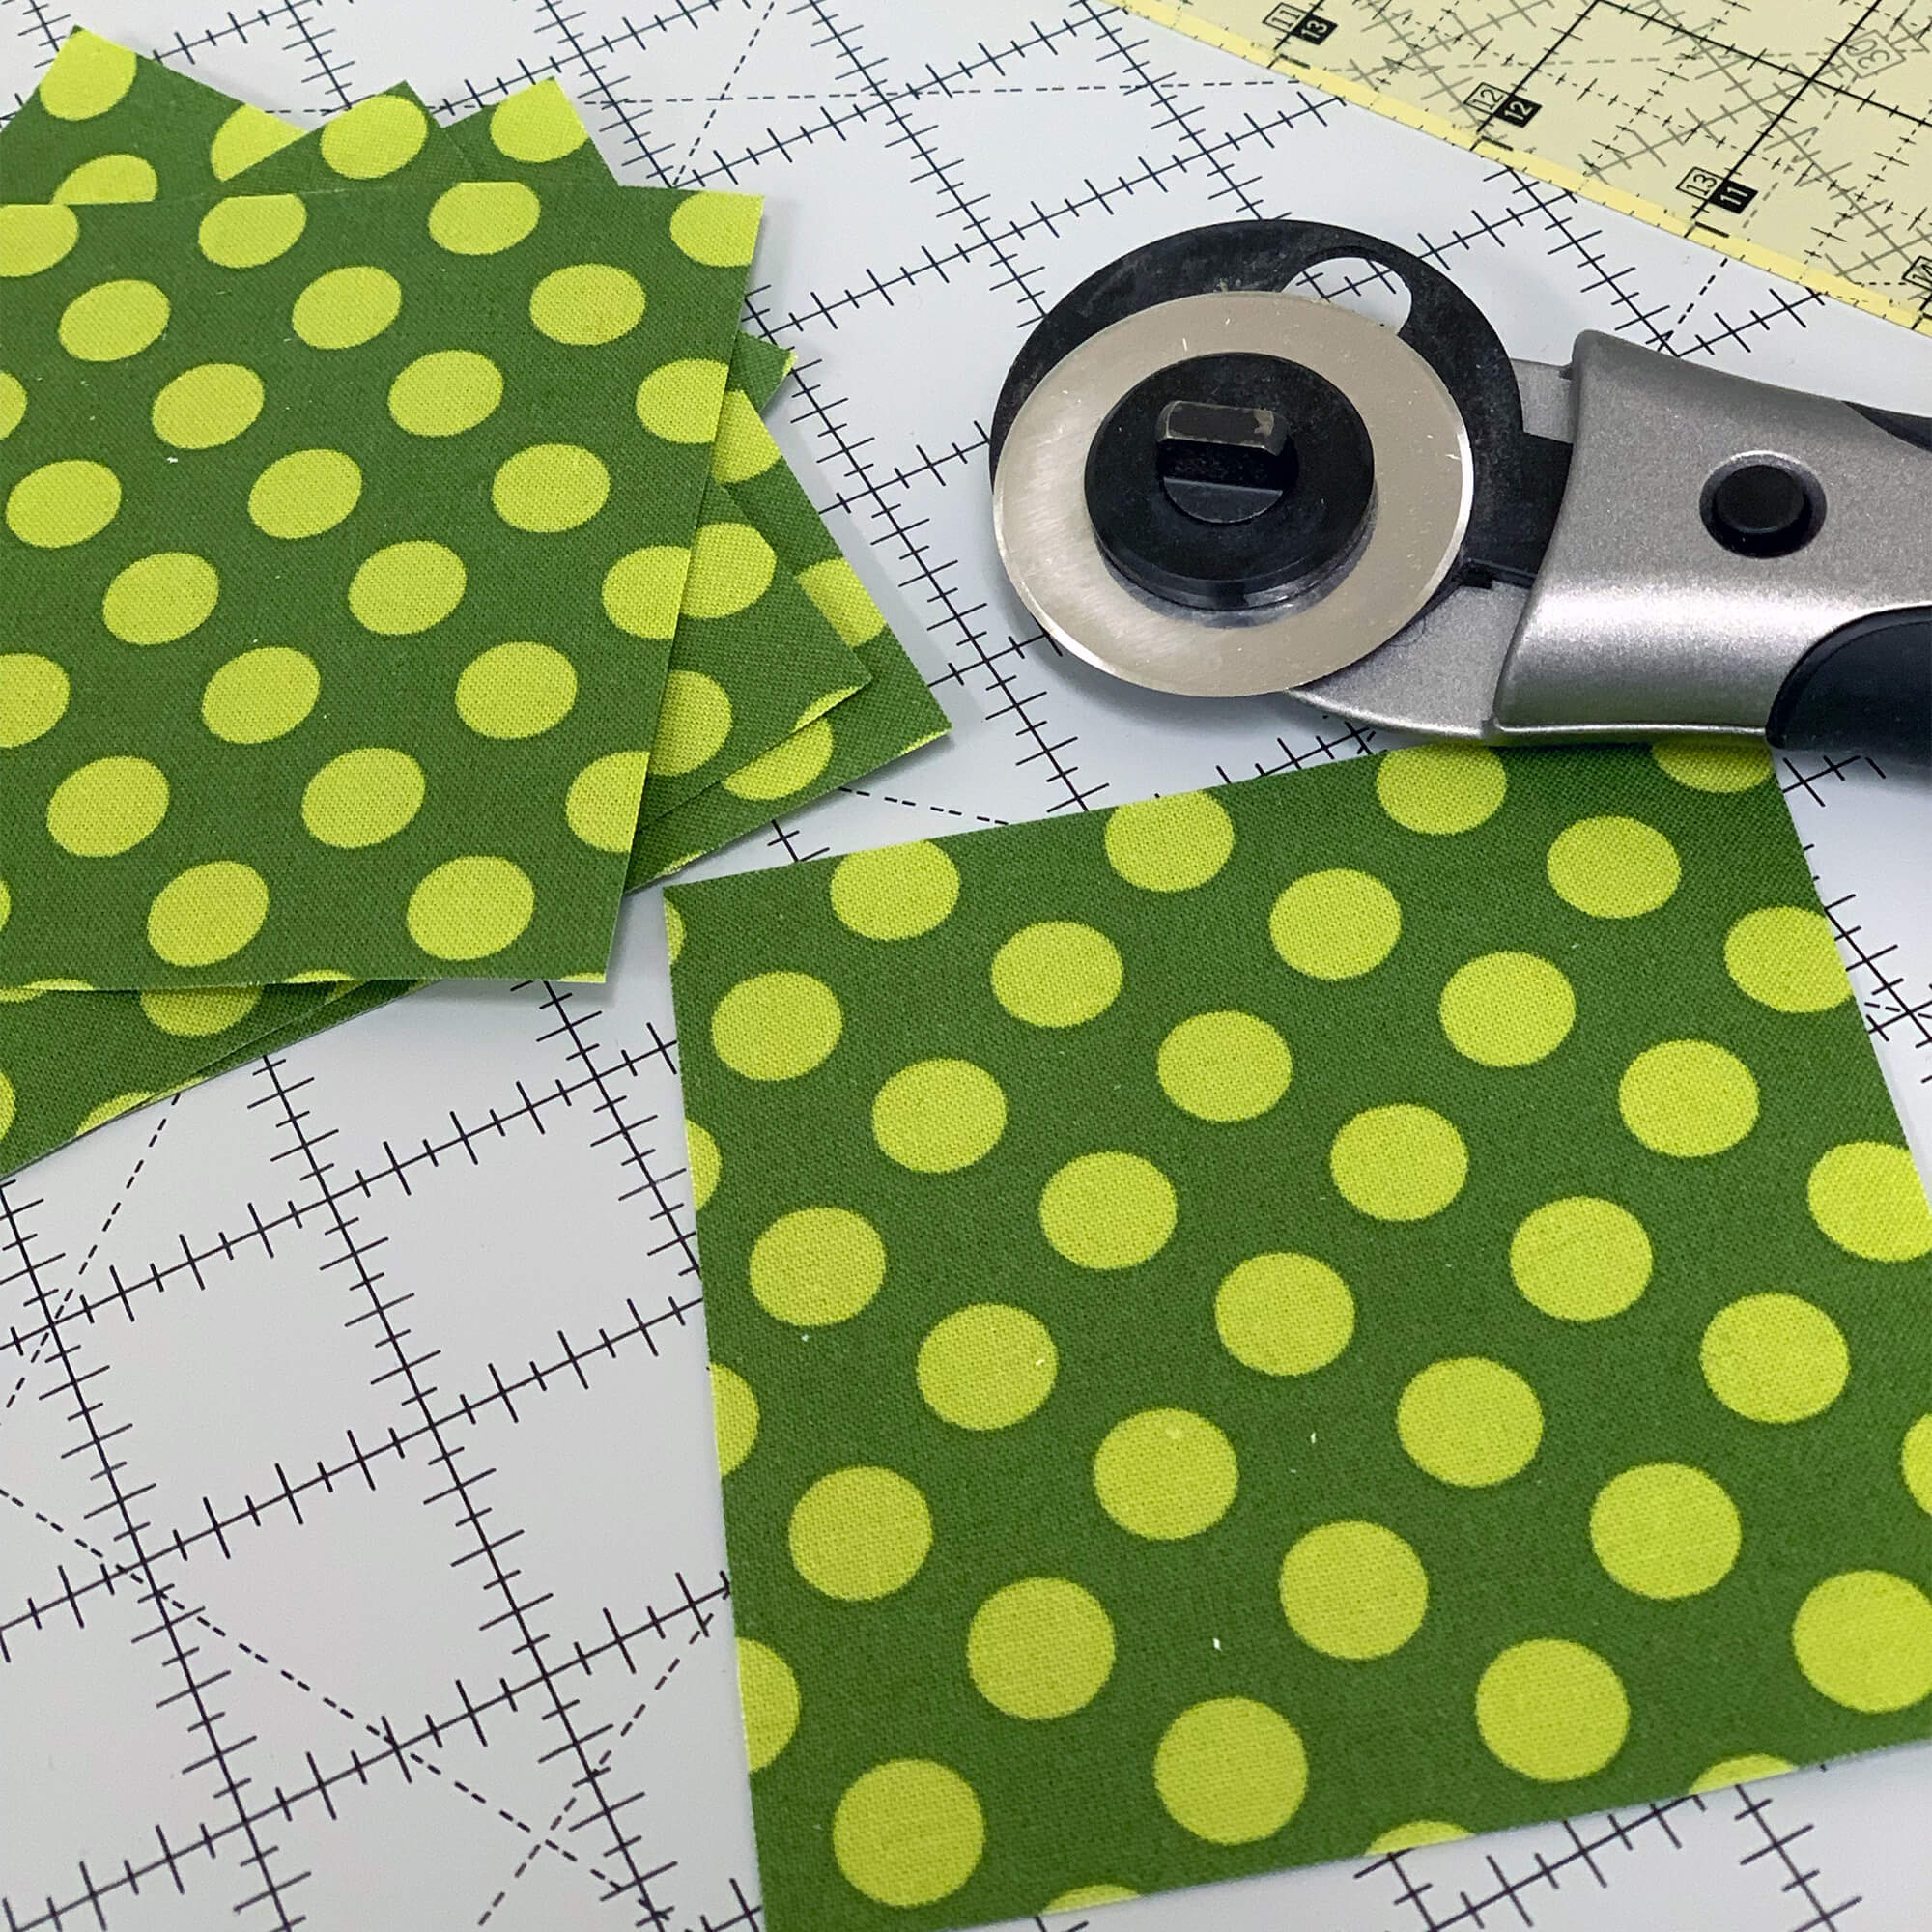
Cut 5 fabric squares for each tree. 
We cut 8" squares for our big tree, 6" squares for our middle-sized tree, and 4" squares for our small tree. We used one fabric for each tree, but you can mix and match too!


Step 2: Fold your squares
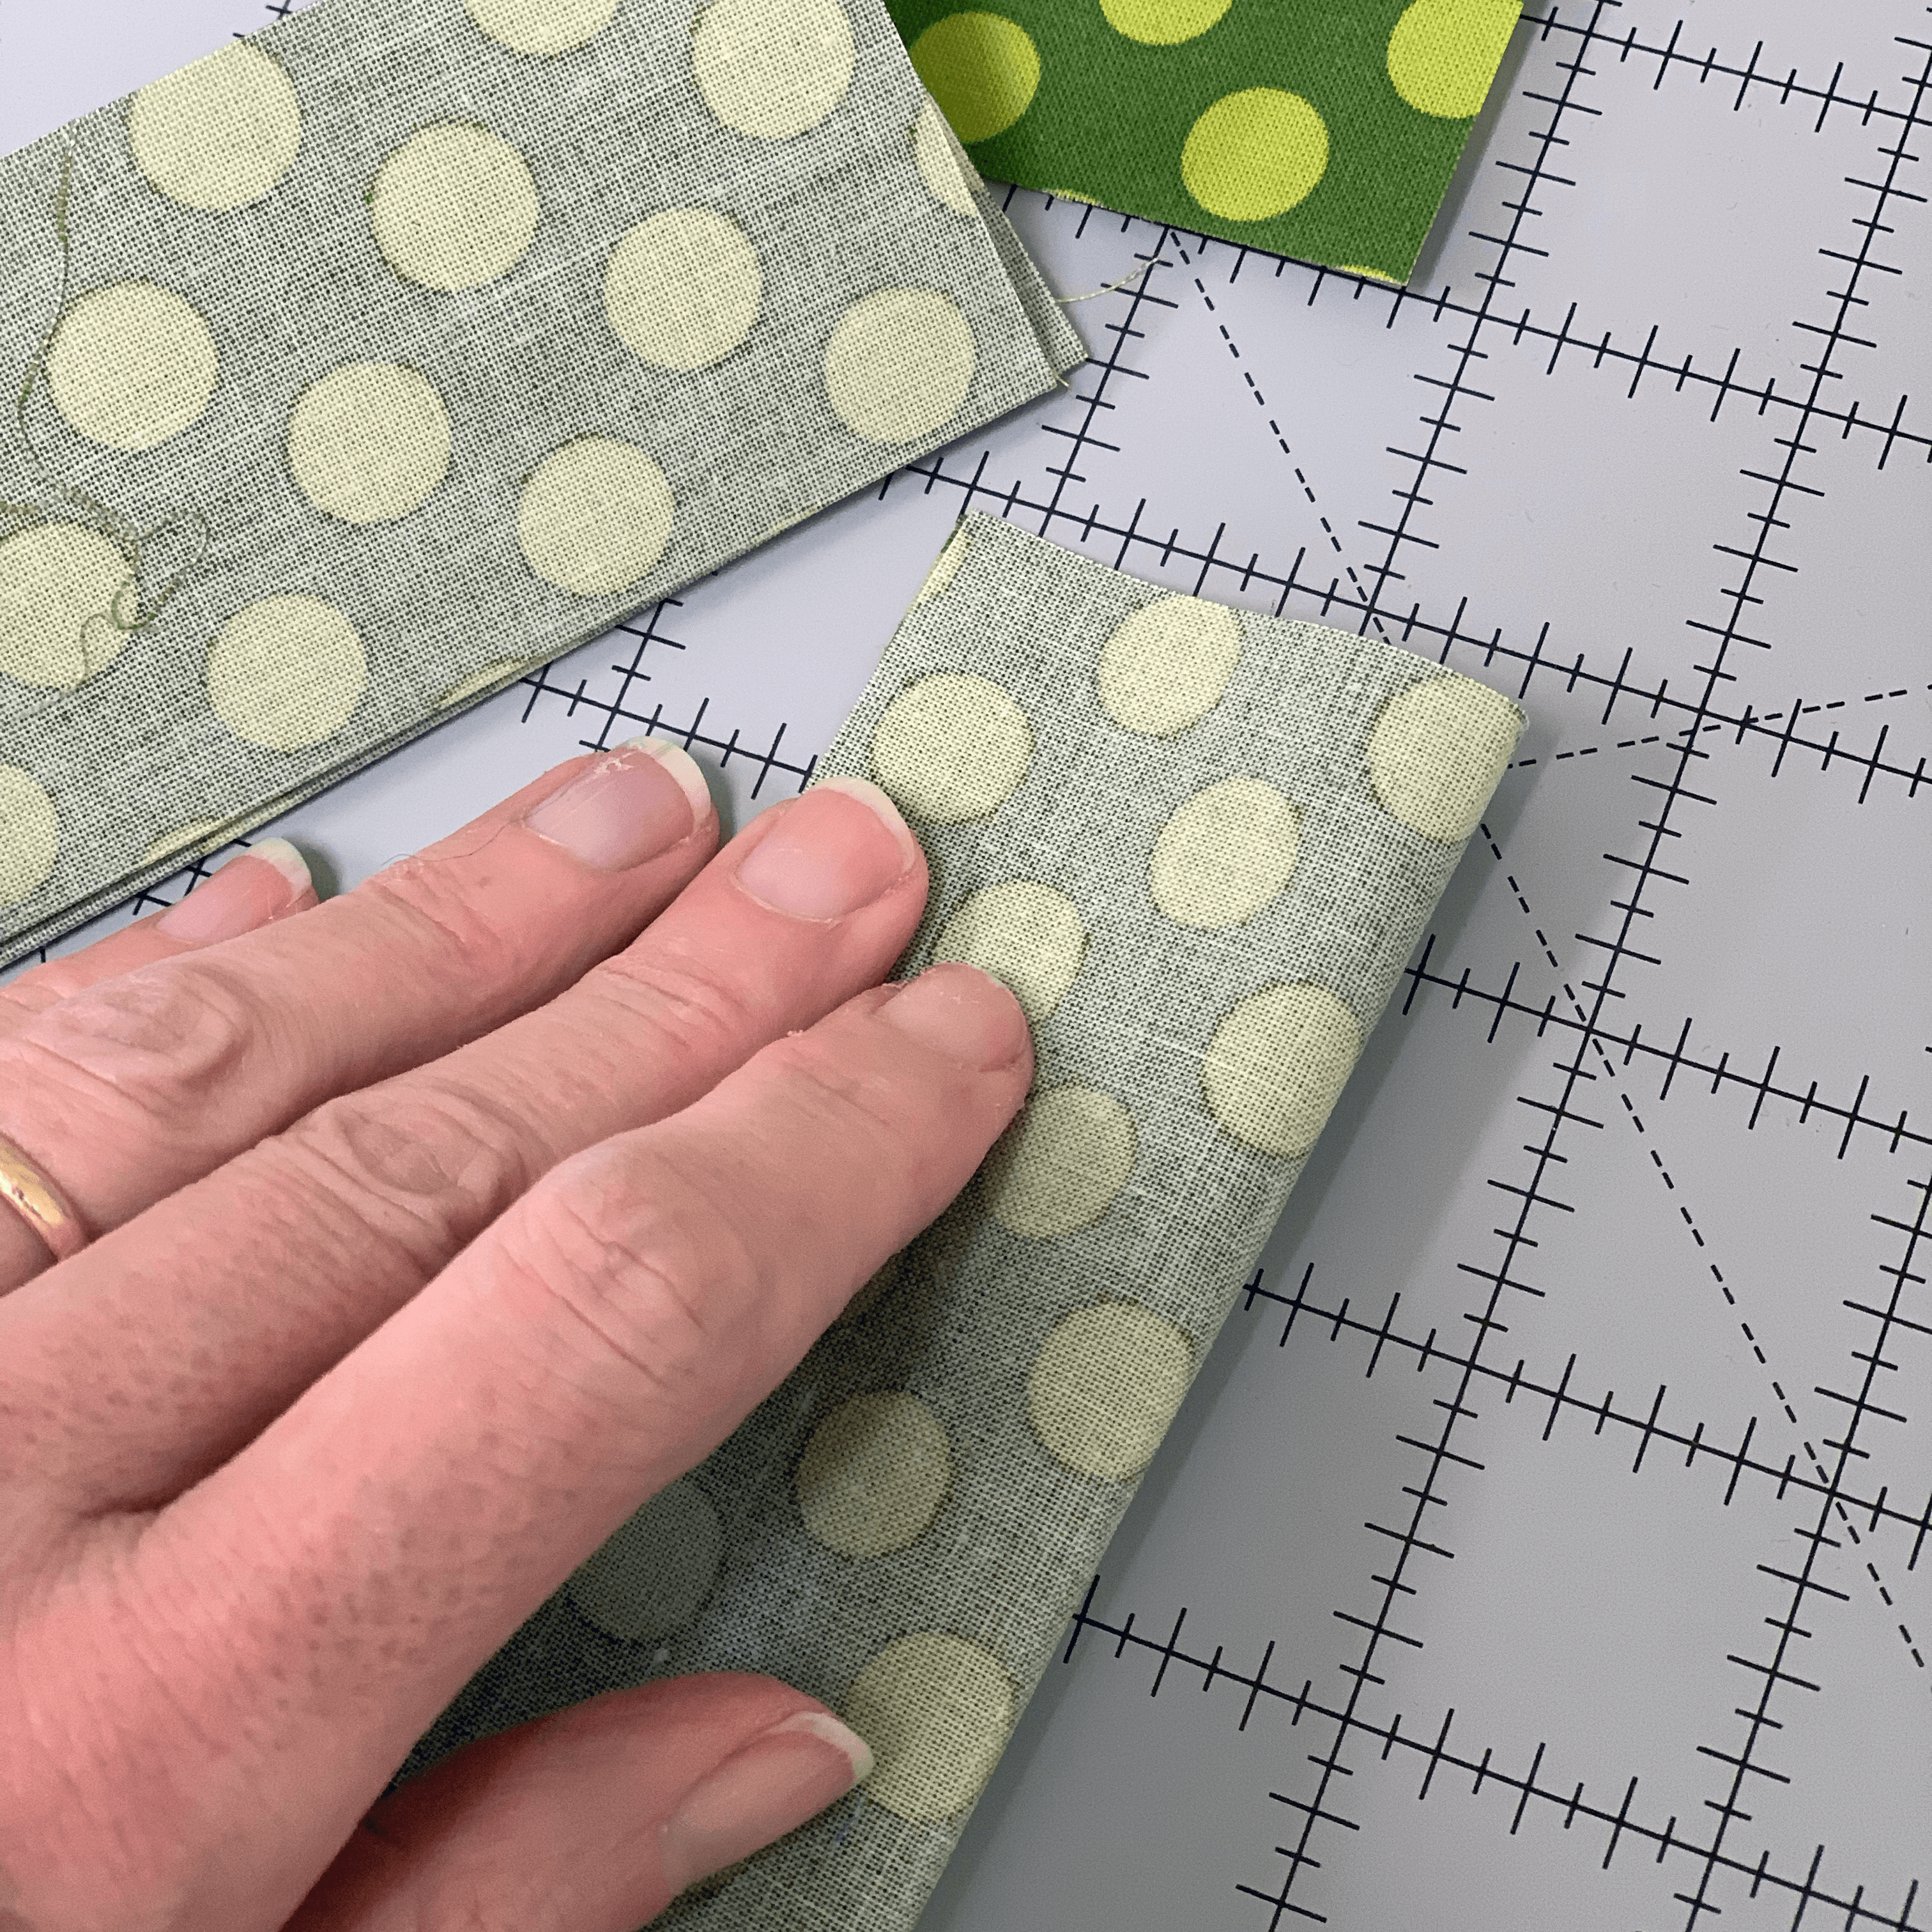
Fold your fabric squares in half and stack them neatly with the folded side aligned. You may wish to clip your pieces together along the folded side with Wonder Clips or small binder clips to keep them aligned.


Step 3: Shape the tree
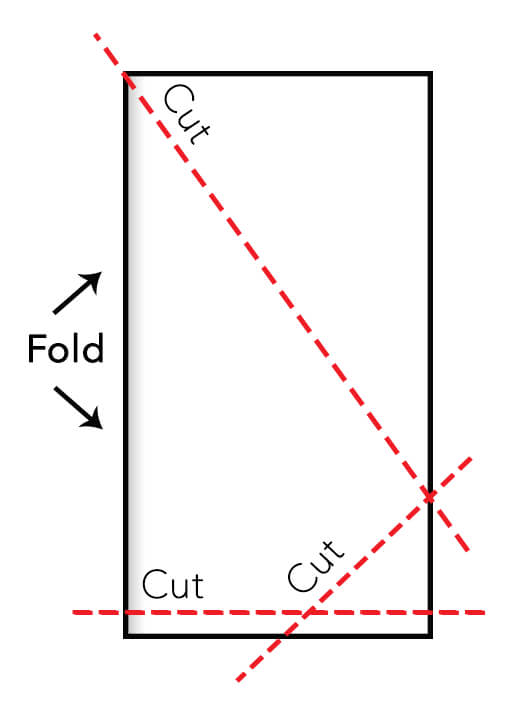
Using a rotary cutter and ruler, trim the bottom of your tree at a right angle to the folded side. This will be the base of your tree. 
Make a second cut from the bottom edge to the outside edge at a roughly 40 degree angle, starting about half way across the bottom edge.


Make a third cut from fold side of the the upper corner to the outer edge right of the last cut you made. 


Step 4: Add branches
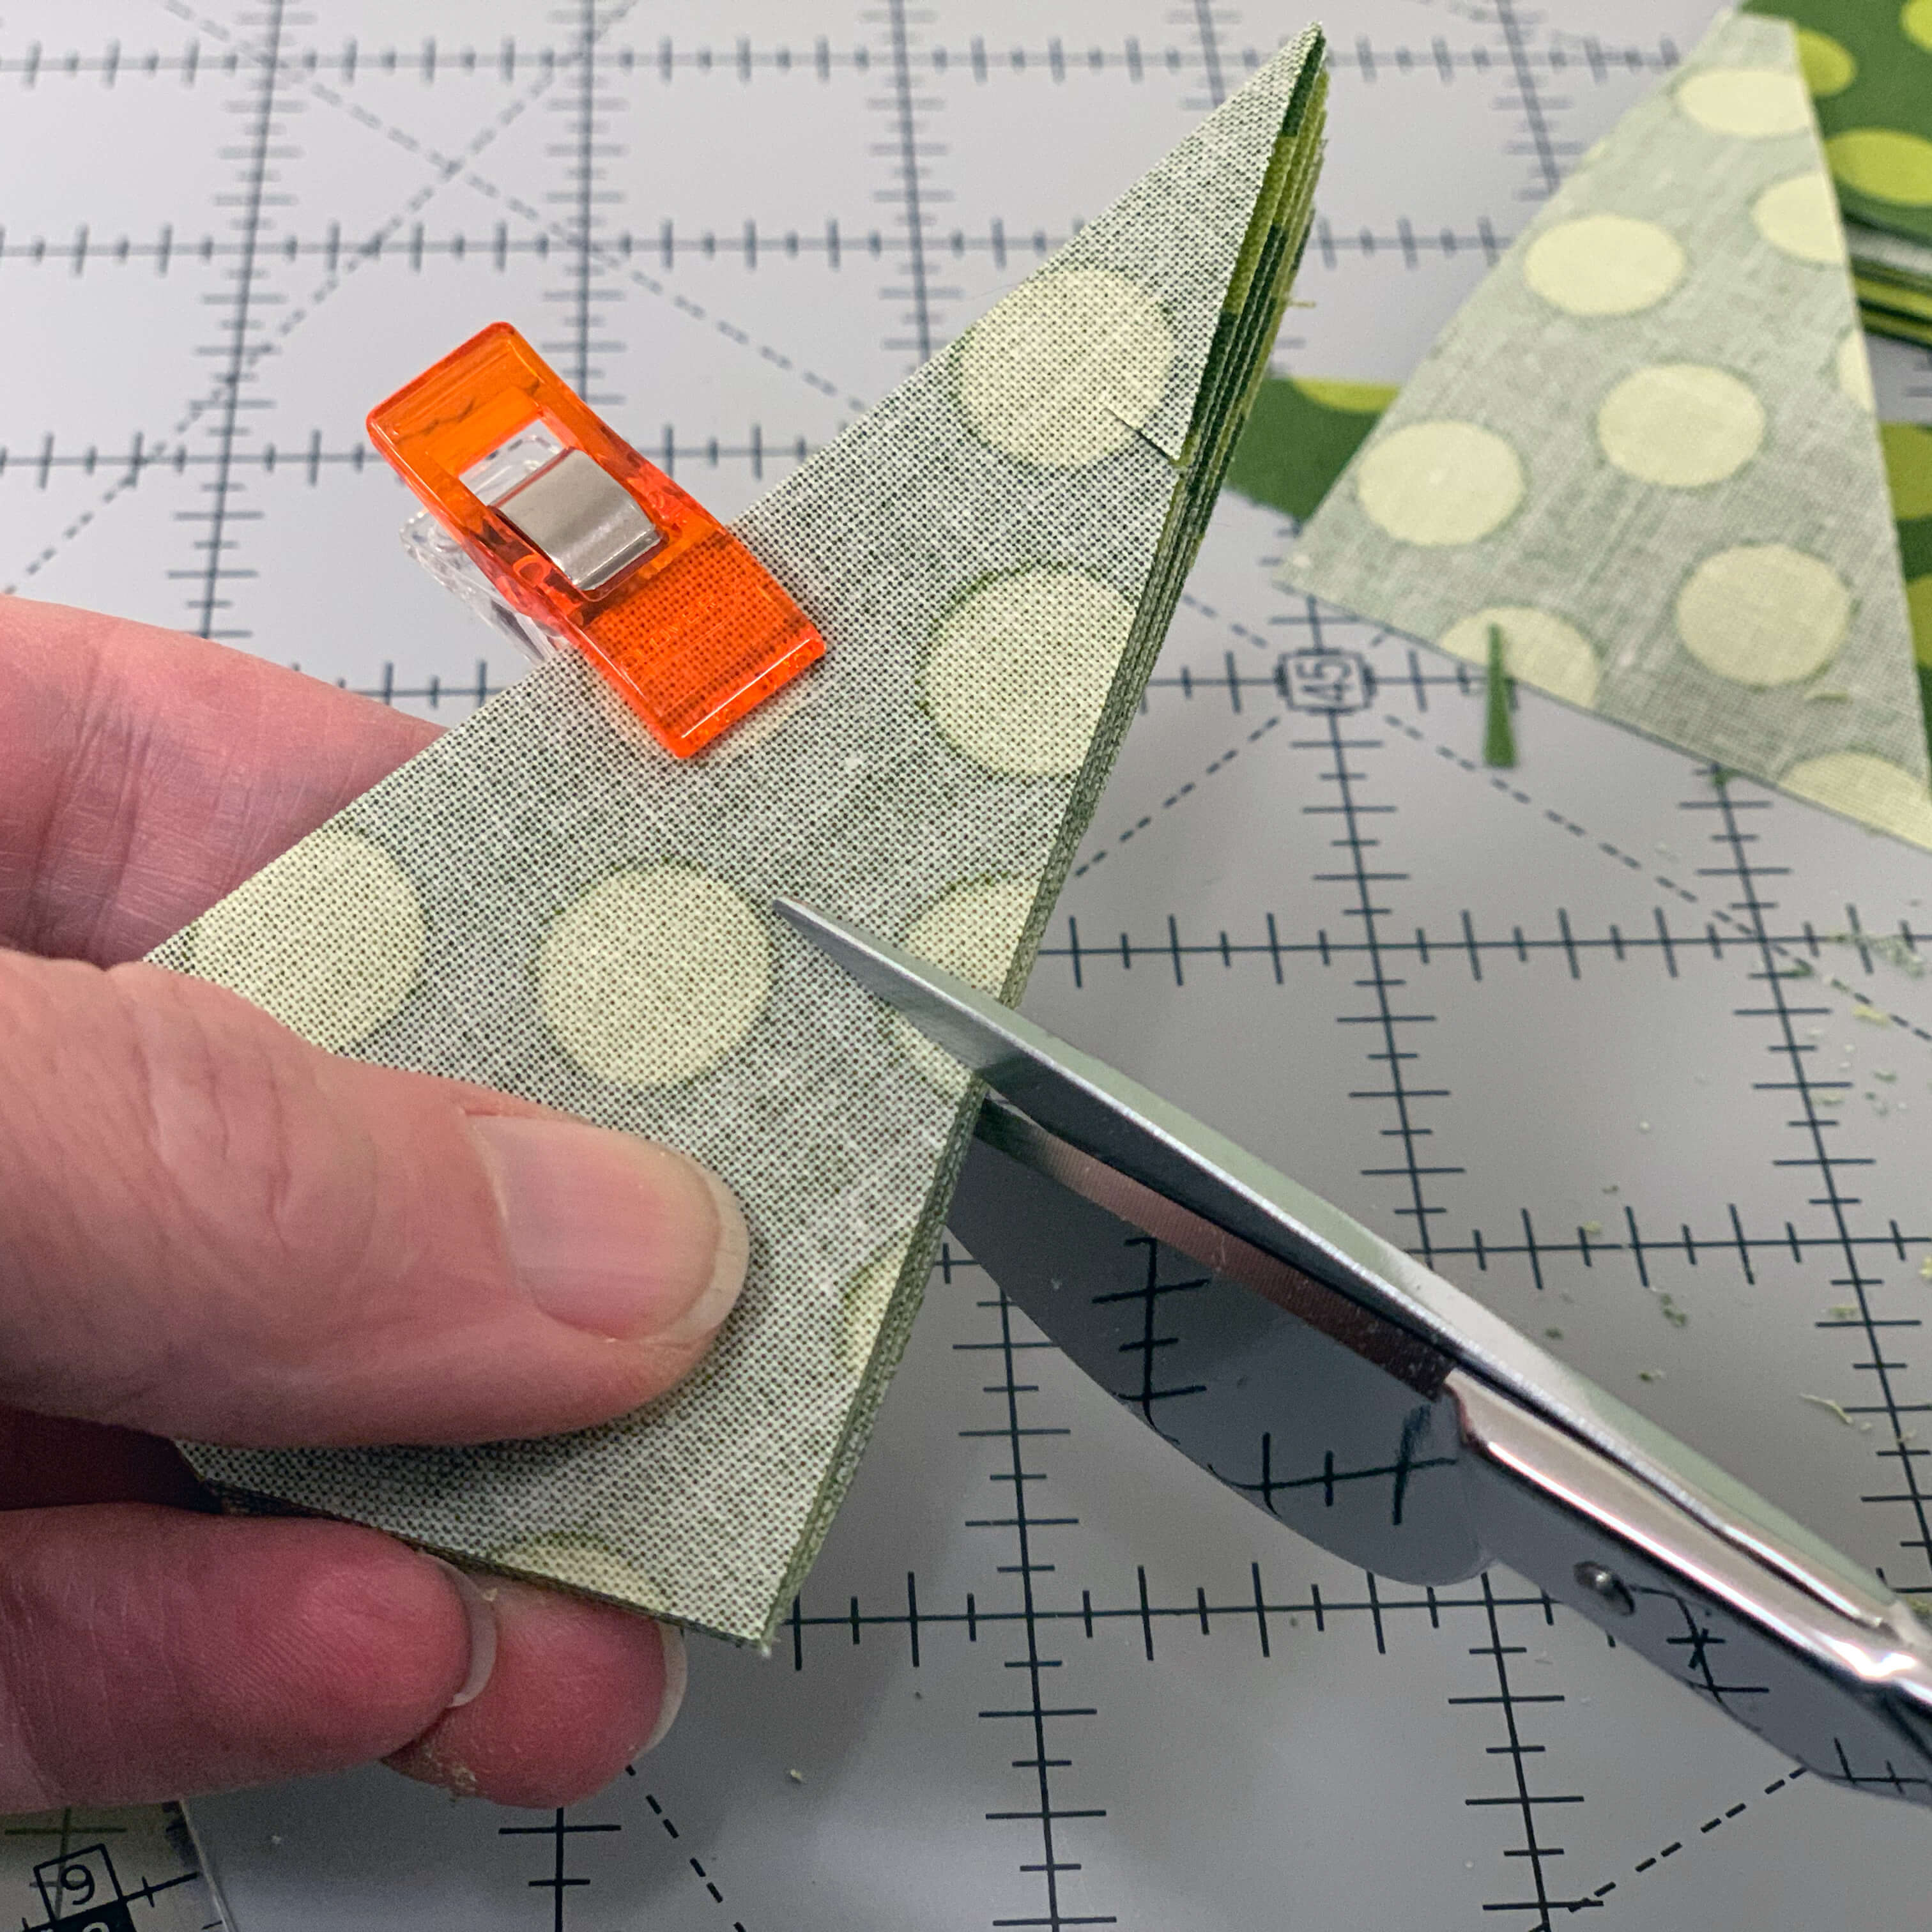
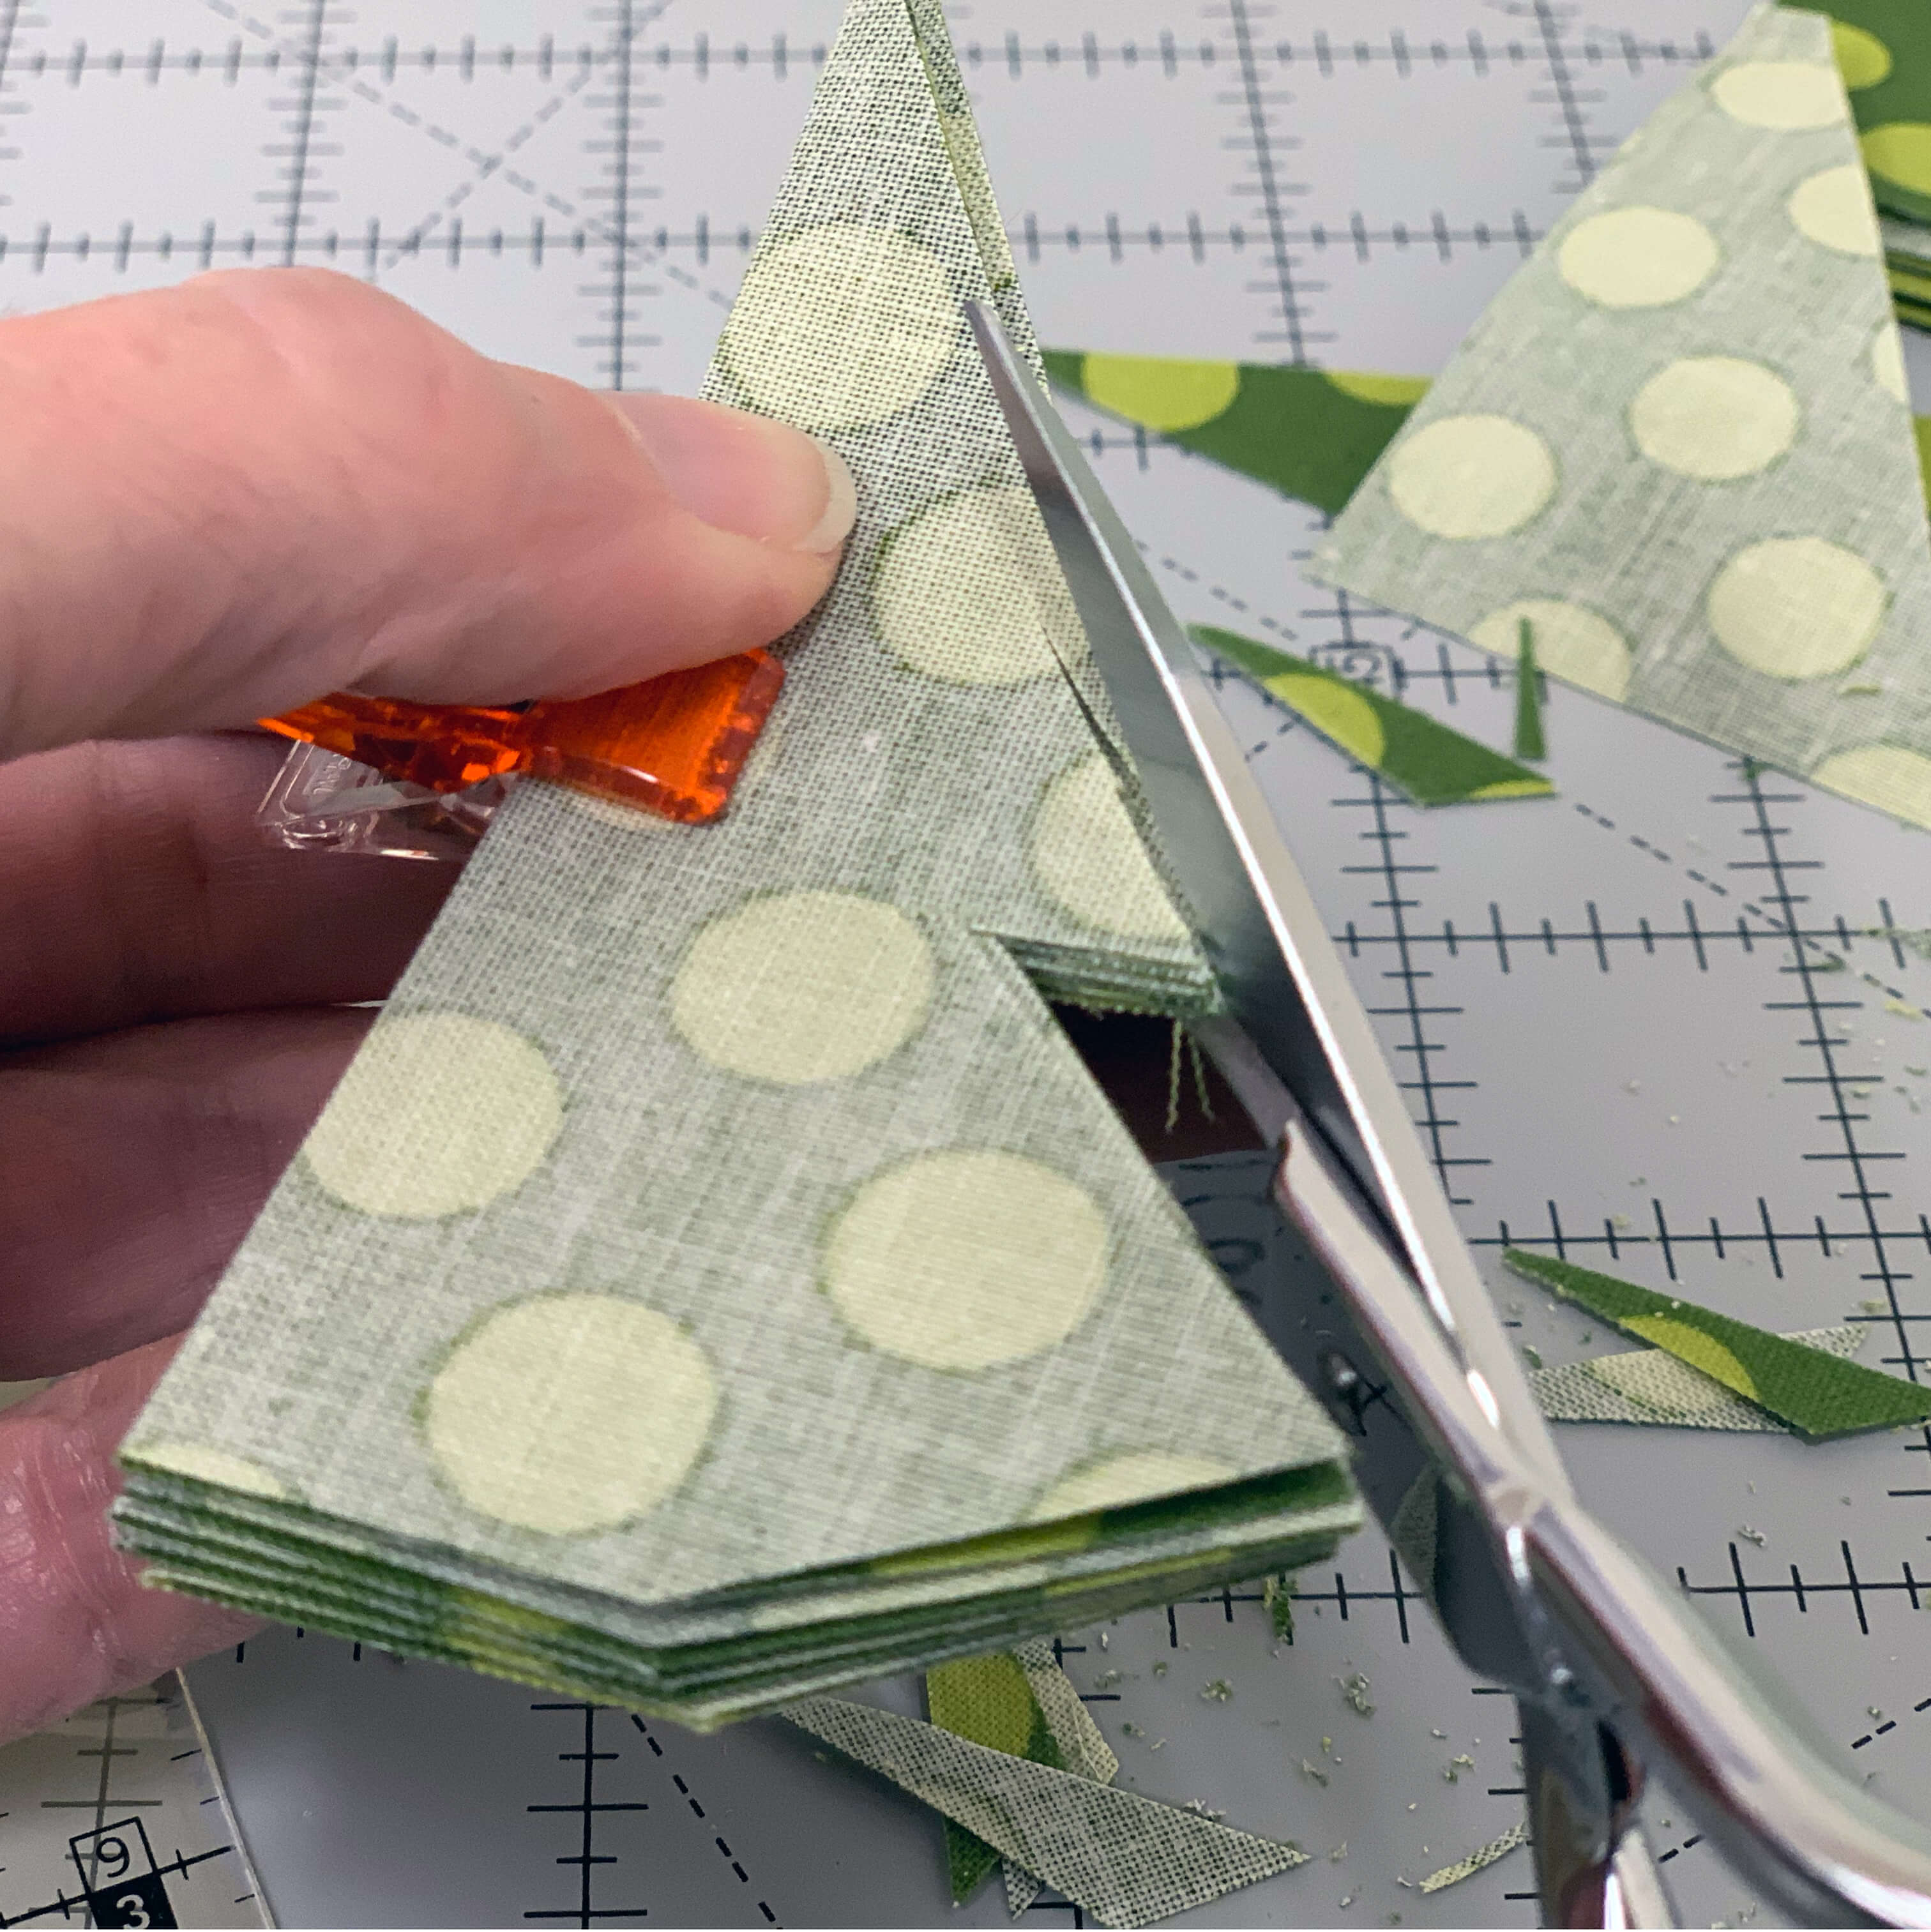
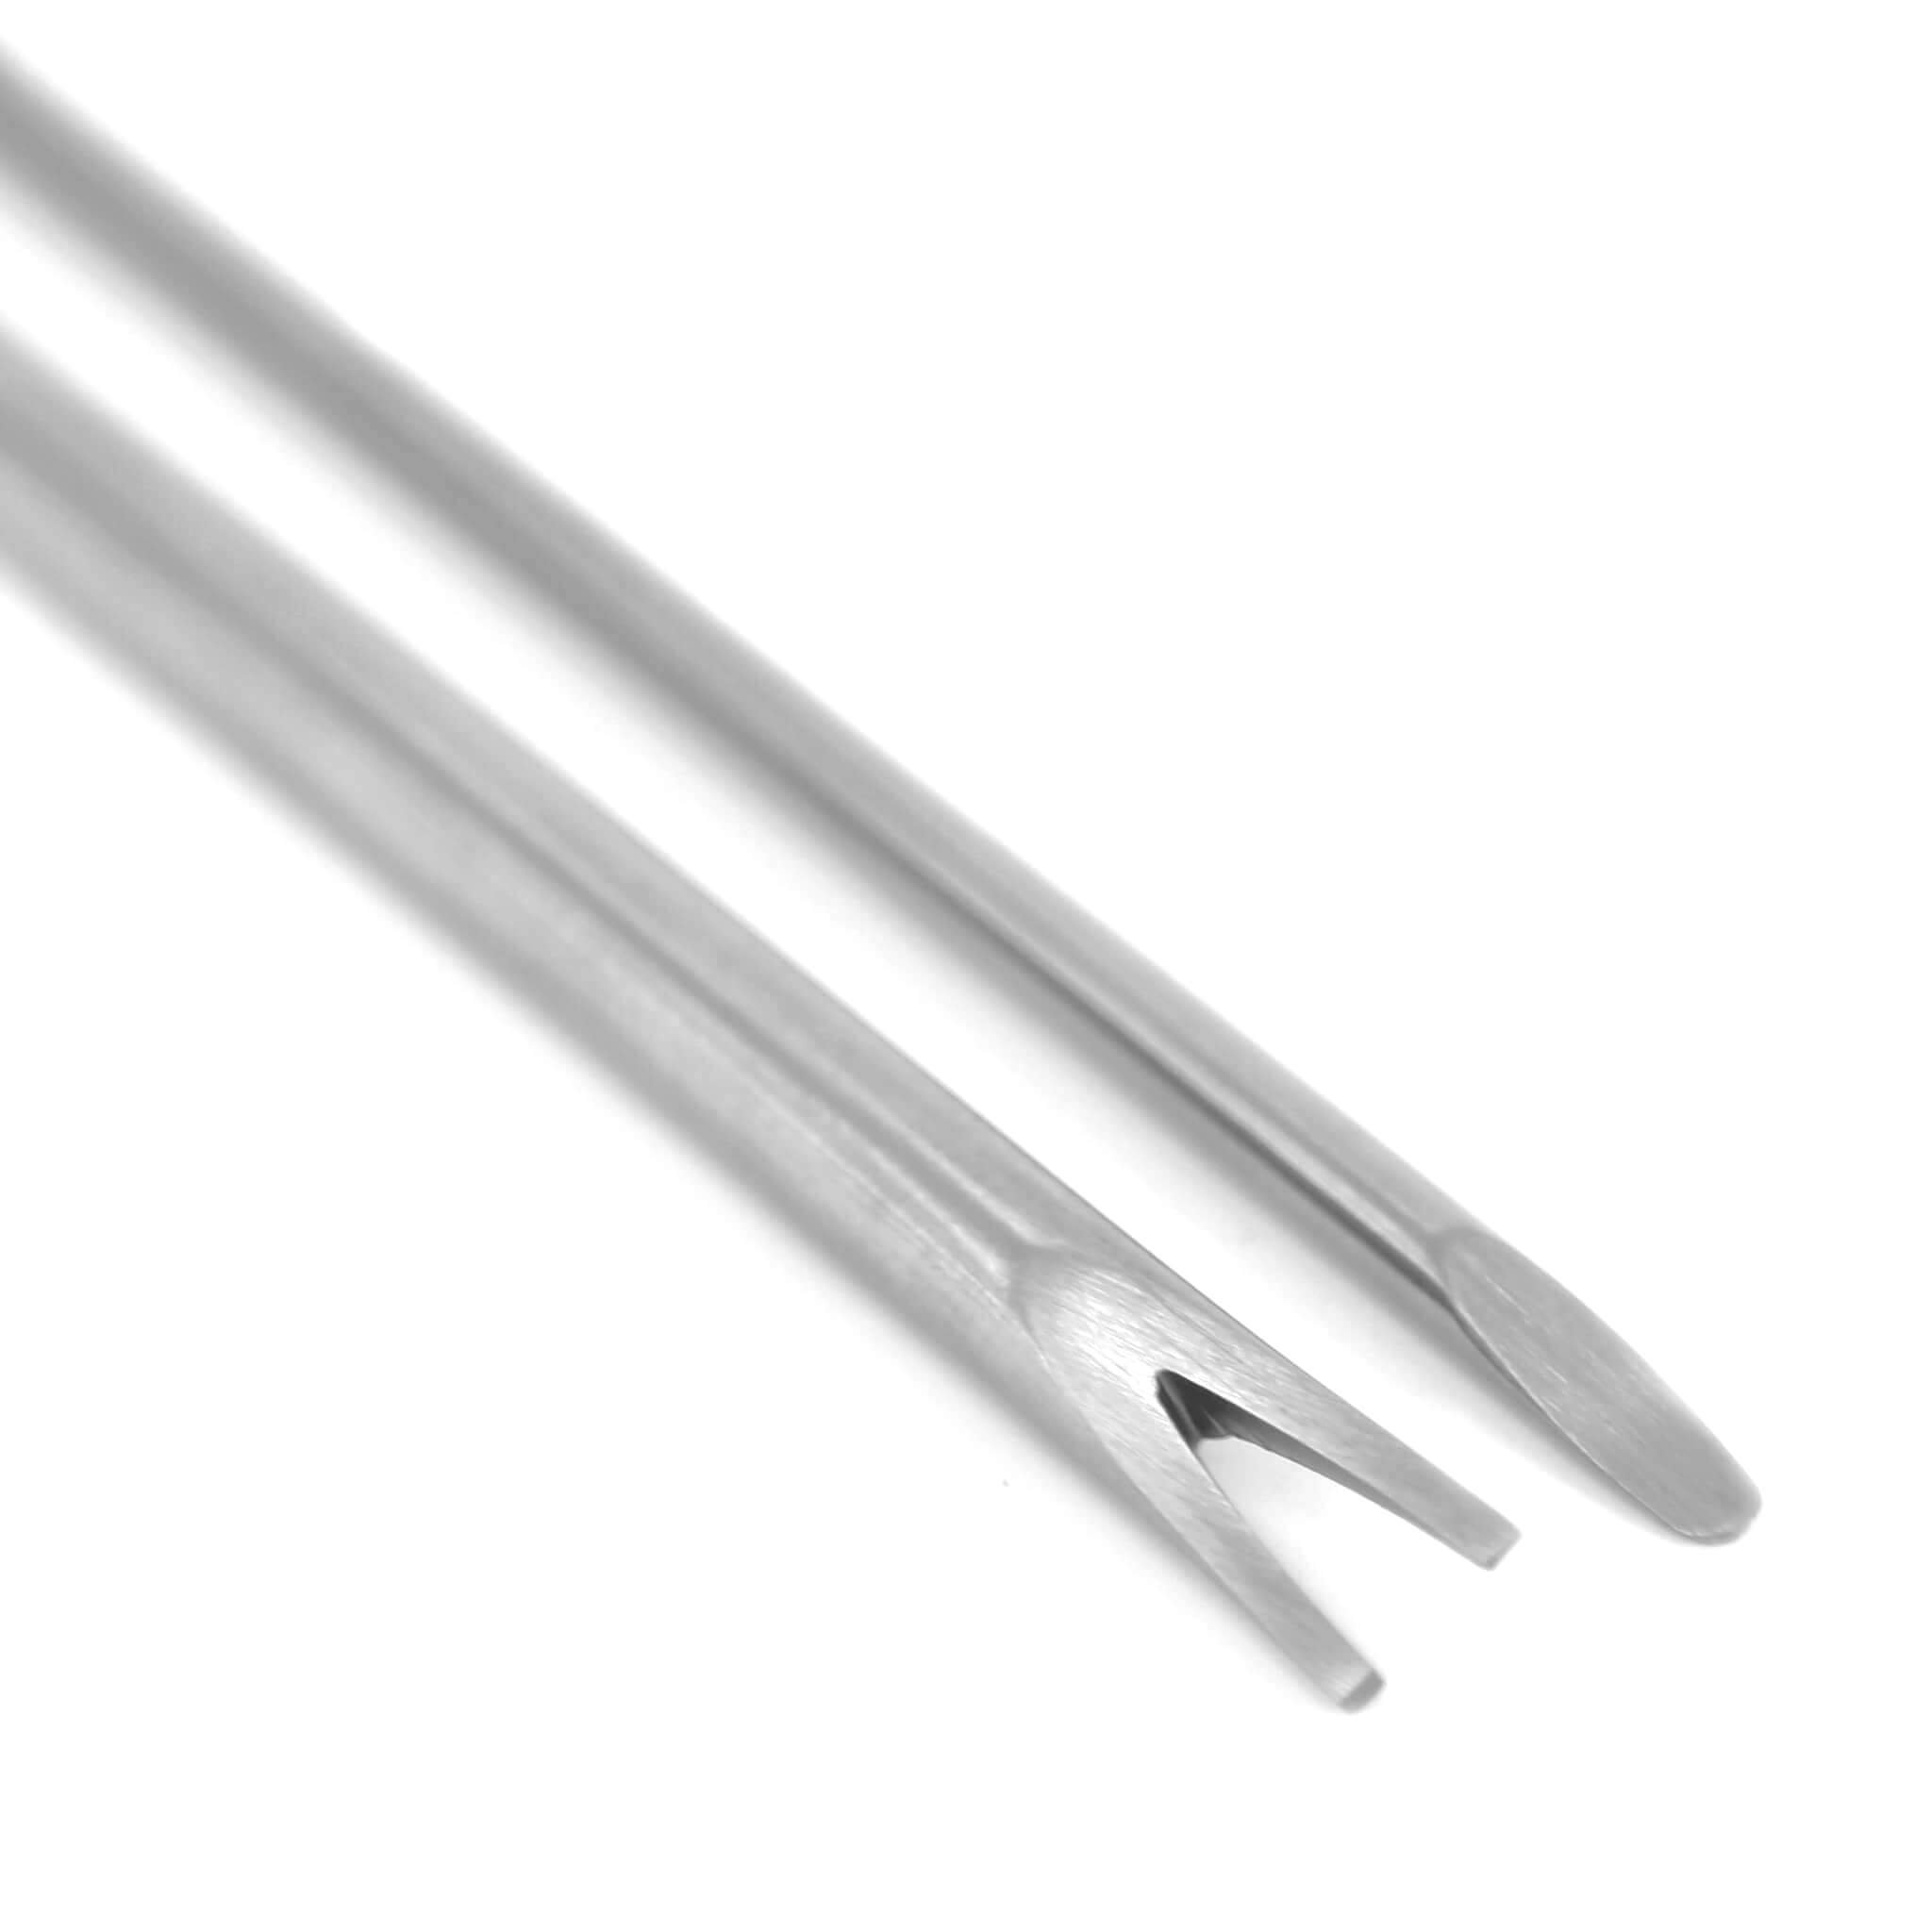
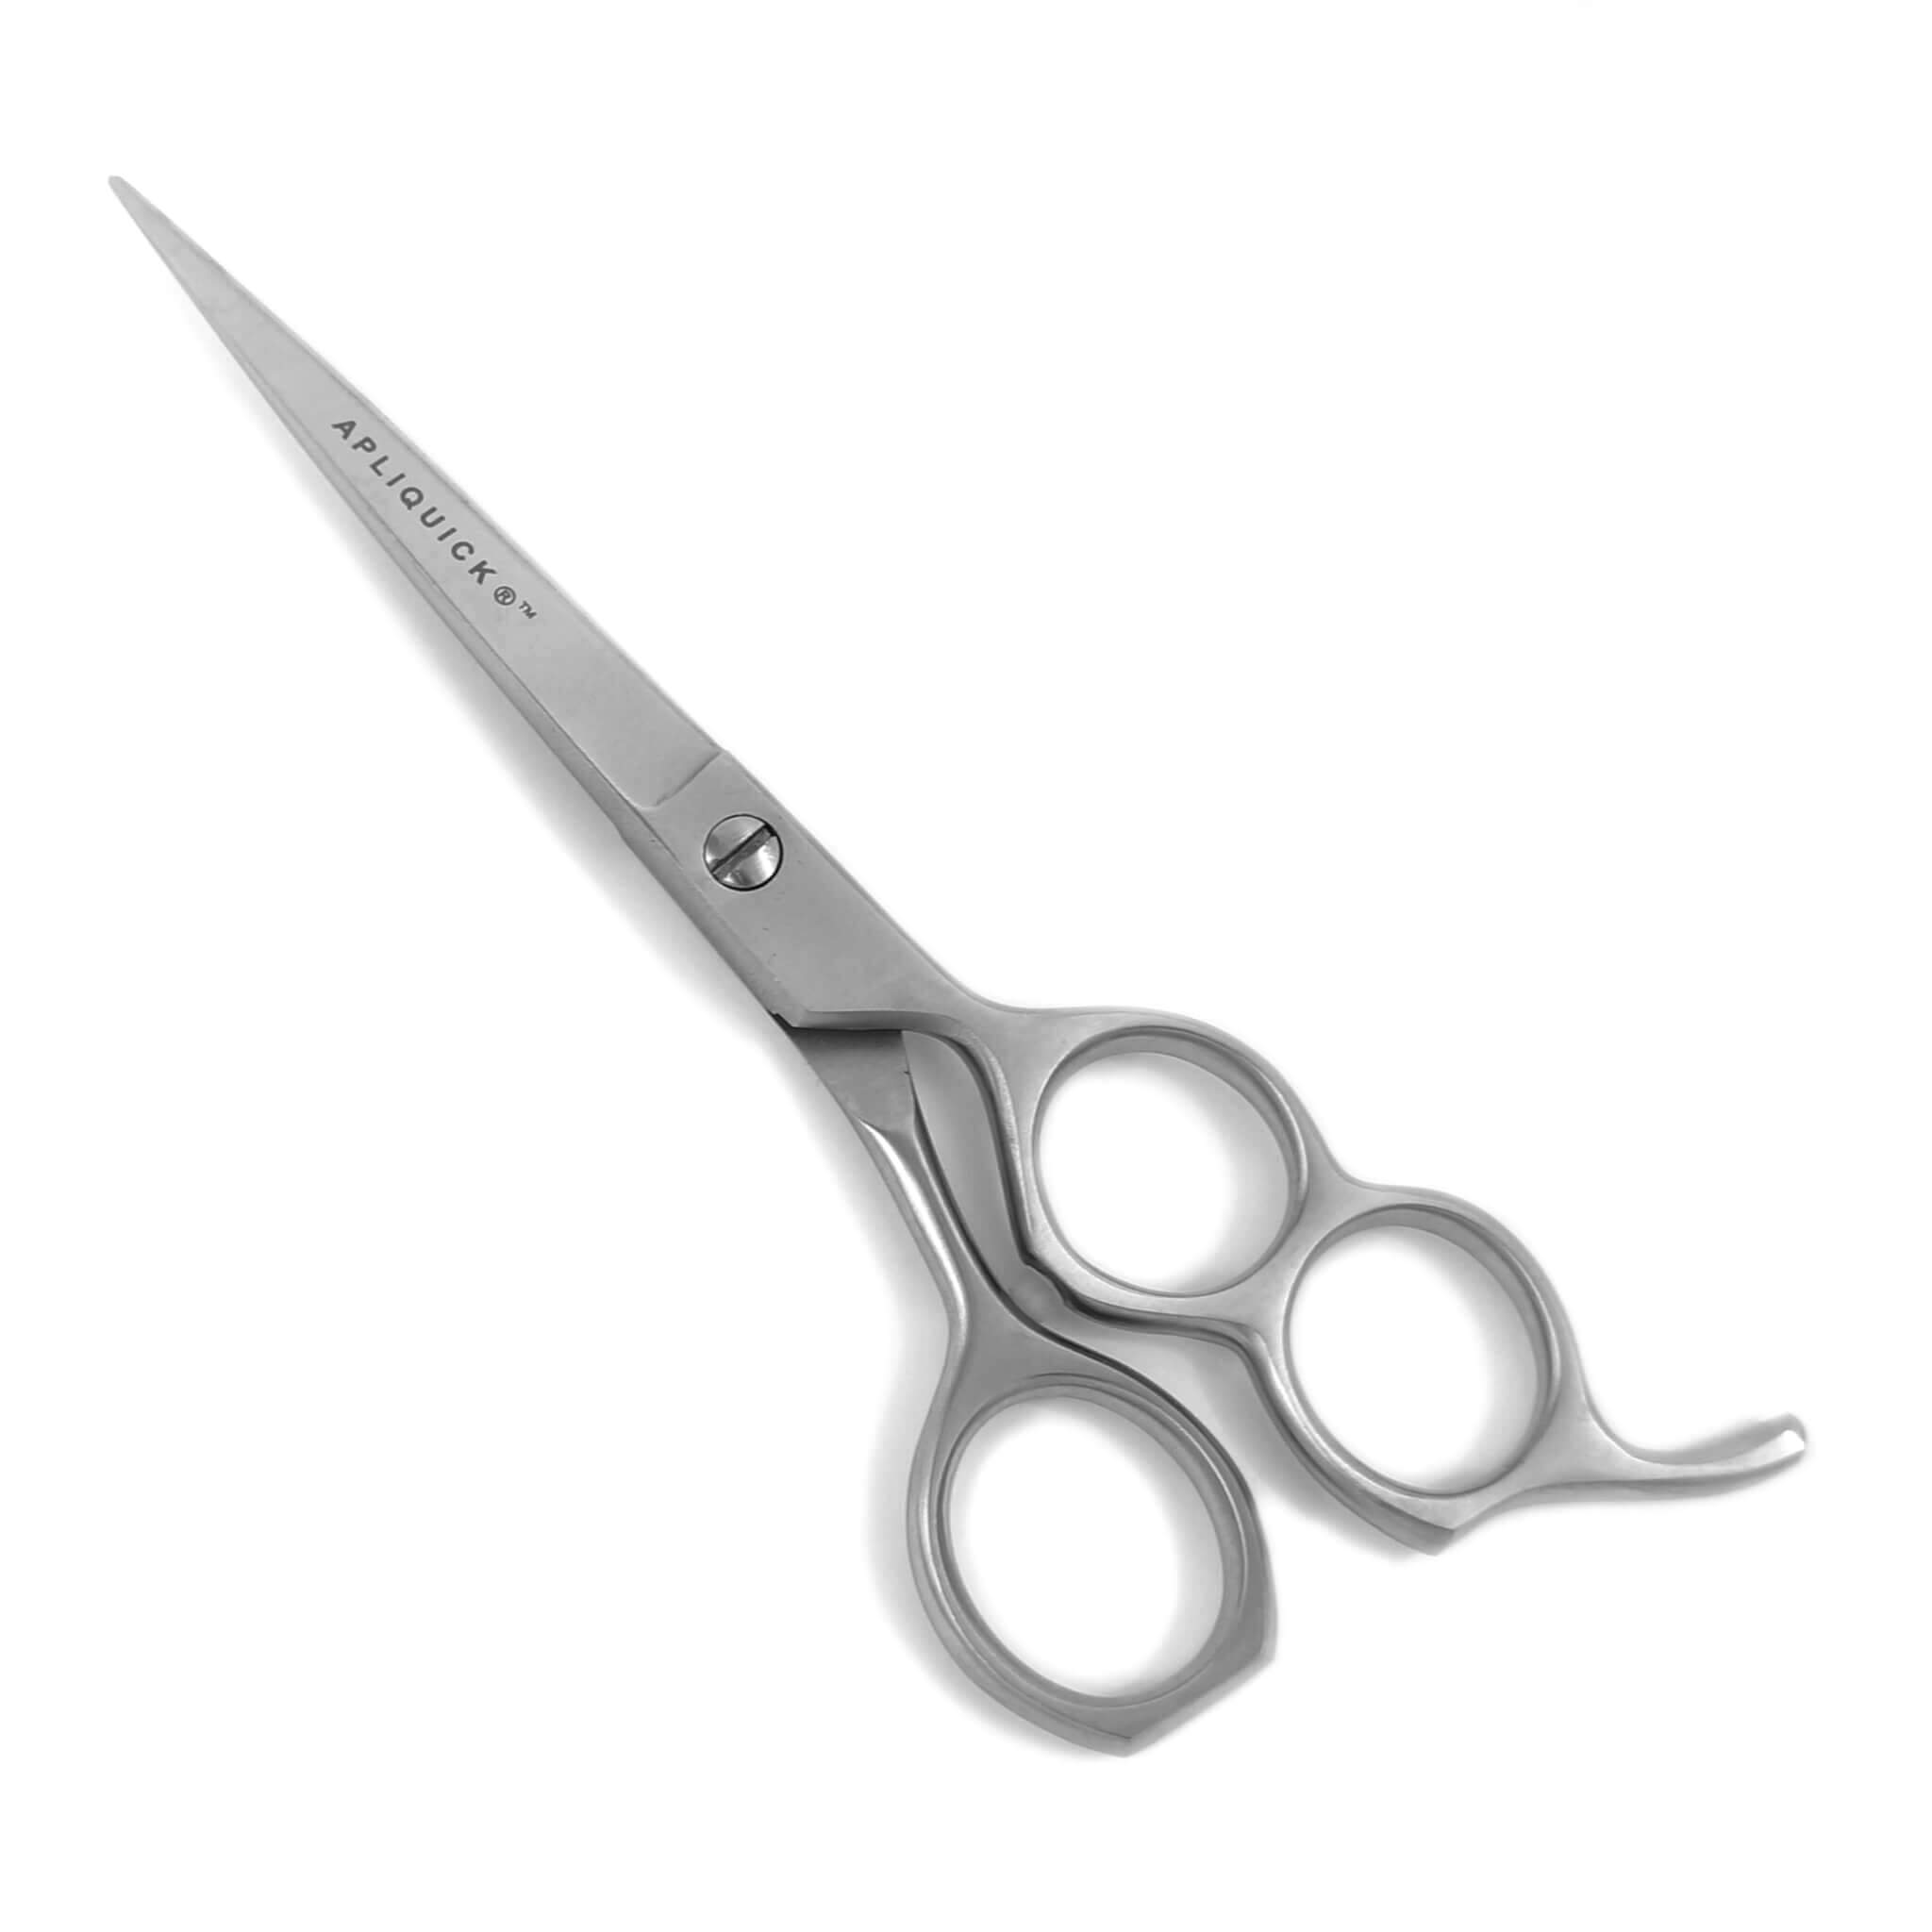
Using clips or holding your pieces very tightly to keep them aligned, use your sharp scissors (the duck-billed scissors in the photo are not necessary to the project - they are just very sharp!) to cut two or three horizontal notches into the outside edge of your tree pieces - these will be the bottoms of the branches. Cut from the outer side of the tree bottom up to the first notch, and then from the outer point of each branch up to the next notch up. 


Step 5: Assemble your tree
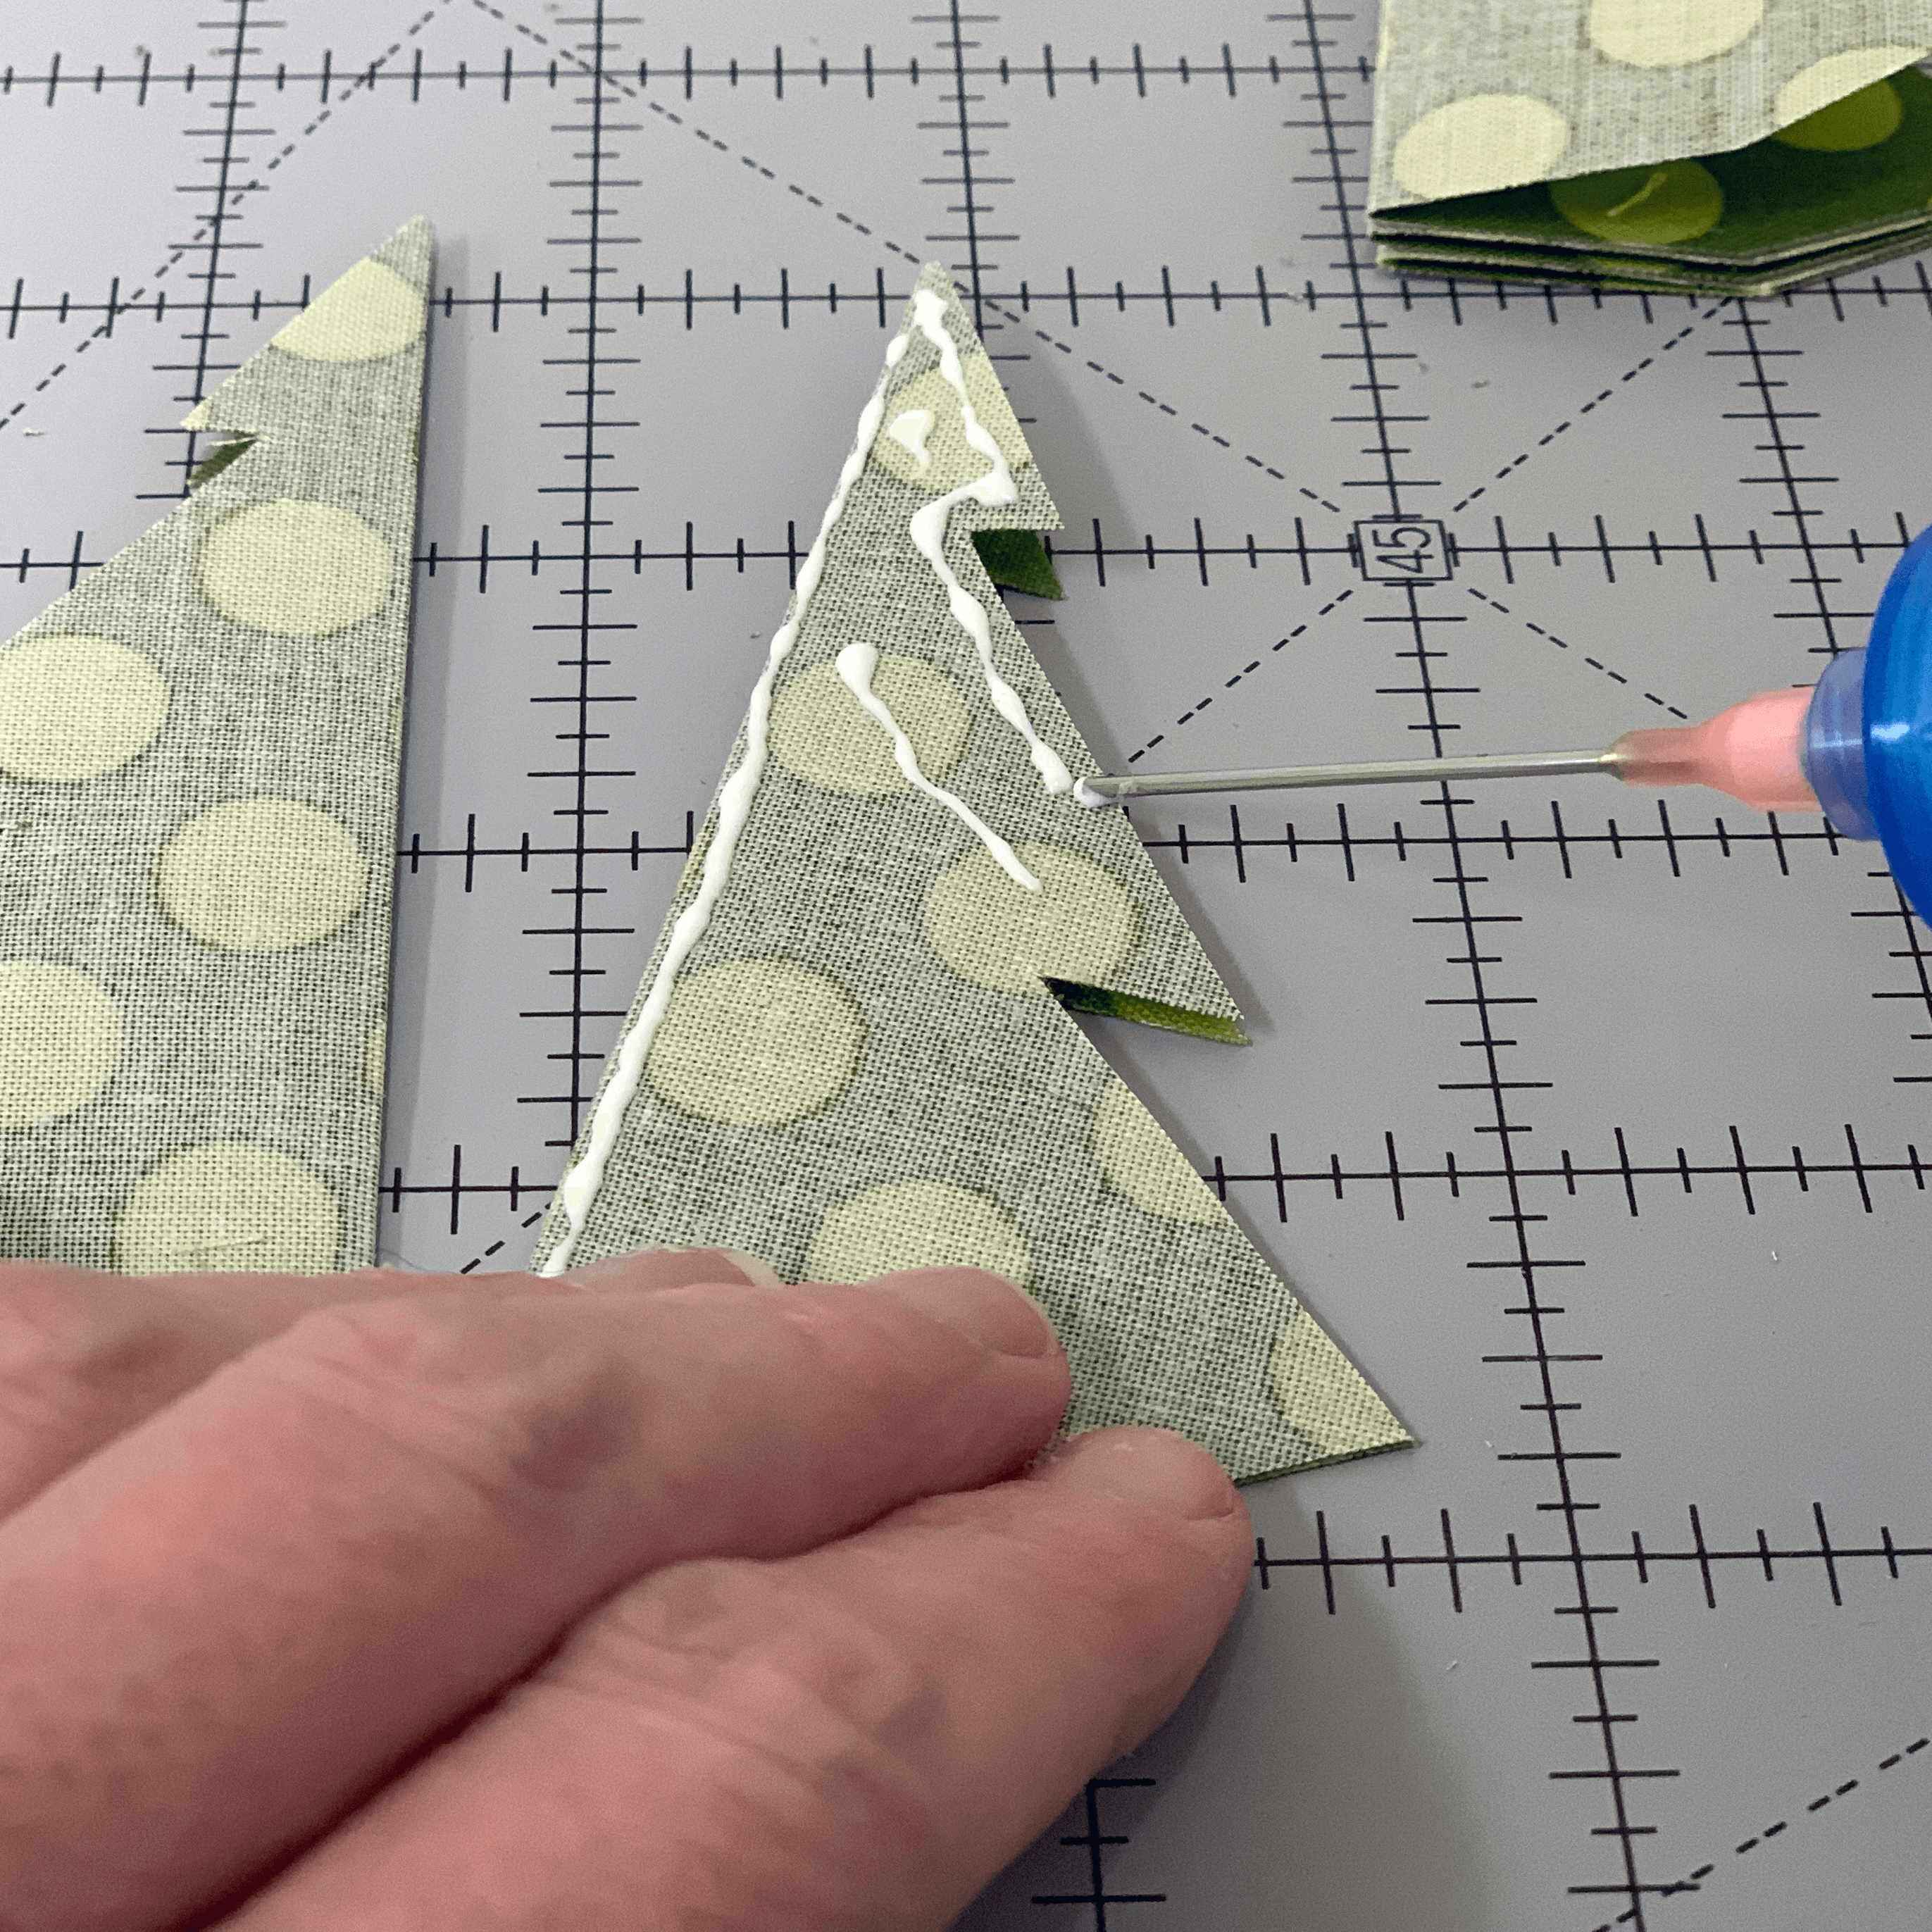
Starting with one tree piece, apply fabric glue around the edges of one side. Place another piece on top of this one, being careful to align the edges (especially the folded edges). Press together. Repeat this process until each piece has been glued to the next. 


Allow the glue to dry and open out your tree! If you see any branch edges that aren't aligned well, you can trim them.


  5

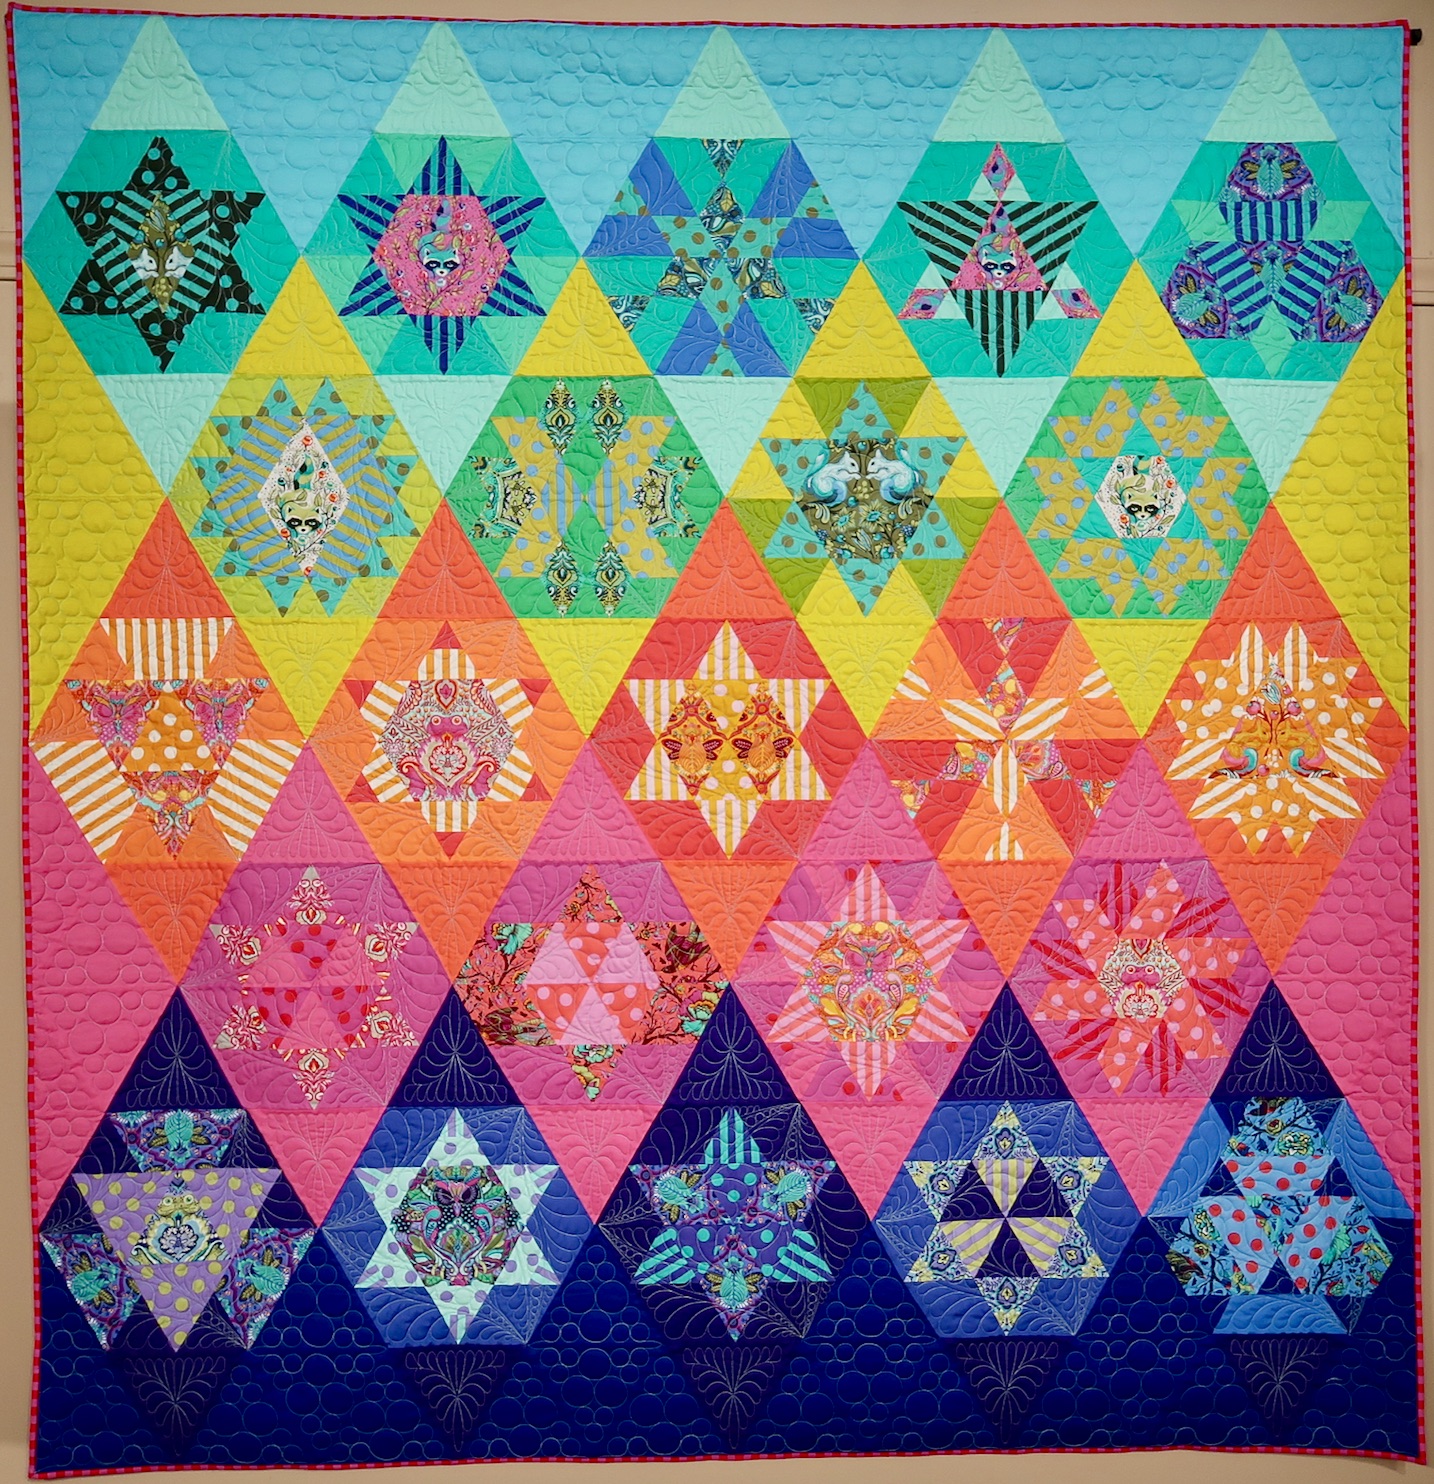
Trendsetters is the latest mystery quilt from Sheila and was a bit of a challenge for her followers to put together.

Learn more about Sheila and her mystery quilts in Show 2512.

TrendsettersbySheilaChristensen - 36 Pieces Non-Rotating

TrendsettersbySheilaChristensen - 100 Pieces Non-Rotating

TrendsettersbySheilaChristensen - 289 Pieces Non-Rotating

TrendsettersbySheilaChristensen - 36 Pieces Rotating

TrendsettersbySheilaChristensen - 100 Pieces Rotating

TrendsettersbySheilaChristensen - 289 Pieces Rotating

Original Photo: Mary Kay Davis

  4

Trendsetters is the latest mystery quilt from Sheila and was a bit of a challenge for her followers to put together.

Learn more about Sheila and her mystery quilts in Show 2512.

Original Photo: Mary Kay Davis

  10

Ok - Here's the whole description... 

From the Pantone website:

"Instilling calm, confidence, and connection, this enduring blue hue highlights our desire for a dependable and stable foundation on which to build as we cross the threshold into a new era."

PANTONE 19-4052 Classic Blue


A timeless and enduring blue hue, PANTONE 19-4052 Classic Blue is elegant in its simplicity. Suggestive of the sky at dusk, the reassuring qualities of the thought-provoking PANTONE 19-4052 Classic Blue highlight our desire for a dependable and stable foundation on which to build as we cross the threshold into a new era.

Imprinted in our psyches as a restful color, PANTONE 19-4052 Classic Blue brings a sense of peace and tranquility to the human spirit, offering refuge. Aiding concentration and bringing laser like clarity, PANTONE 19-4052 Classic Blue re-centers our thoughts. A reflective blue tone, Classic Blue fosters resilience.

As technology continues to race ahead of the human ability to process it all, it is easy to understand why we gravitate to colors that are honest and offer the promise of protection. Non-aggressive and easily relatable, the trusted PANTONE 19-4052 Classic Blue lends itself to relaxed interaction. Associated with the return of another day, this universal favorite is comfortably embraced.


  4

Ricky sits down with 17-year-old Australian quilter Jackson Cook at the Houston International Quilt Festival 2019. Find out how Jackson became so good at quilting and how he got to Houston in the first place.

  0
In Show 2512, Tami Pfeil gave you just a taste of all the things that you can create using unsual fabrics. Everything from quilts and dresses to floor canvases and tote bags. To help you get started, she has a coupon for you.
 
Head on over to ShopFabric.com and use the code THEQUILTSHOWDOTCOM for 10% off your first order.


  8

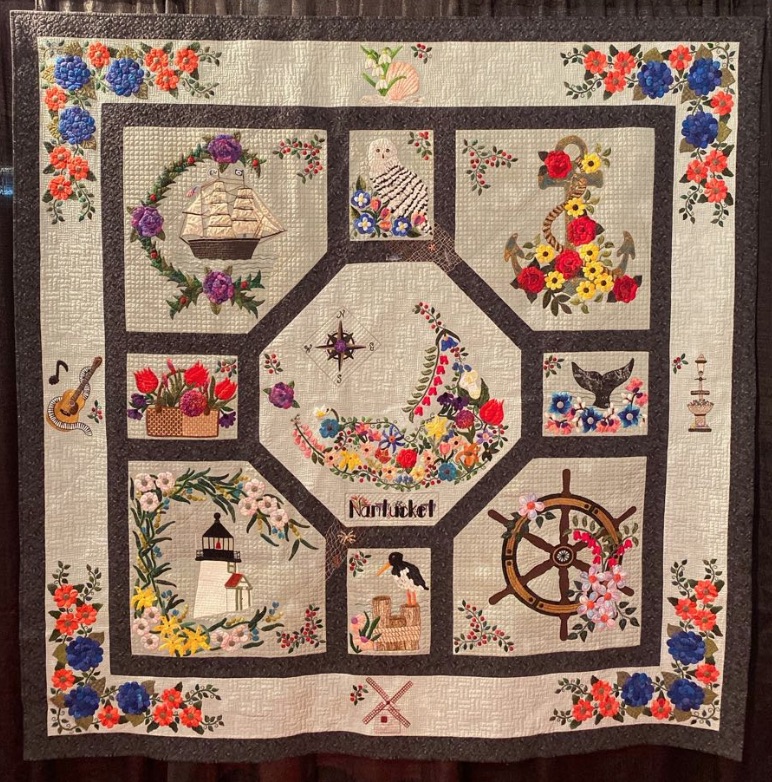
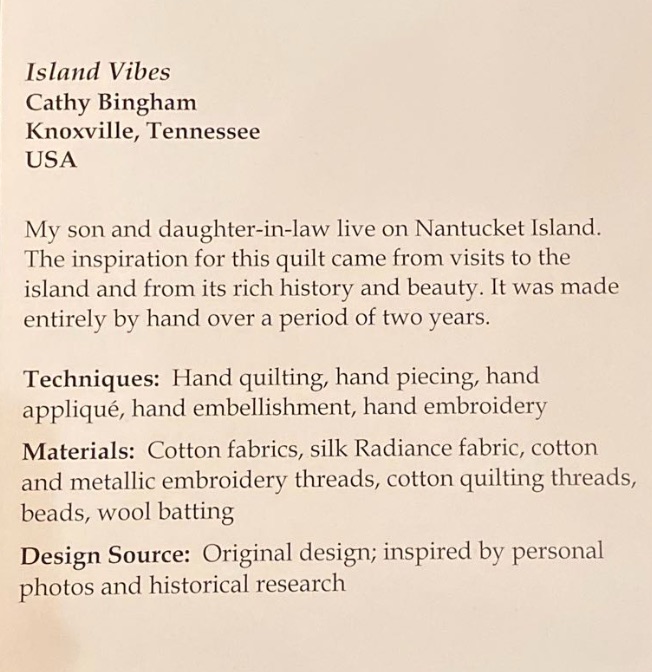
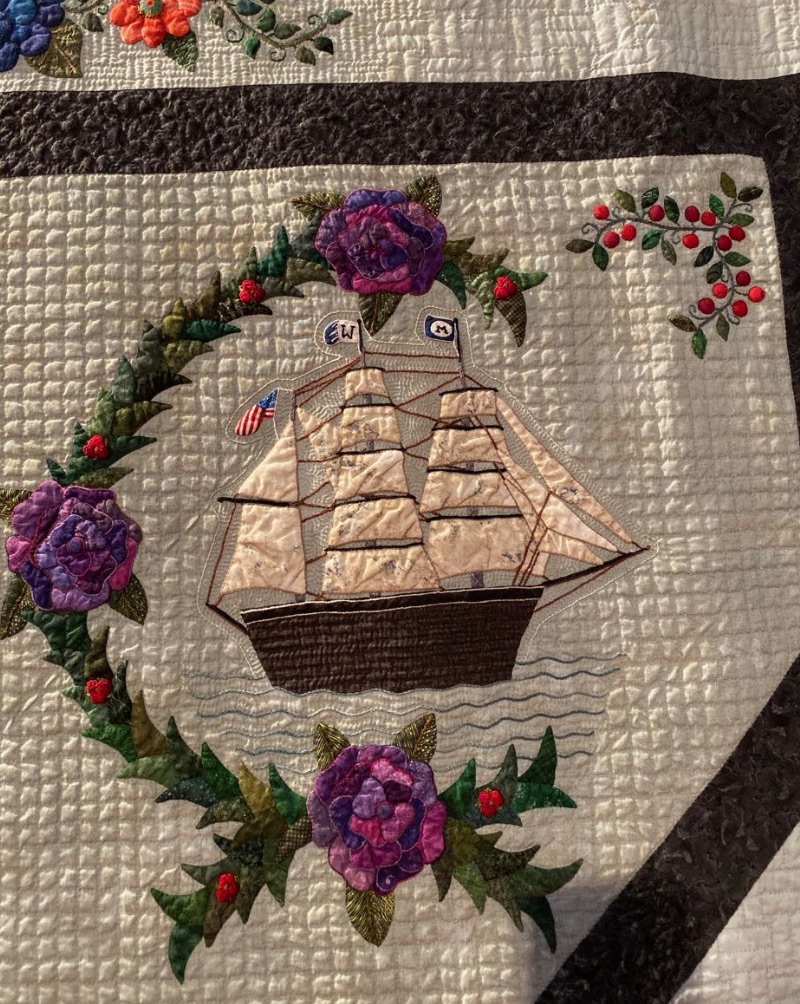
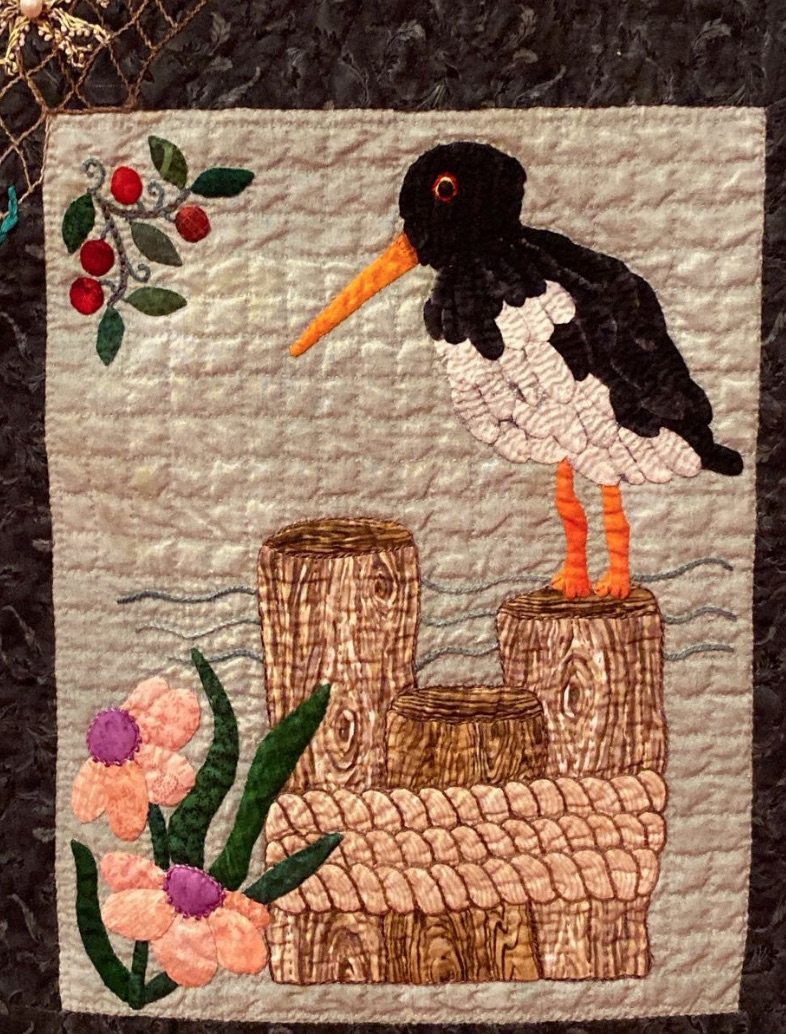
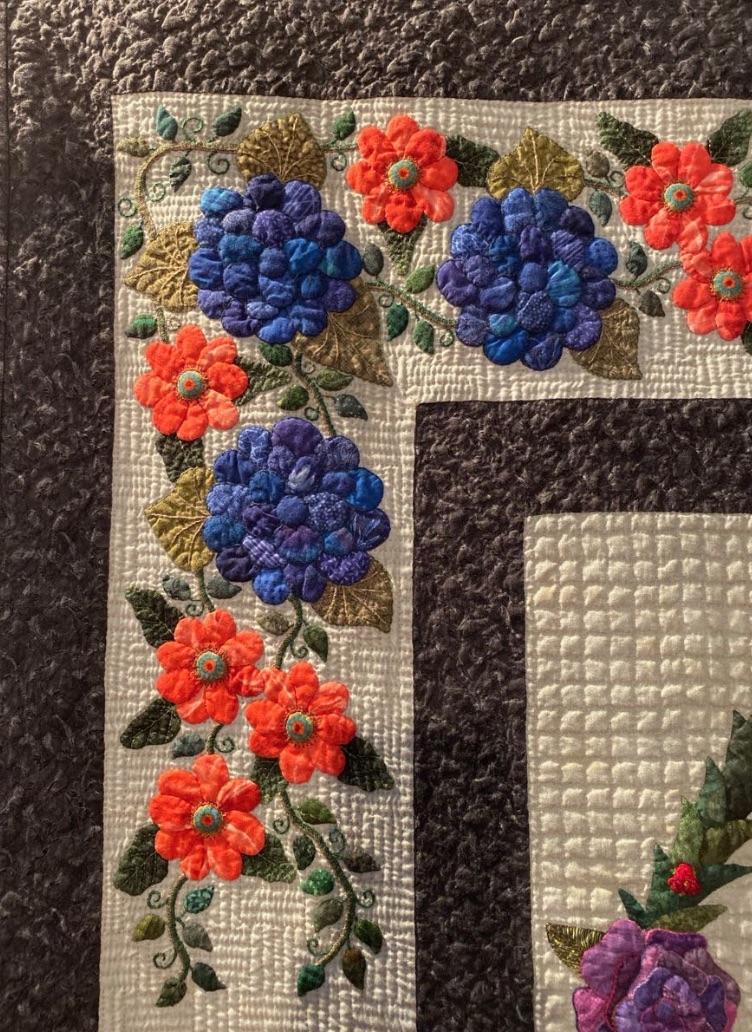
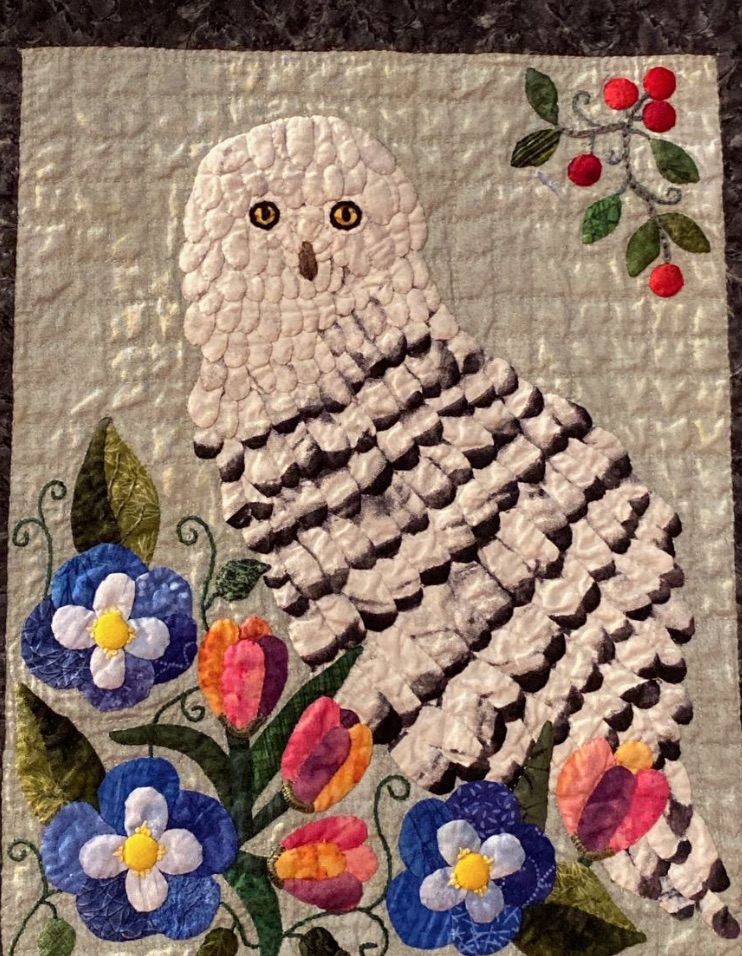
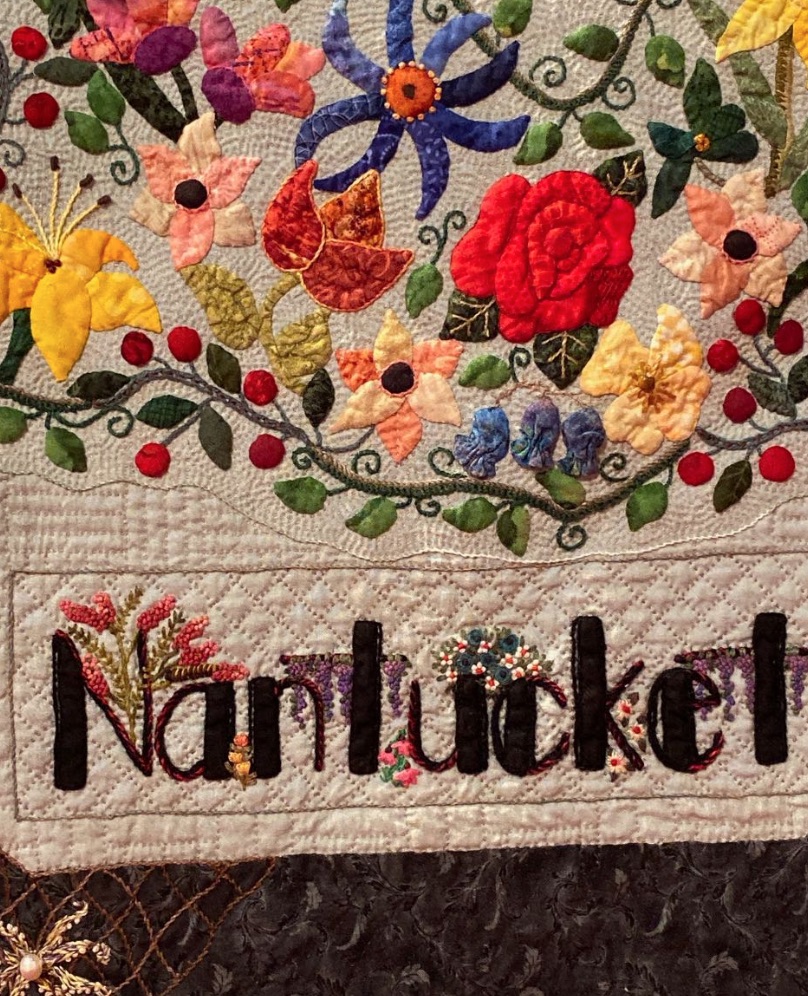
Made entirely by hand over a two-year period, Island Vibes was inspired by visits to Nantucket. Cathy Bingham created this entirely original quilt based on personal photos and historical research. Has your love for a particular place inspired you to make a quilt?

Island Vibes was on display at the International Quilt Festival in Houston 2019.


  9

3082_gift_bags.jpg
Need a last minute gift bag but can't find any nice wrapping paper in the house? Why not stitch up a few of these adorable little gift bags, sent to us by TQS member Lorchen, when a "quilty" item is needed. With only two fat quarters you can make several (see Alex's demo in Show 706). 

Click here to download tutorial.

  2

Lilo recently visited the European Patchwork Meeting in Sainte-Marie-aux-Mines, France and discovered a wonderful exhibit they were featuring there. Swiss quilt group patCHquilt was celebrating their thirtieth anniversary by putting on a showcase of 100 challenge quilts for the occasion. The challenge was open to all members of the group of every skill level and each quilt had to adhere to the following criteria:

  • Works must be original, not from a kit and must include a red border.
  • They must be 30 cm wide, 120 cm long, and displayed portrait style.
  • The quilt must include at least 1/2 of the Edelweiss fabric (that each person received), and feature a piece of that same fabric that is 10 cm x 10 cm in size.

To join in the celebration with patCHquilt, we will be featuring four of the challenge quilts each week that were displayed as part of the exhibition at the European Patchwork Meeting.

Please enjoy the next four quilts from Gabrielle Savoiz, Gaby Stebler, Gisela Cerny, and Gisele Lehmann.

Title of Quilt: No Wolf in the Cabin

Quilter's Name: Gabrielle Savoiz

Title of Quilt: In Balance

Quilter's Name: Gaby Stebler

Title of Quilt: Lived Tradition

Quilter's Name: Gisela Cerny

Title of Quilt: Edelweiss

Quilter's Name: Gisele Lehmann