Design walls are a must for any quilter. What's a design wall? It is a vertical wall that allows you to shift about and preview quilt blocks, compare fabrics, and determine a design layout. Covered in either flannel or batting, the design wall's slightly fuzzy surface allows pieces of fabric to stay in position as you move them about without using pins. By stepping away from a design wall, you are better able to judge a quilt's overall appearance as it is much easier to determine areas that might need tweaking.
Why do you want a design wall?
- Viewing a project on a table, floor or bed does not give you the same perspective, unless you climb up on a ladder.
- Pinning or nailing into your walls will leave permanent marks.
- Avoid your fur friends napping on your project while it is on a tabletop.
- Watch your project grow and be inspired whenever you see it.
- If real estate in your space is at a premium, go vertical. Having a design area on the wall leaves more room in your work space.
Tip: Does your creative space not allow for you to step back very far to view the design wall? Take a photograph of your work. Looking at the photograph will help you get a good perspective of the project.
Tip: Use gridded flannel to help square your work while it grows.
Tip: Keep the color of the flannel or batting to white, cream or ivory. This way you only notice the WIP, not the wall itself.
Determining the best size design wall for you depends on your available wall space and the type of work you do. Building a design wall is not difficult, and by doing so you can create a wall that is specific for your needs. Commercial design wall options are available e.g., free-standing floor models, collapsible (which are great for retreats or workshops), and retractable units. The range in price is generally determined by materials and size.
Want to include a design wall in your space, but don't know how to go about it? Here are some out-of-the-box solutions that quilters have thought of when it came to adding design walls.
- Live in an apartment or rental and can't attach anything using nails in your space? Use repositionable hooks to hold the wall.
- Is wall space at a minimum? How about adding a decorative shelf (with a retractable design wall) over the door or a closet in the room?
- Does your space allow for a track system that hangs from the ceiling? Hang walls that can also function as movable doors.
- Have limited space for displaying both quilts and a working design wall? Use a curtain rod with clips to hold the design wall. When not in use, substitute a finished piece.
- Sharing a public space with your studio area? Use one side of a folding screen as a design wall, the other side can be decorative.
- Does your room have sliding doors? Make the doors into a design wall.
- Like the idea of a moveable wall? Cut a slot in a stable stool (see the picture below) to hold your wall. When finished, the wall can be placed out of sight.
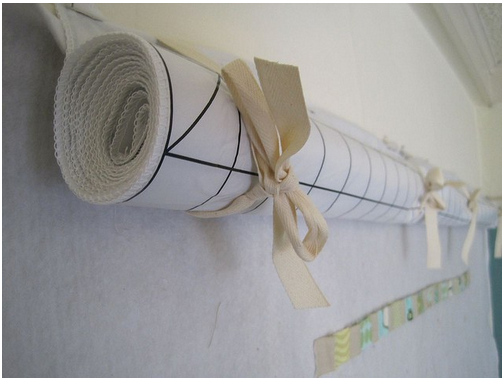
Katie has a clever way of using laminated fabric and ribbons for her design wall. SewKatieDid
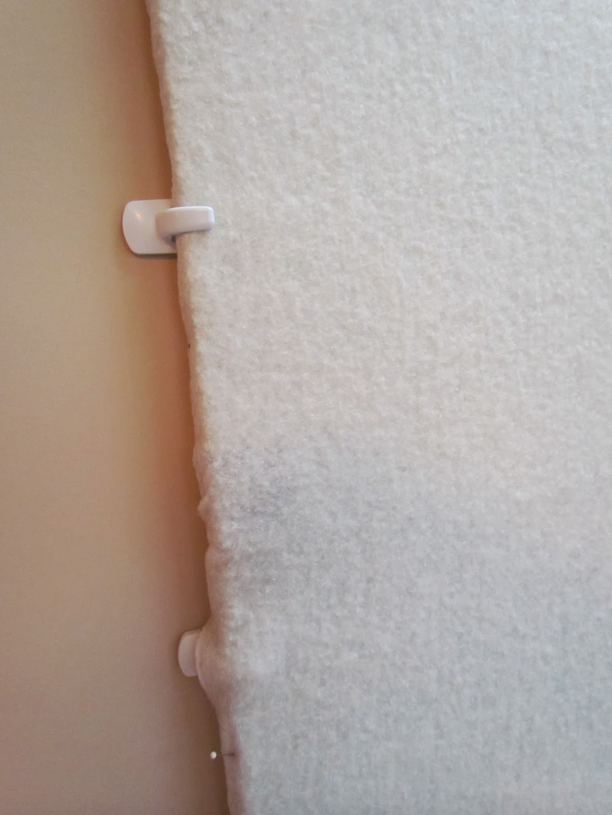
Melody hung her design wall with repositionable hooks. Fibermania
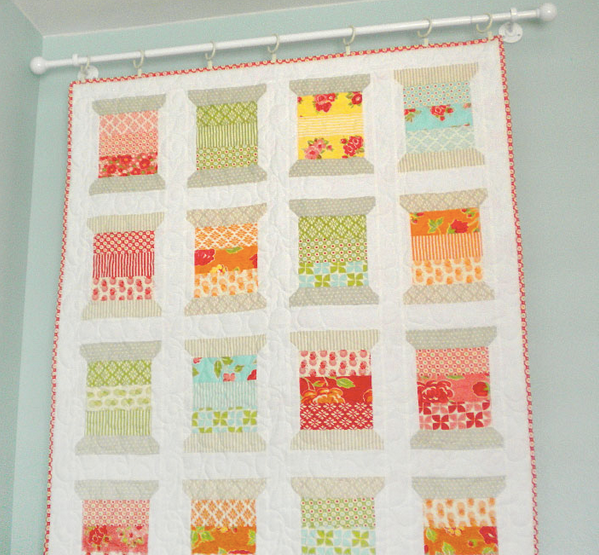
Hang a piece of flannel or batting using clips on a drapery rod. When not in use, hang a finished small quilt. Craftsy
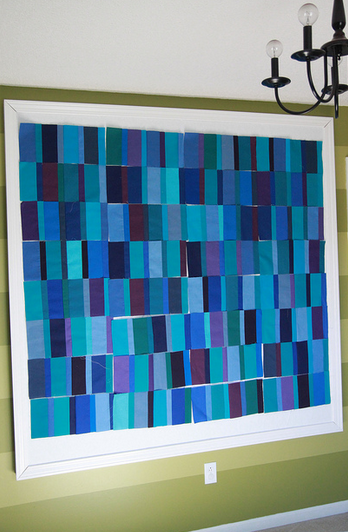
Add a frame. AnythingPretty

Design-A-Way retractable design wall offers both single and double surface walls. Design-a-way
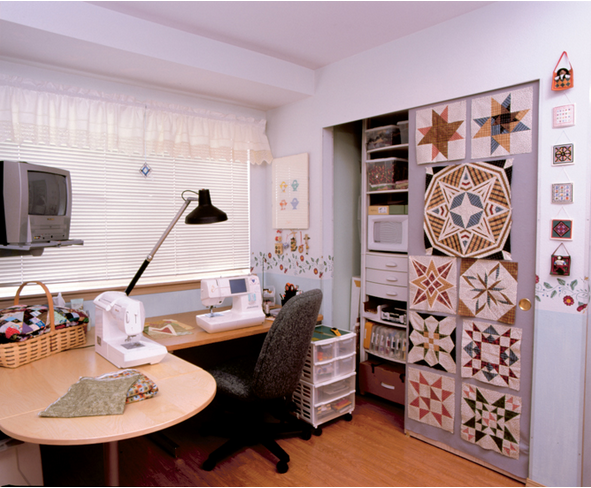
Use sliding doors of a closet. Martingale
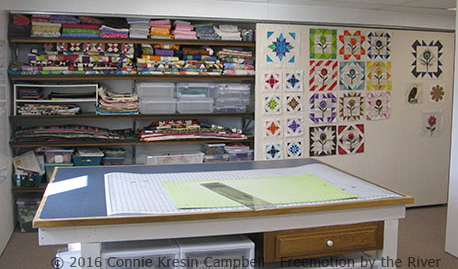
Design wall on a track system. ConnieKresin
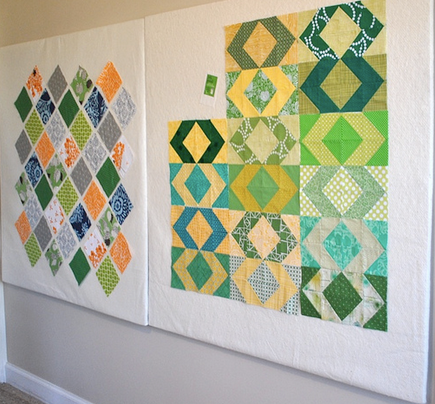
Make your own design wall. Craftbuds
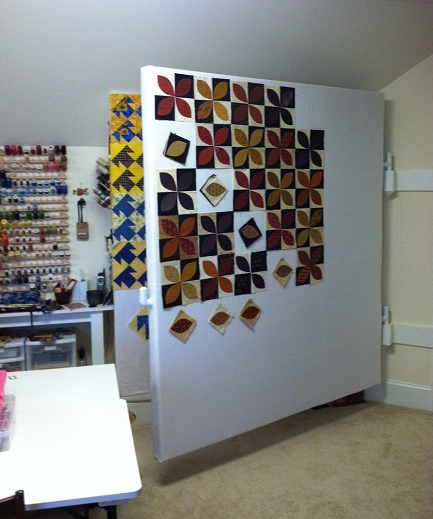
Need more than one design wall? How about using a hinged system. GrammyQuilts
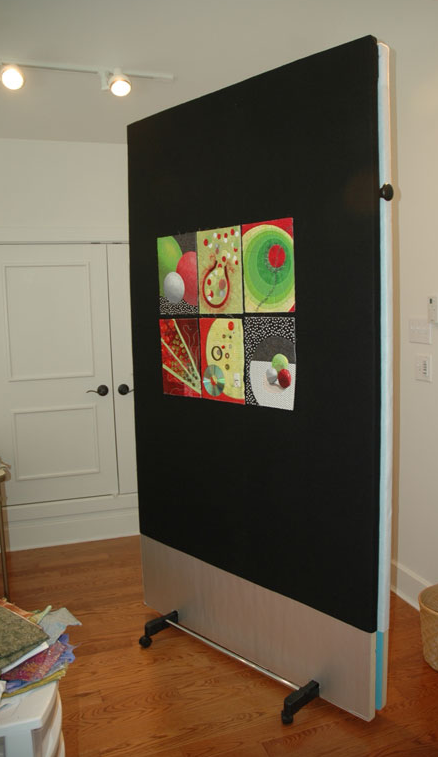
Two sided design wall on wheels. MountainVistas

Portable wall on stool base. Core77
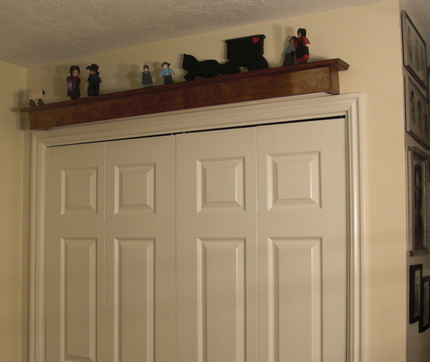
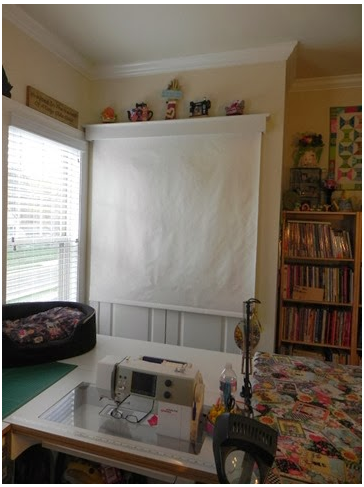
Vanishing Design walls look like decorative shelving and can be painted to match the trim in your studio. VanishingDesignWall
Just joined our year of organizing? Click here for other TQS Organization blogs.


.jpg)
RSS feed for comments to this post