13

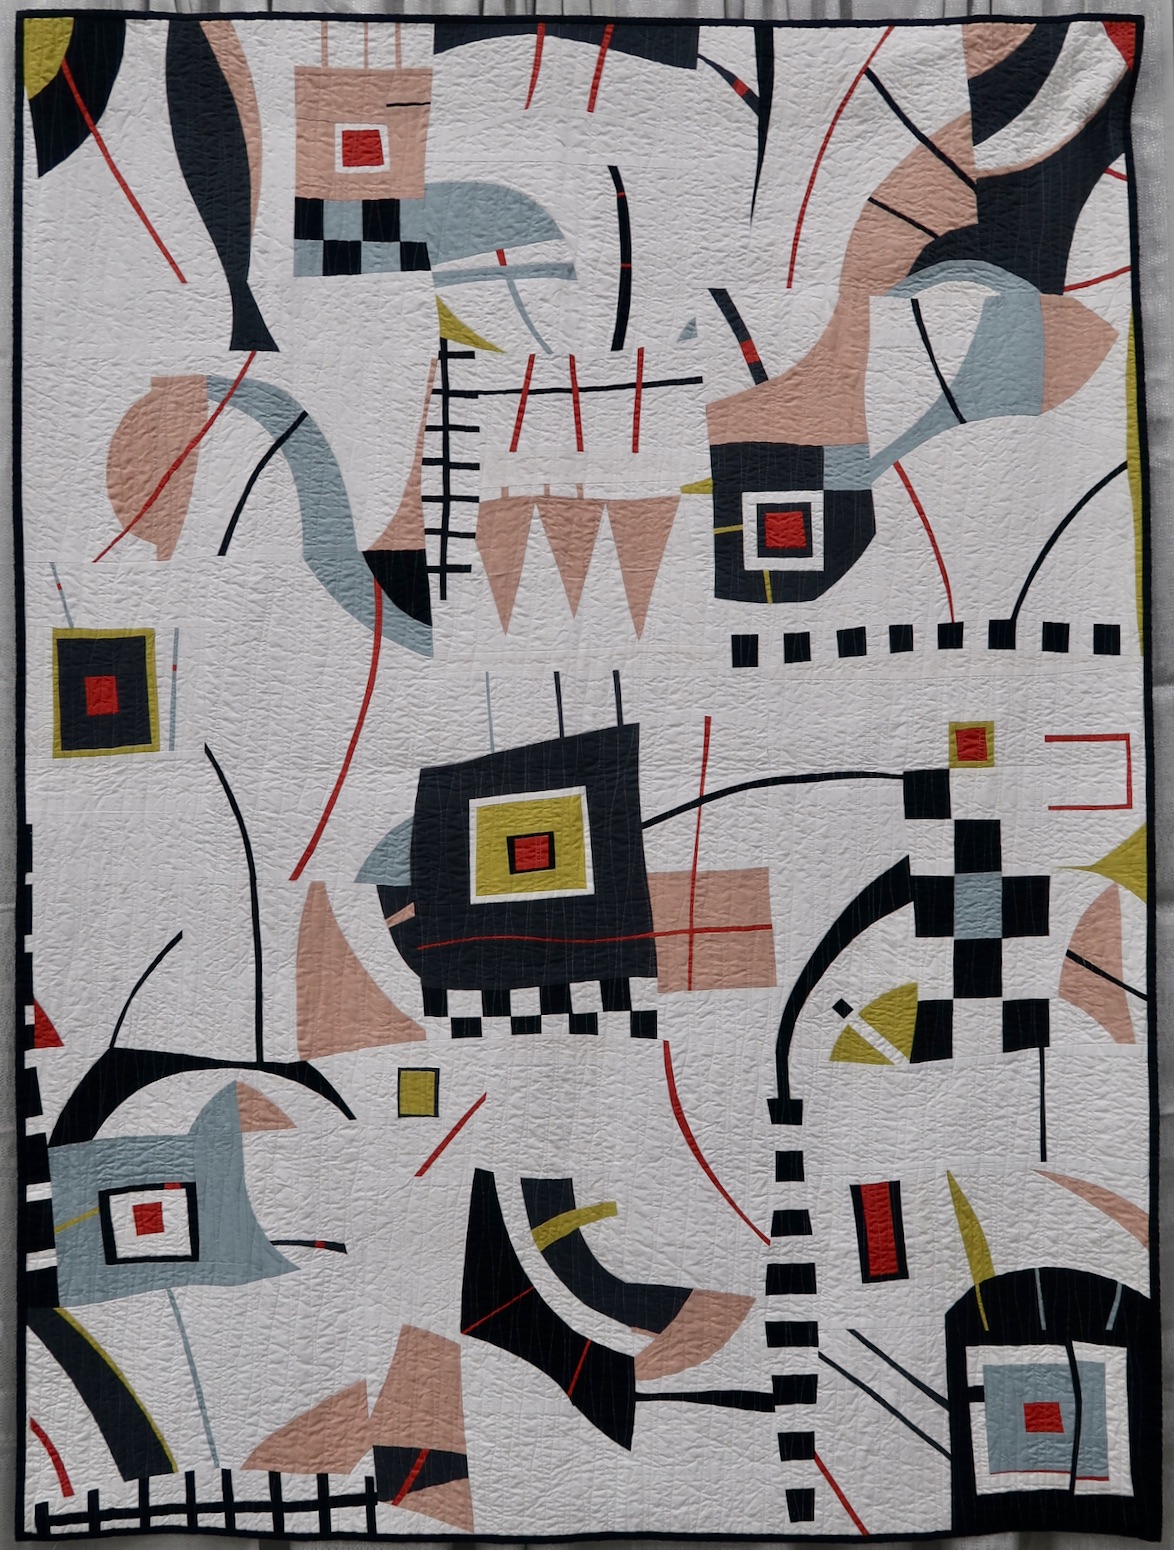
And Then Three Come Along At Once by Stephanie Crawford


When it comes to creating the illusion of space on a flat two-dimensional surface such as a quilt, the use of imaginary (or real) lines to create perspective trick the viewer into thinking that there is actual three-dimensional depth. Subjects appear less flat when you give them perspective. Last week we shared five of the six key ways an artist can create space on a two-dimensional surface. This week we will focus on the sixth element, perspective.

One Point Perspective:

Think of it this way. If it's large, it's closer. If it is small, it's further away.

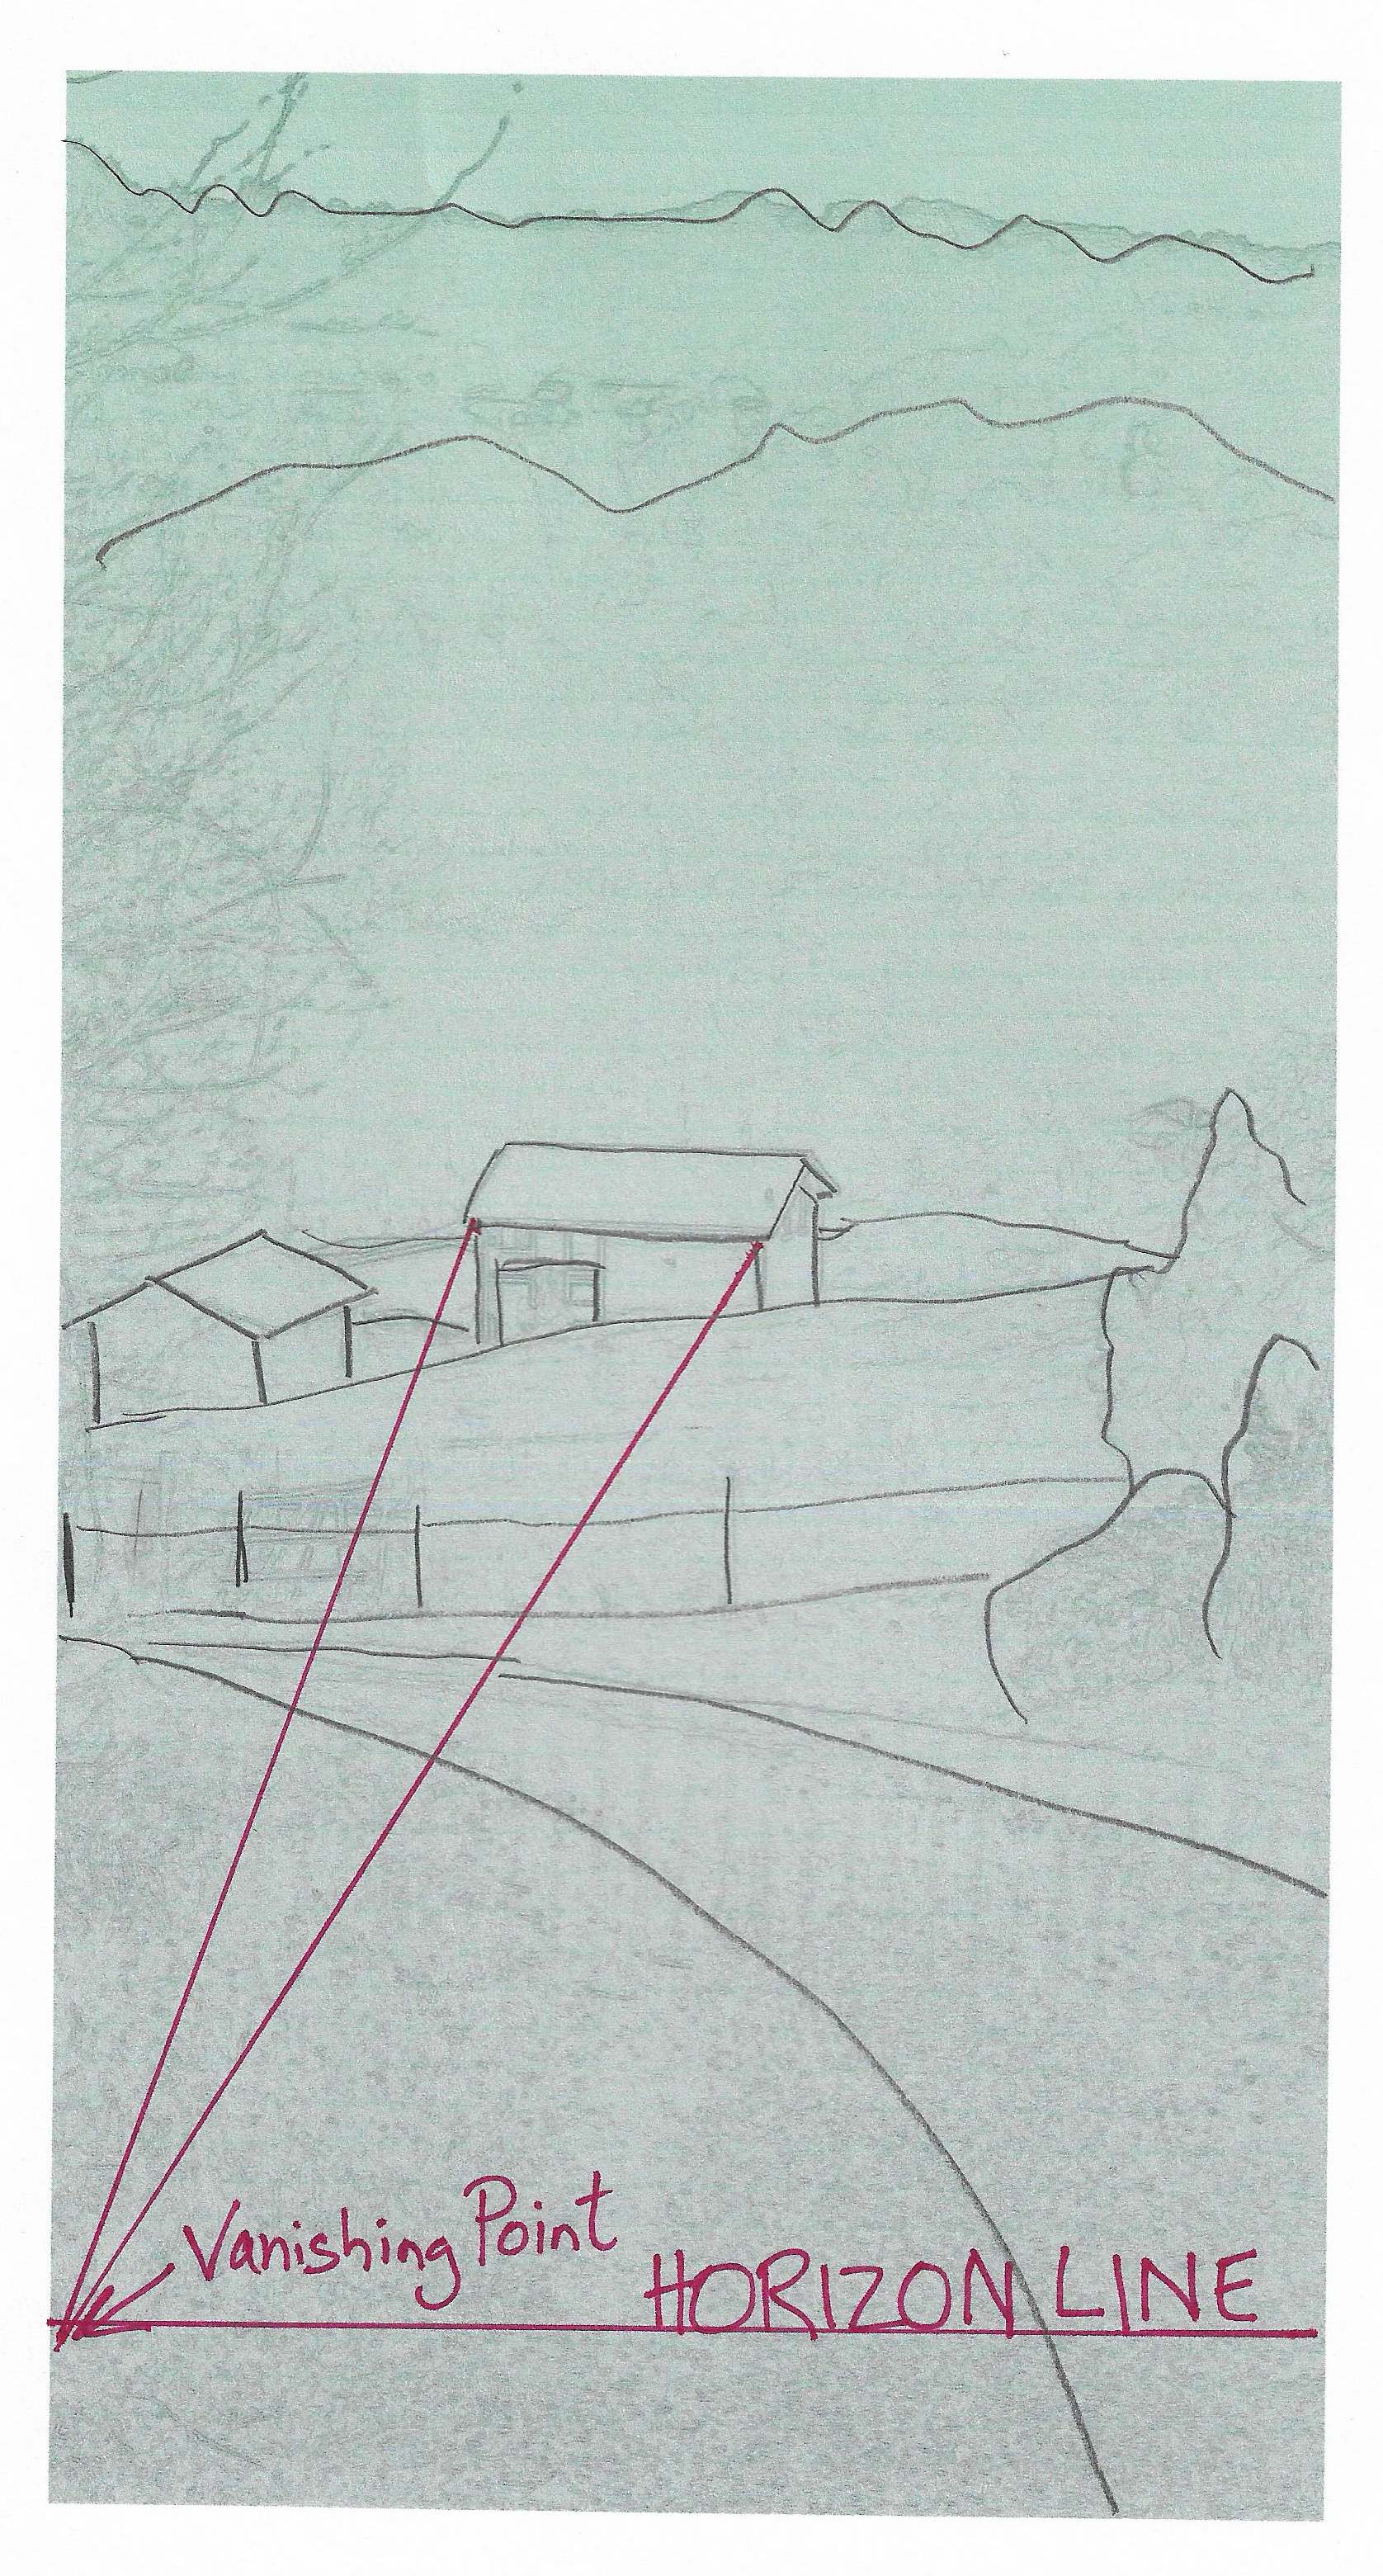
Let's use the drawing of a road leading out of town as an example. If you look closely, you will see a horizontal line that is in the center of the drawing. This line represents the horizon. The trees sit at the base of the horizon line, while the clouds hover above.

The road is drawn using two lines that meet at one point along the horizon line. The lines of the street are drawn at an angle to create the illusion of distance and depth. Notice how both the road, and buildings along it, seem to disappear into the horizon. At the point where everything seems to disappear is called the vanishing point.

Now look at the buildings along the road. In real life, the buildings would all be about the same size. But, in a drawing, the buildings along the road need to be smaller to give the impression that they are further away.


Two Point Perspective:

In two-point perspective there are two vanishing points. Think of standing at the intersection of a city road.  
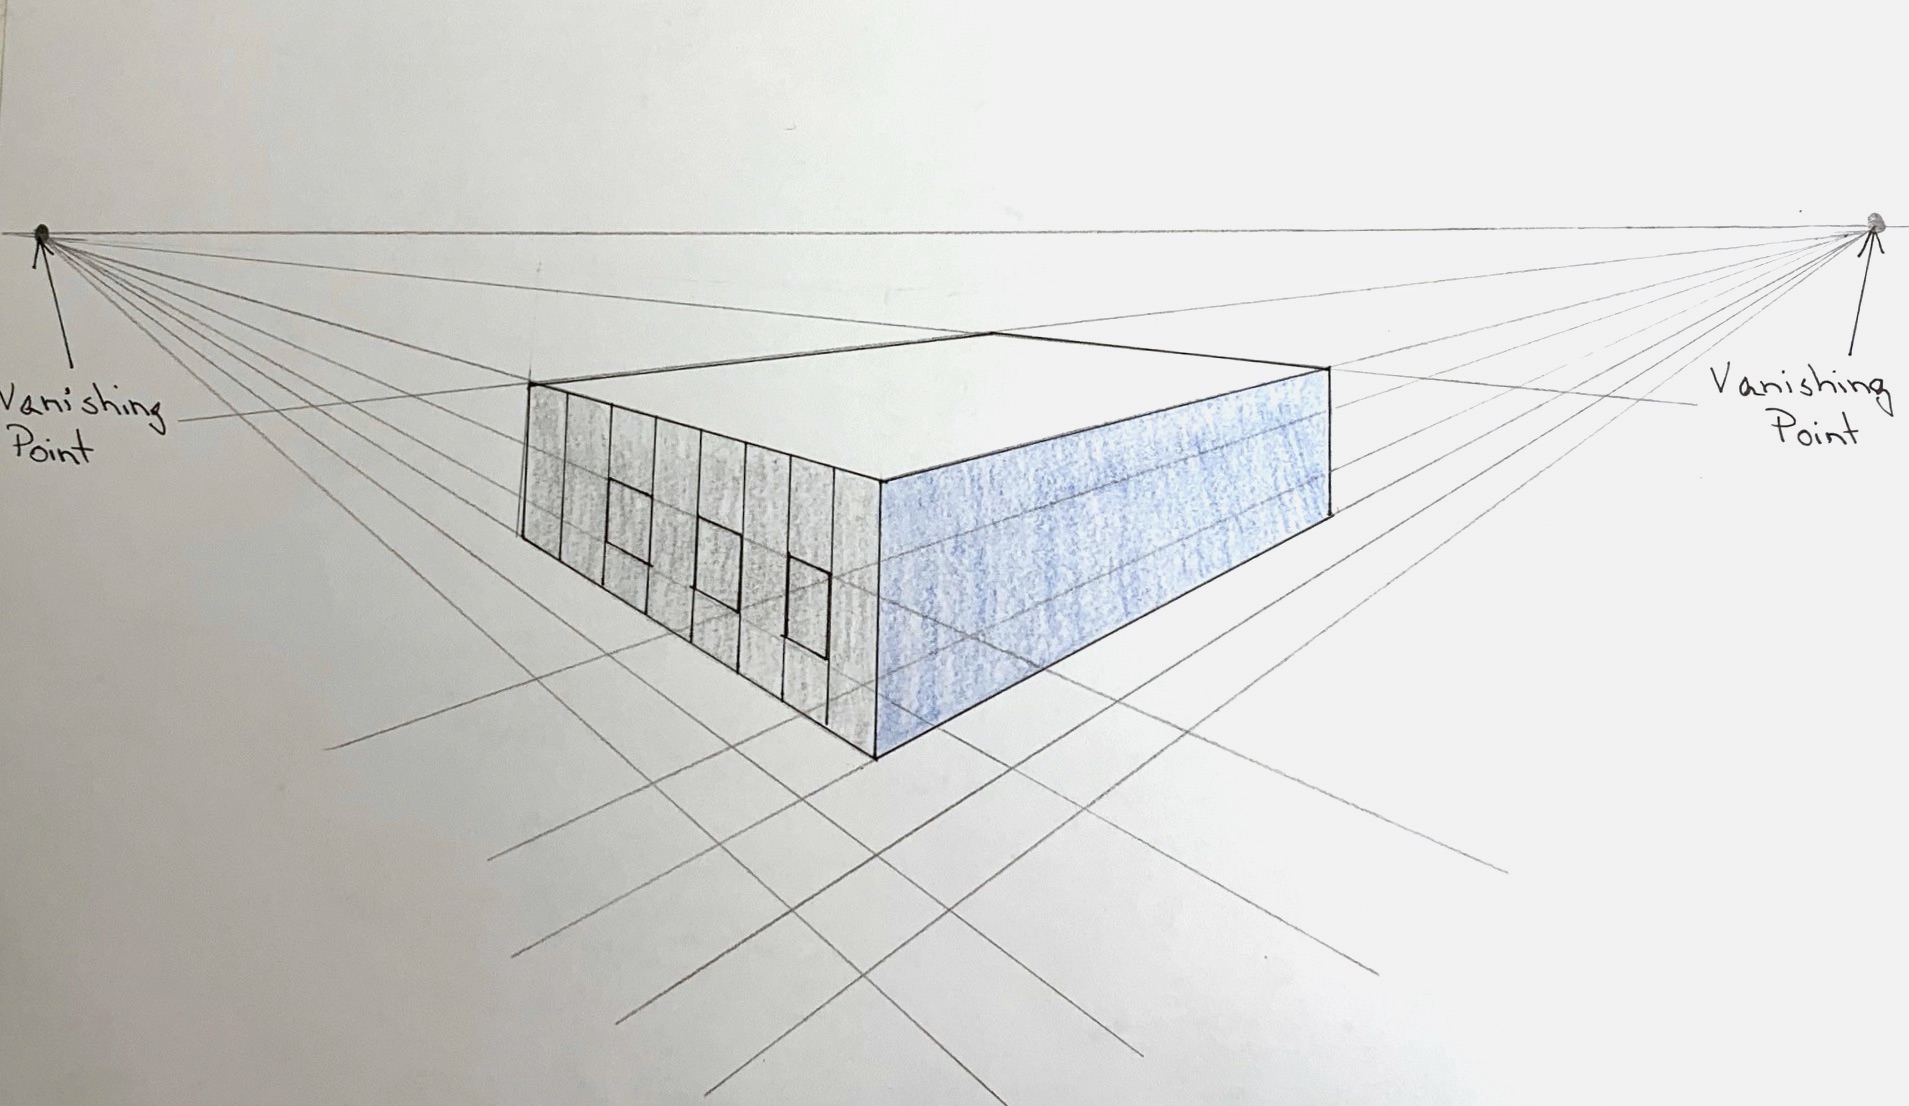
The building closest to you is the largest, while those on either side seem to vanish in two different directions.


Now that you have seen the graphic illustrations, let's look at examples in actual quilts:

One-Point Perspective
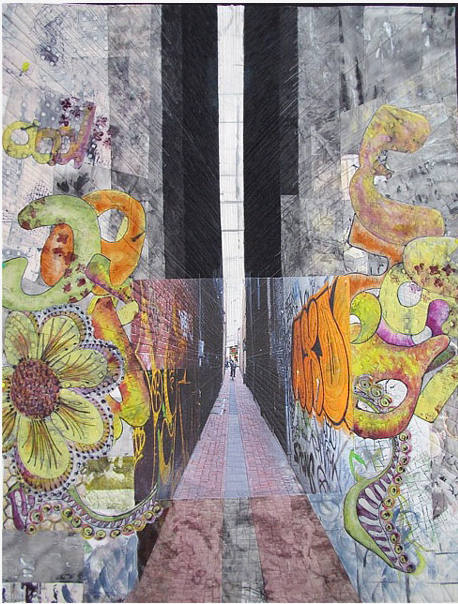
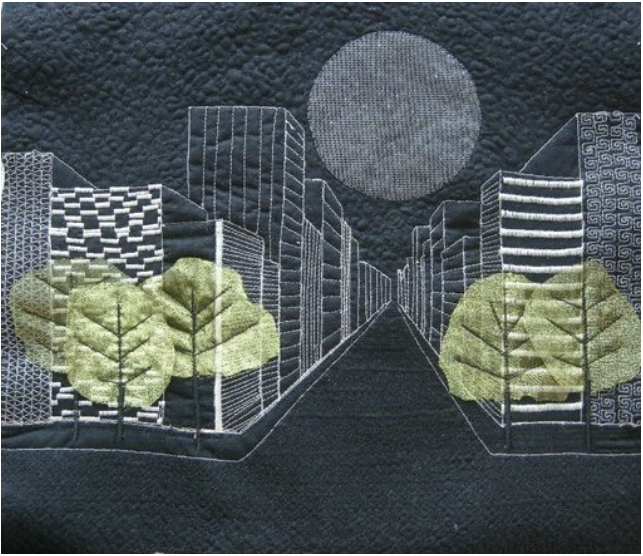
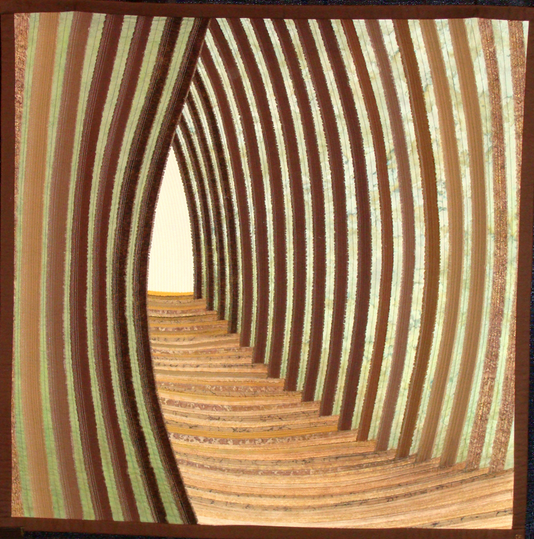
Amsterdam Alley: The Shortcut Between by Leslie T. Jenison  Ciudad Fantasma by by Cecilia Koppmann
Amsterdam Alley: The Shortcut Between by Leslie T. Jenison (Left) ; Ciudad Fantasma by by Cecilia Koppmann (Right)
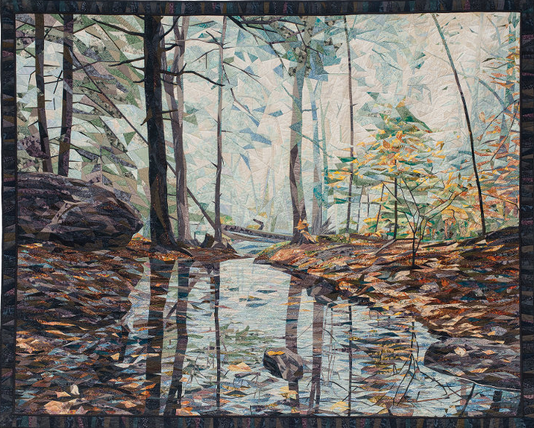
Pathway To A Secret Garden by Dianne Firth Piece and Quiet by Cynthia England
Pathway To A Secret Garden by Dianne Firth (Left) ; Piece and Quiet by Cynthia England (Right)
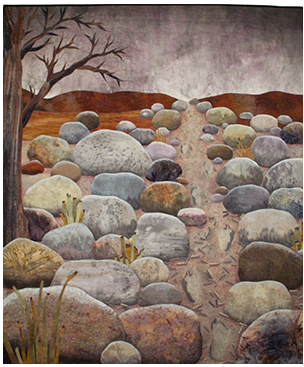
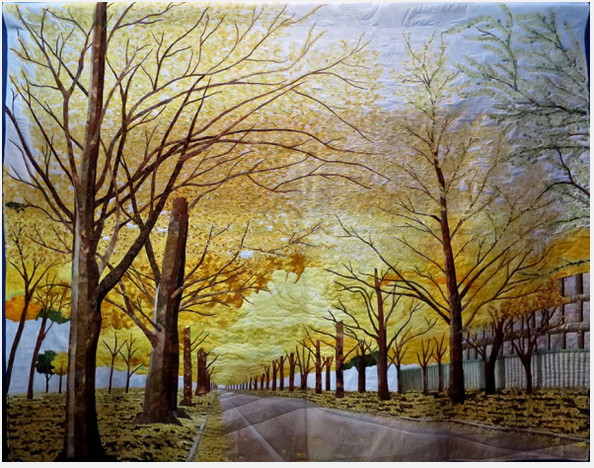
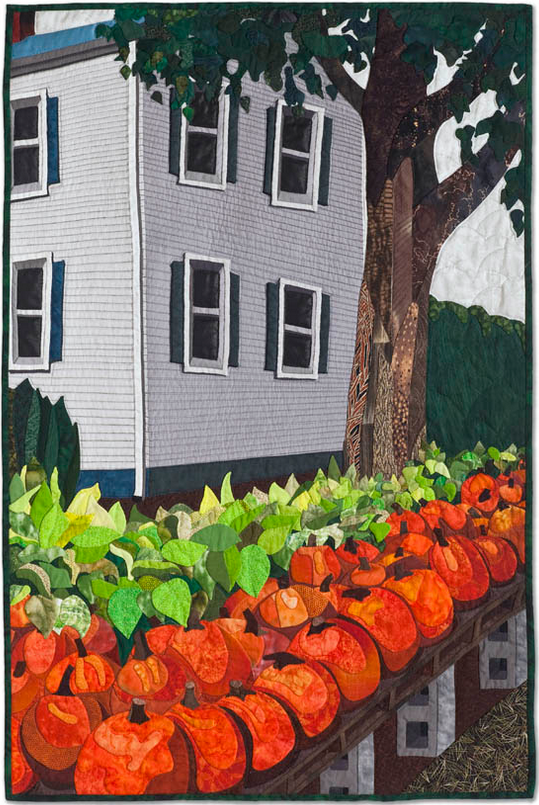
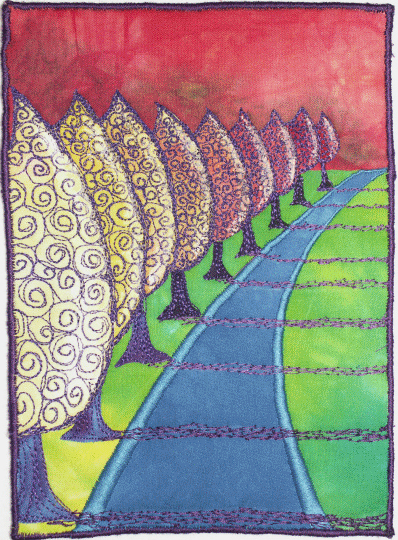
 Space Refugee by Betty Busby The Street Of Golden Leaves by Keiko Kimura
Space Refugee by Betty Busby (Left) ; The Street Of Golden Leaves by Keiko Kimura (Right)

 
Circle Line Art School


Two-Point Perspective

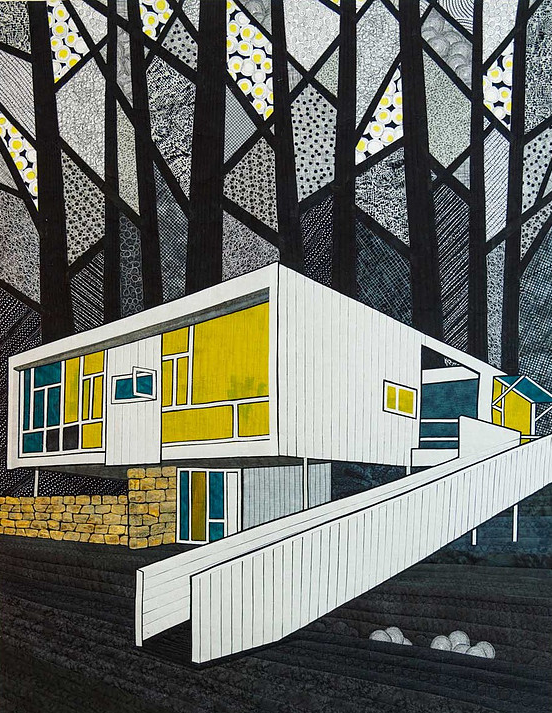
Hadley House by Sara Sherwin Roberts Rose Seidler by Gloria Loughman
Hadley House by Sara Sherwin Roberts (Left) ; Rose Seidler by Gloria Loughman (Right)
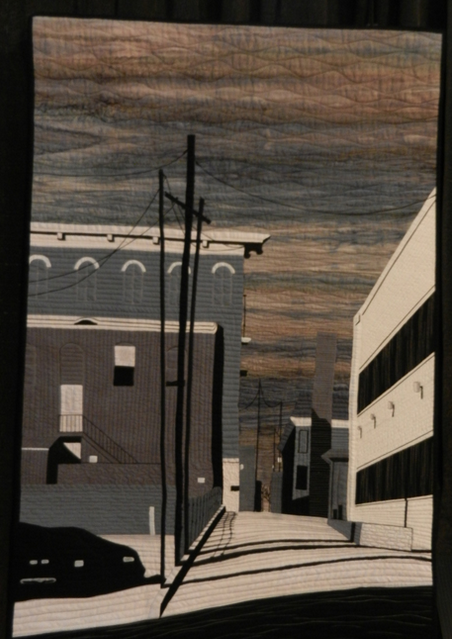
 Alleyway by M. Bunte
Alleyway by M. Bunte


Circle Line Art School


Perspective in Quilts

by Allie Aller (Show 1906)
All images by Allie Aller unless otherwise noted

Landscape quilts that employ the basic concepts of perspective have richness and believability. We are drawn into the scene to our visual delight. 

What is perspective? It can be defined as the rendering of three dimensional space on a two dimensional page (or in our case, the flat surface of a quilt.)

What are the basic concepts of perspective and how can we use them?

The first is depth. We want to see into a landscape. To "fool the eye" into perceiving elements in our landscape as being nearer to us or farther away, thus providing depth, there are some basic tricks we can employ.

In the examples below, four tricks are used:

1) Objects in the foreground are heavier and more detailed. The orange autumn tree closest to us has thicker lines than the yellow trees in the middle ground. The hills in the background are made with thinner and thinner lines. This simple trick gives the illusion of distance.

2) Faraway objects get paler in color. In this first quilt, the hills in the background become a paler and paler purple, the farther away they are.
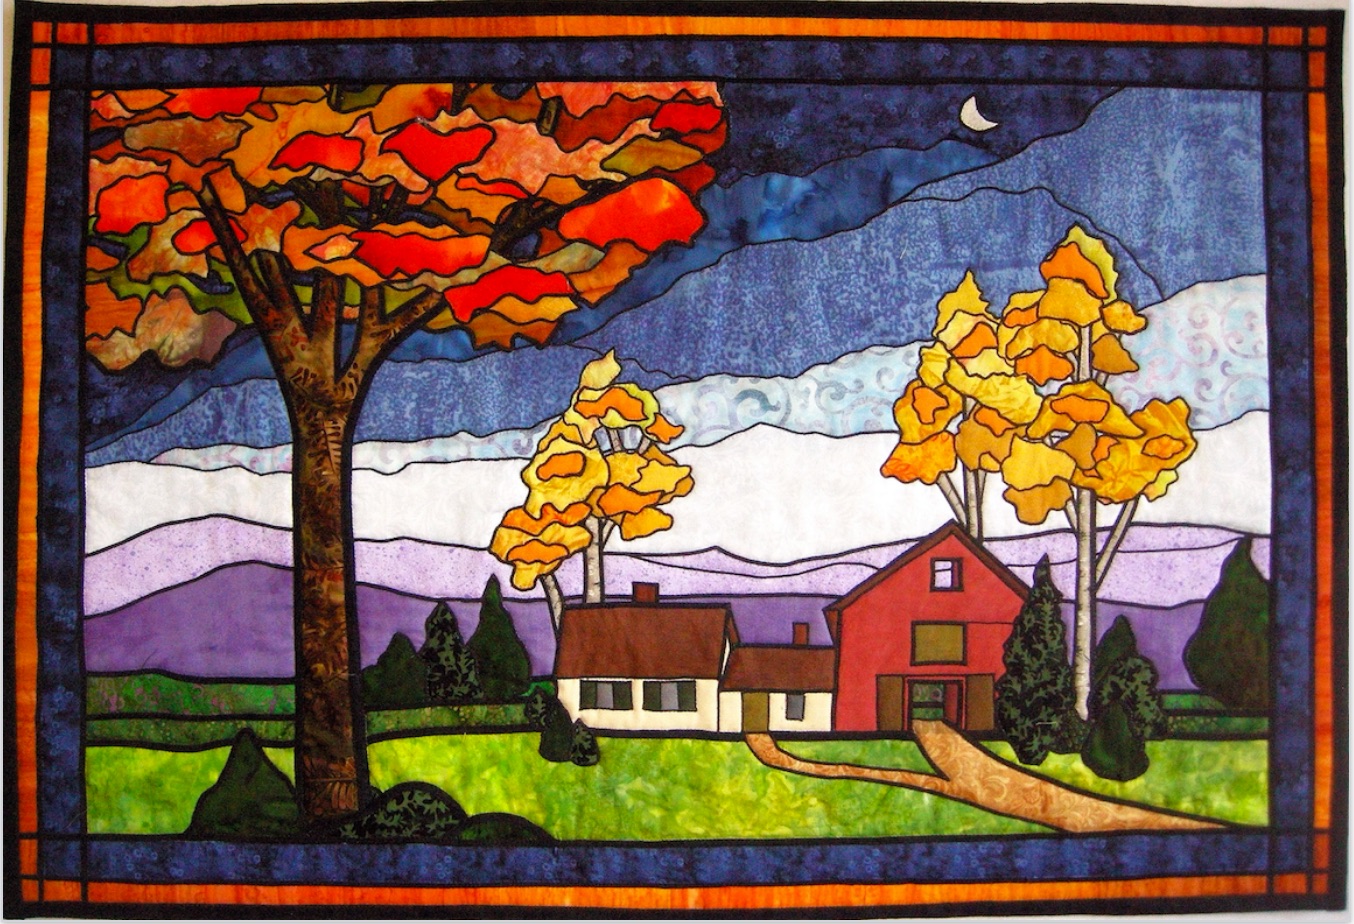
The Parrish Farm by Allie Aller

3) The same objects, farther away, are smaller. In the Lake Michigan scene below, the trees to the right of the picture, which are farther away, are rendered as shorter, but we "know" they are really the same size as the trees in the foreground. This concept is called "diminution".

4) The foreground shows lots of detail and texture; the farther into the background we go, we see less detail. Notice in this second picture that there is a lot of grassy detail in the foreground; then there is less in the middle ground, and none at all in the background.
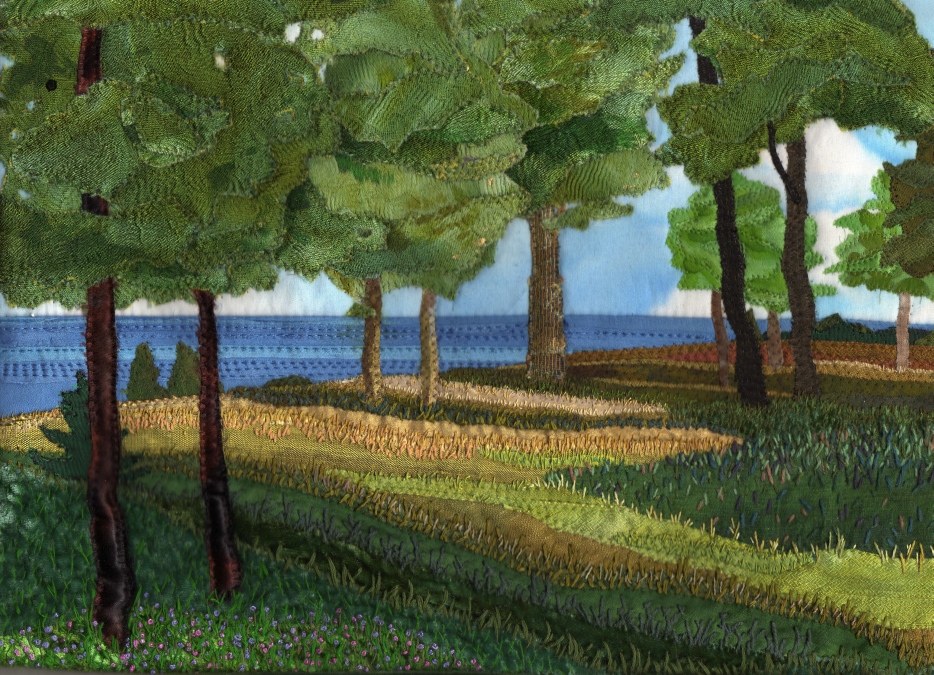
Morning Banks Small by Allie Aller

The second basic concept of perspective is convergence. Vertical lines that are parallel in real life appear to get smaller and closer together as they recede into the background. That is because they are all aimed at the vanishing point, that imaginary point at which parallel lines receding from an observer seem to converge in the distance to a common point on the eye level or horizon line. (More on the Horizon Line in a moment.)

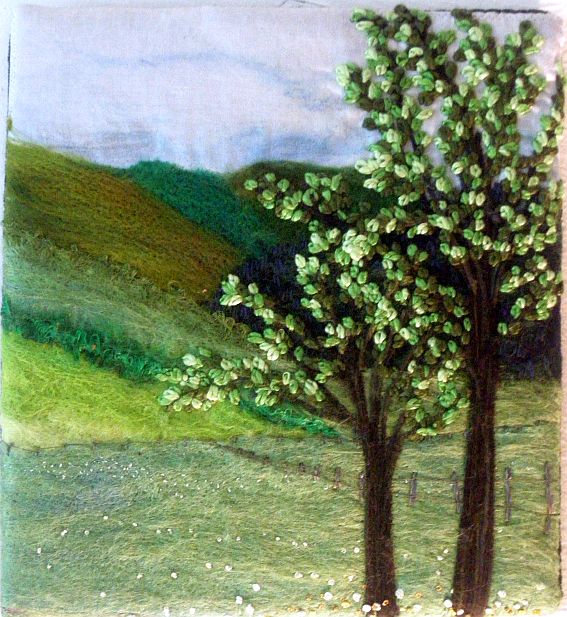
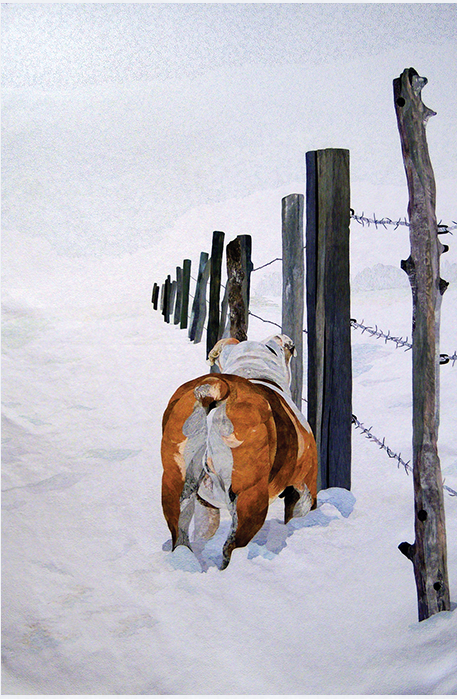
In the two pieces below, the fence lines illustrate this concept. In reality those fence posts are all the same size and spaced equally apart, but in perspective, they get smaller and closer together, the farther into the background they recede.  This doesn't have to be perfectly accurate, just believable.
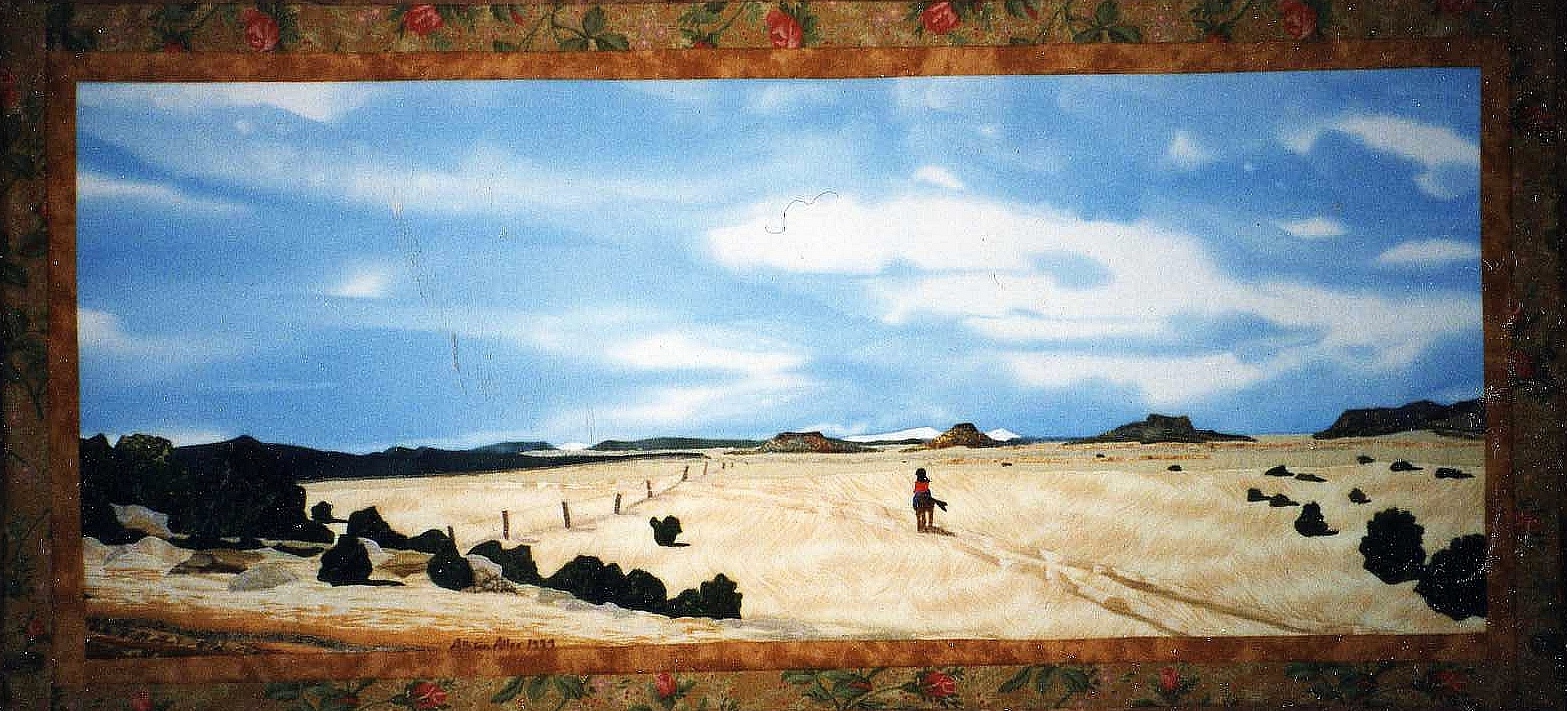
Wagon Mound 4 Heading Out by Allie Aller  Laura's Trees 2 by Allie Aller

Besides the fence posts suggesting perspective, in this second felted and embroidered piece, even the little French knot flowers are larger and farther apart in the foreground, and tinier and closer together in the background. Both these tricks work together to create the illusion of depth.

The little house in the quilt detail below also just hints at perspective, the way the roof line and ground line, though parallel in real life, convey two converging lines, aimed toward the vanishing point on the horizon.
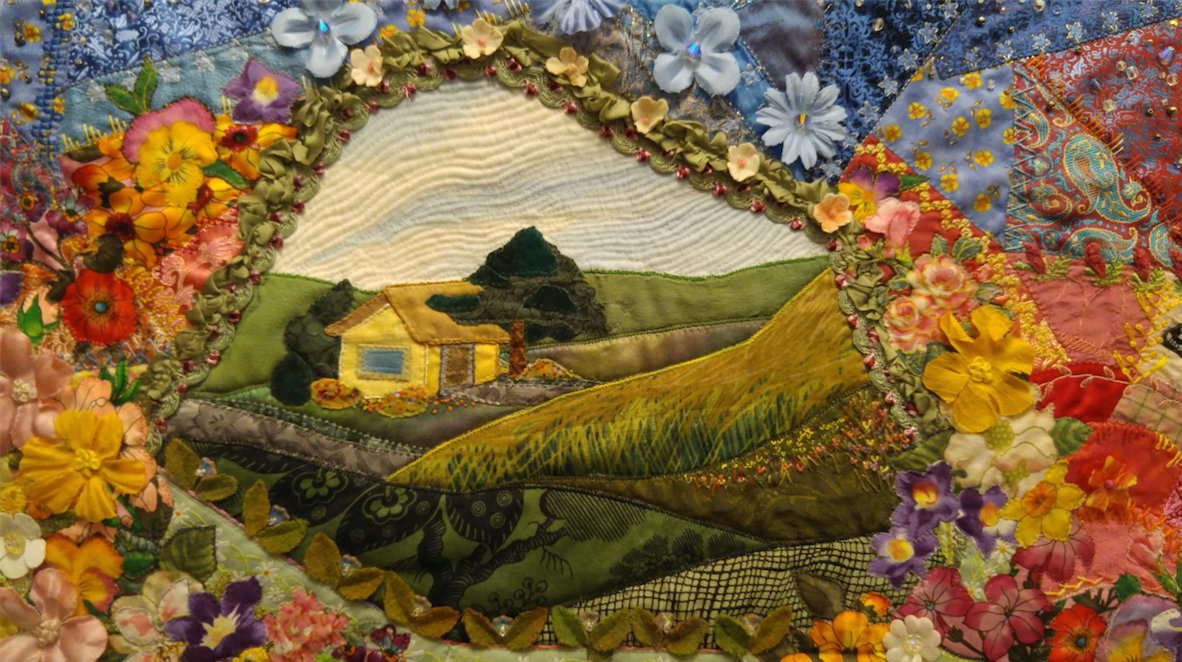
My Washougal Dream Center Detail by Allie Aller

This leads us to the third basic concept in perspective, the horizon line. It is the actual height of the viewer’s eyes when looking at an object, interior scene, or an exterior scene. That eye level height determines how the viewer will see the scene. 

From an aerial view, or bird's eye view, we are looking down on a scene, and the horizon line is very low. The eye level view shows an image or scene just as we would look straight out at it from a standing position, so the horizon line will be somewhere in the middle of the picture. From the worm's eye view we are looking up at our scene, so the horizon line will be very high.

So if we have an eye level view and are looking directly at a house, it will look like this, as in this embroidered printed photograph:
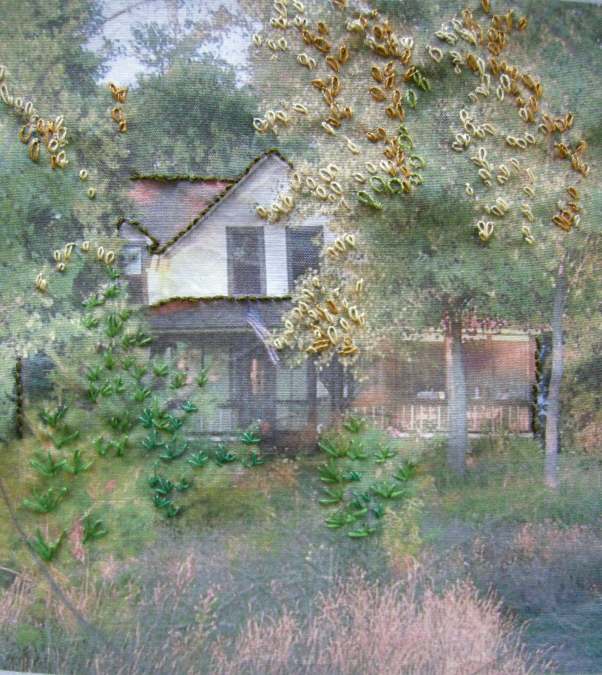
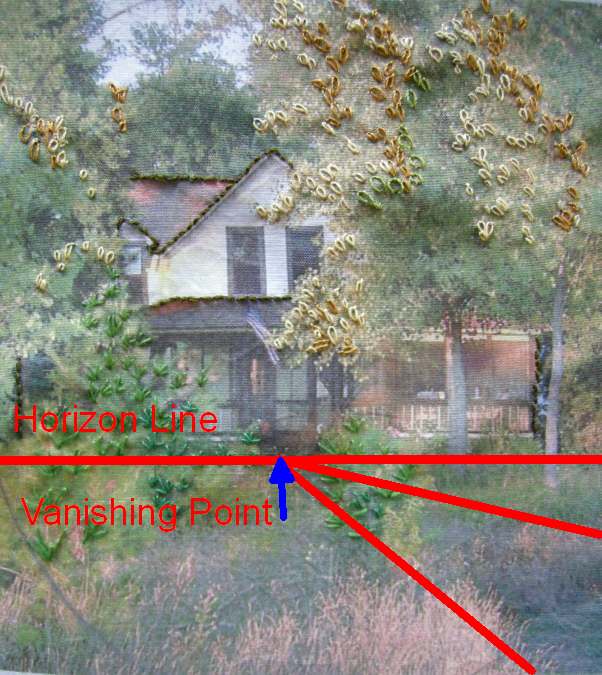
  Bryant Cottage by Allie Aller    

The horizon line, though we don't see it, is right about level with the steps of the porch, with its vanishing point right under the door.  But look!  Notice the shadow in grass in the lower left corner. That is actually a trodden path leading to the front door, and can you see how its lines converge towards the vanishing point? Even this subtle convergence gives depth and perspective to our scene.

Let's review these two basic rules for using perspective in quilting to gain depth in a scene:

1) Make the objects in your foreground with bigger heavier lines, more detailed shapes, and richer in color and texture than objects in the background. (This is why I always make my landscape skies very, very flat. I personally don't want texture in my sky because it brings it too much to the foreground, and really, what could be further away than the sky?)

2) Determine which view you want to show your quilt's picture from: aerial, eye level, or worm's eye.  That will help you find your horizon line and vanishing point, where all lines in your scene converge.

Homework:

Look at several photographs of buildings or simple scenes, and determine where the horizon line and vanishing point is in each one. See how lines in the image--roof lines, window casements, etc, angle towards that vanishing point.

Then as you go about your day, occasionally frame a scene with your hands and try and determine the horizon line and vanishing point in the view you are seeing. The series of photos below are an example of an aerial view with a low horizon line, looking down my driveway.
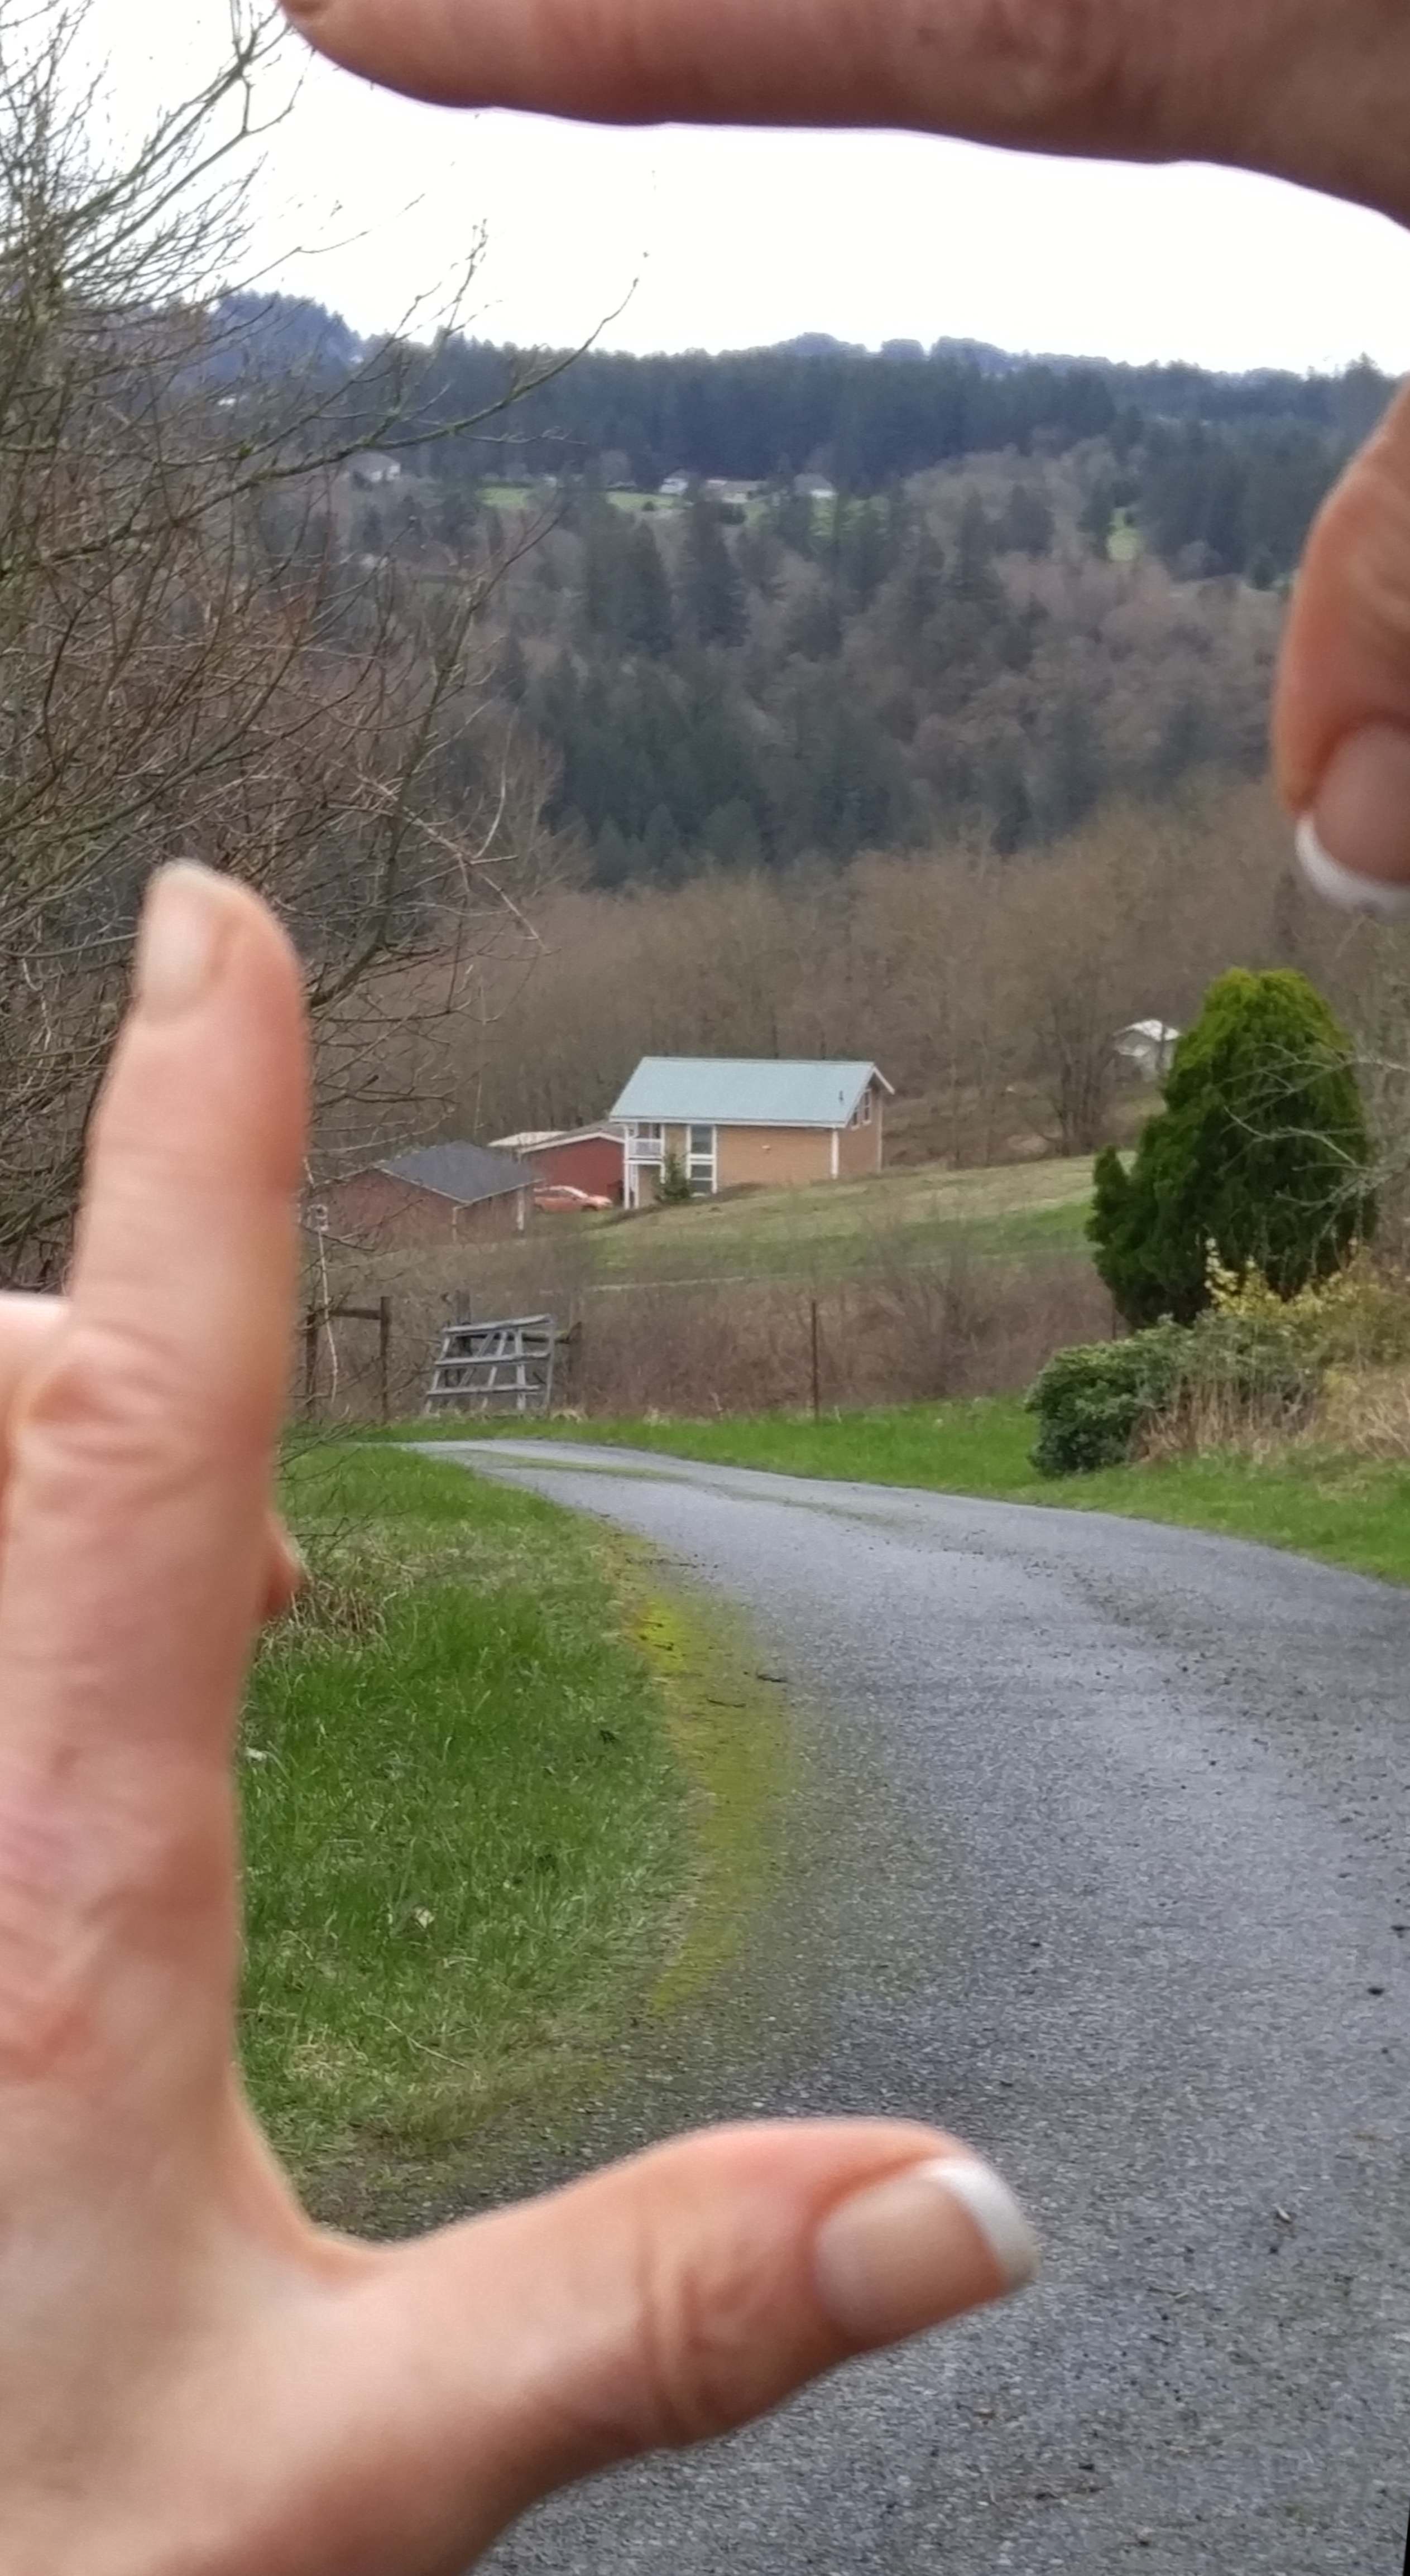
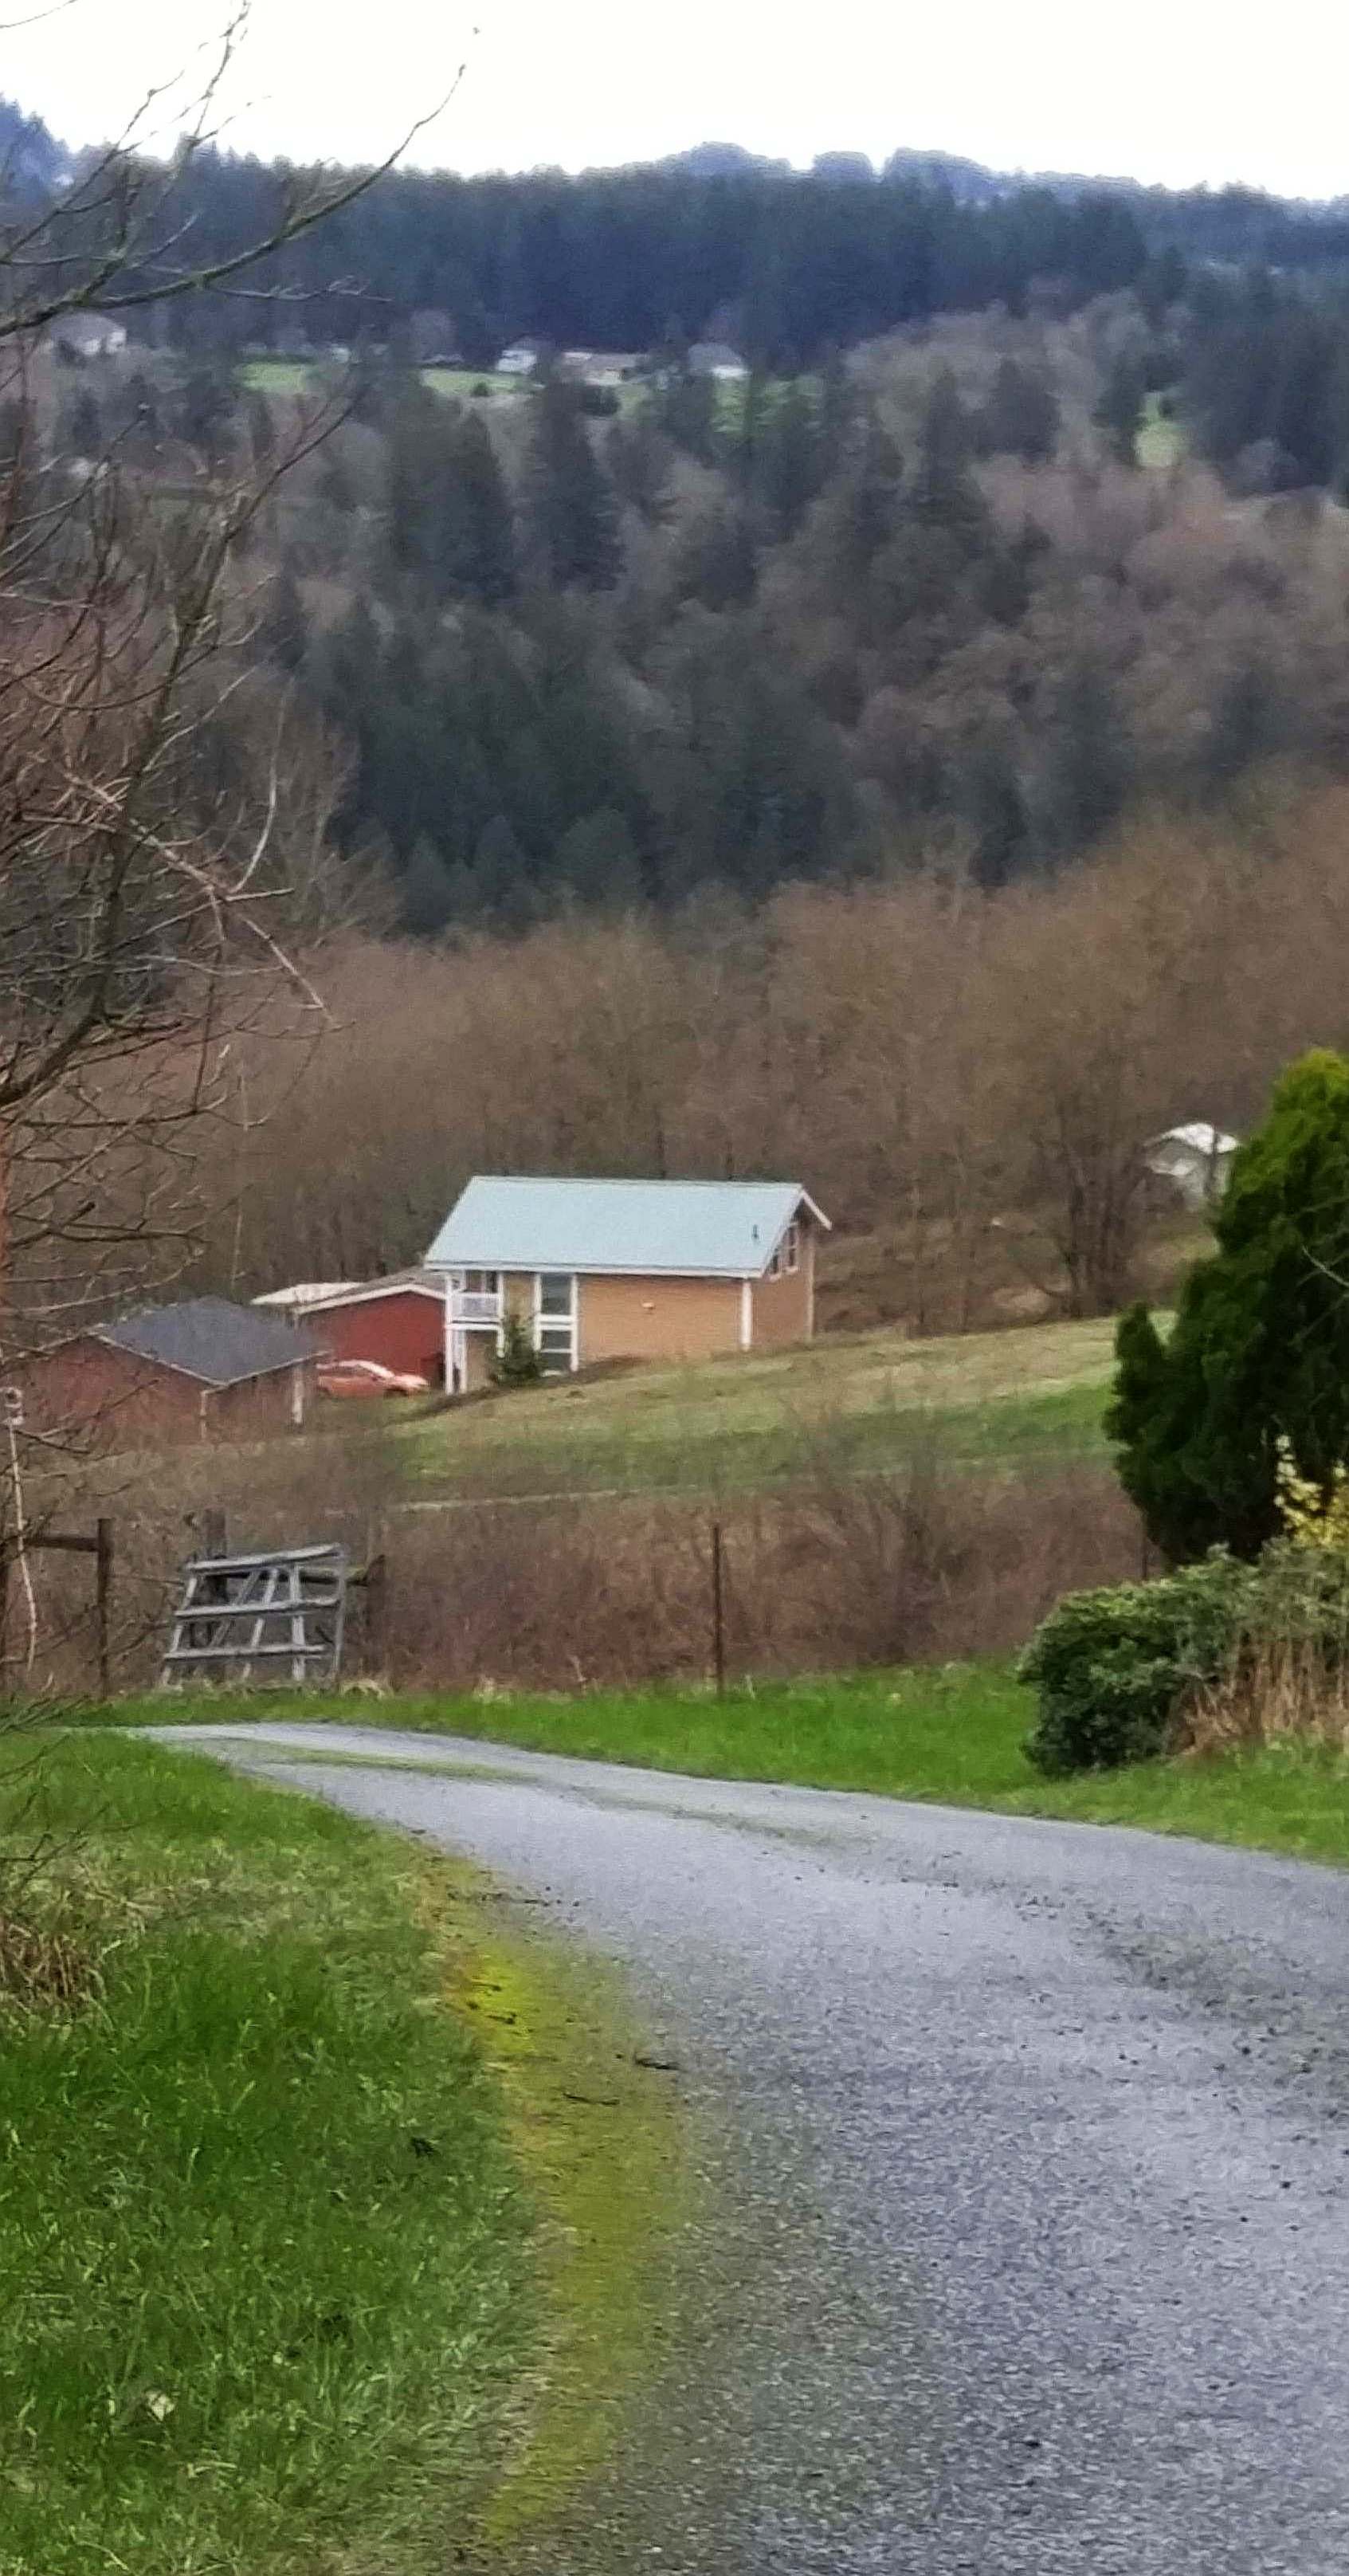
   

If you start thinking and seeing this way, it will come out in the quilts you make as well.

Copyright 2017 All quilts by Allie Aller
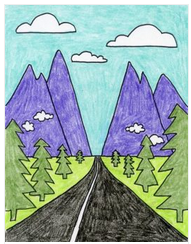
 

Work Exercise: The Vanishing Point Road

by Kathy Barbro

Here’s a simple landscape tutorial that illustrates how to draw perspective with a vanishing point. The drawings help show how much space can be implied in your art just by paying attention to lines and scale. And by keeping elements like the trees all the same type, it’s easy to see how they get smaller and smaller, the further away they get from you.

MATERIALS
• Drawing paper
• Fine tipped black marker such as Sharpie
• Crayons or colored pencils

View and download the landscape tutorial here.

DIRECTIONS
1. Lightly draw a center guideline on the drawing paper with a pencil.
2. Follow the Landscape Tutorial for drawing the landscape.
3. Trace the drawing with a black marker.
4. Color the landscape with crayons. Try using dramatic colors, as in a black road and colored mountains.

Click here for more topics related to The Art of Quilt Design program.

  2

We continue our feature on quilts from the Studio Art Quilt Associates (SAQA) exhibit, Layered & Stitched: Fifty Years of Innovation, as featured at the Texas Quilt Museum. The exhibit is described as:
Studio Art Quilt Associates presents Layered & Stitched: Fifty Years of Innovation at the Texas Quilt Museum in Galleries I and III. These studio art quilts, dating from 1968 to 2016, represent the extraordinary range of talented artists working in contemporary quilt art. Featuring a balance of abstract and representational styles, Layered & Stitched includes several foreign artists, with a wide geographic distribution of makers in general. The curatorial vision of this exhibition embraces diversity and excellence, including three-dimensional works. Juried by Nancy Bavor, Director of the San Jose Museum of Quilts & Textiles; Martha Sielman, Executive Director of SAQA; and Dr. Sandra Sider, Curator of the Texas Quilt Museum, who says, "Jurying this spectacular exhibition was one of the highlights of my career! It is an amazing show of historic significance."

The exhibit has also been collected in a companion book as well, titled Art Quilts Unfolding: 50 Years of Innovation by Nancy Bavor, Lisa Ellis, Martha Sielman, and edited by Sandra Sider. The book is described as:

Published by Schiffer Books, Art Quilts Unfolding offers full-color images of 400 masterpieces along with engaging interviews and profiles of 58 influential artists, key leaders, important events, and significant collections. Organized by decade, an additional 182 international artists' works are featured.
 
An introduction by Janet Koplos, former senior editor of Art in America, and a conclusion by Ulysses Grant Dietz, emeritus chief curator of the Newark Museum, help us to understand the impact and the future of the art.
 
 
The exhibit will be on display at:
San Jose Museum of Quilts & Textiles: April 19, 2020 - July 12, 2020
Ross Art Museum, Delaware, Ohio: May 14, 2021 - July 2, 2021
 

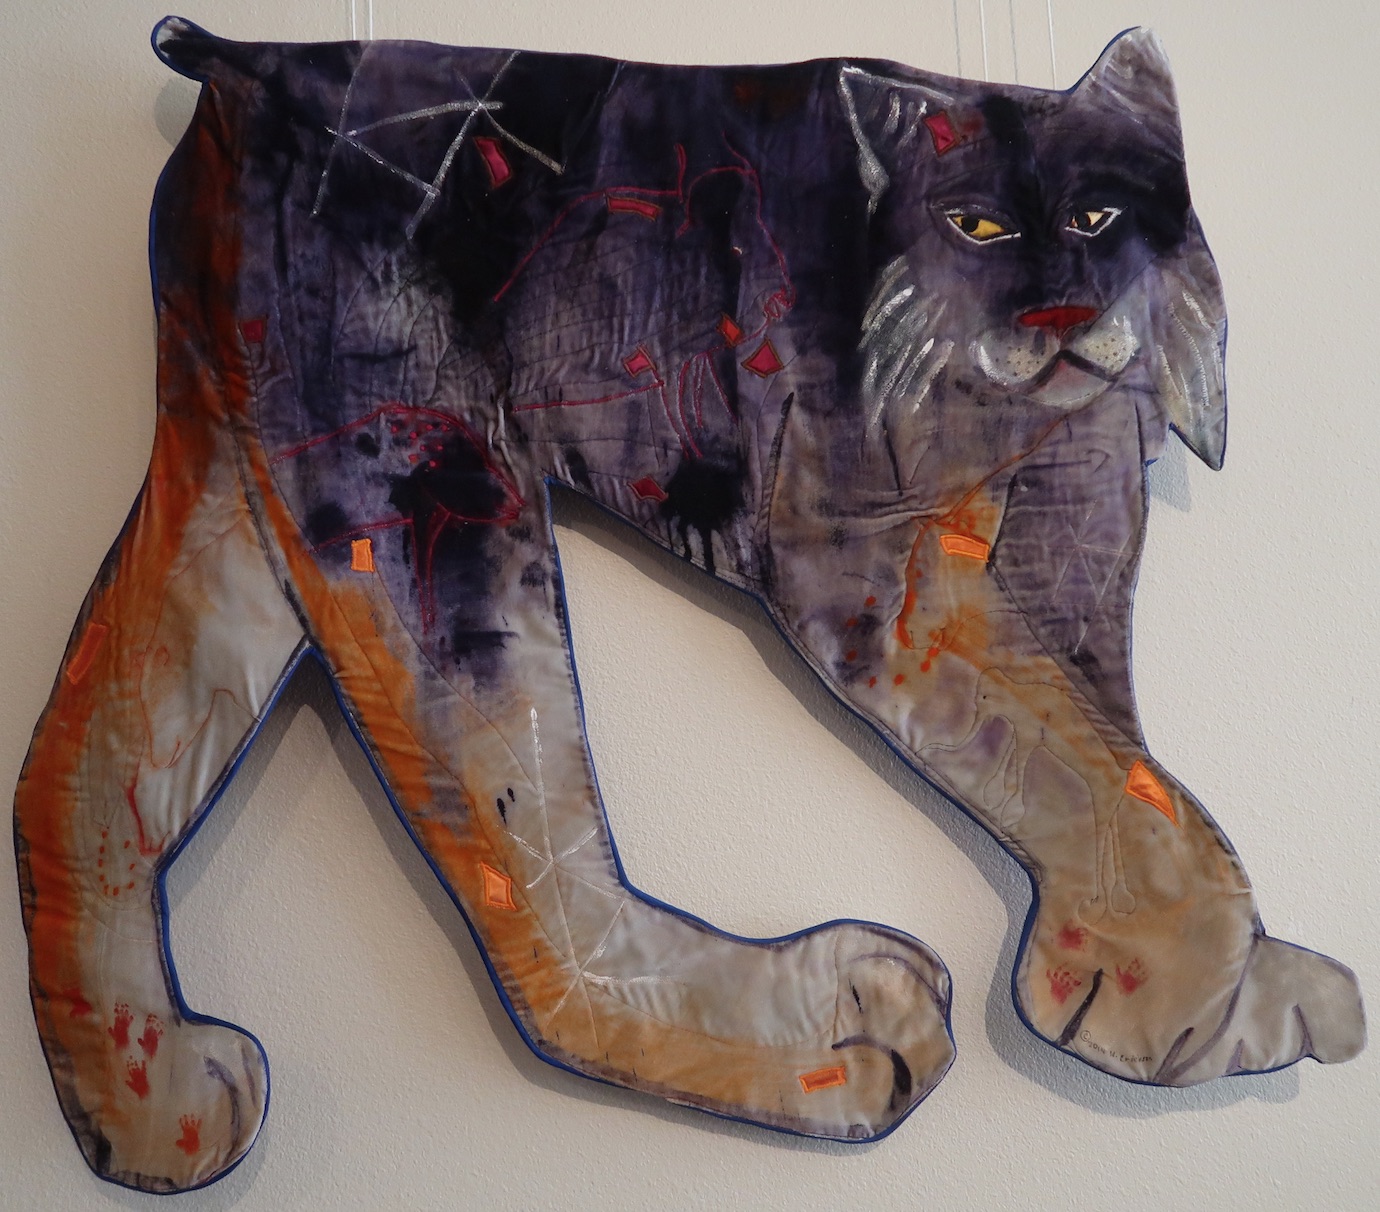
Please enjoy the seventh quilt from the exhibition by Nancy Erickson.

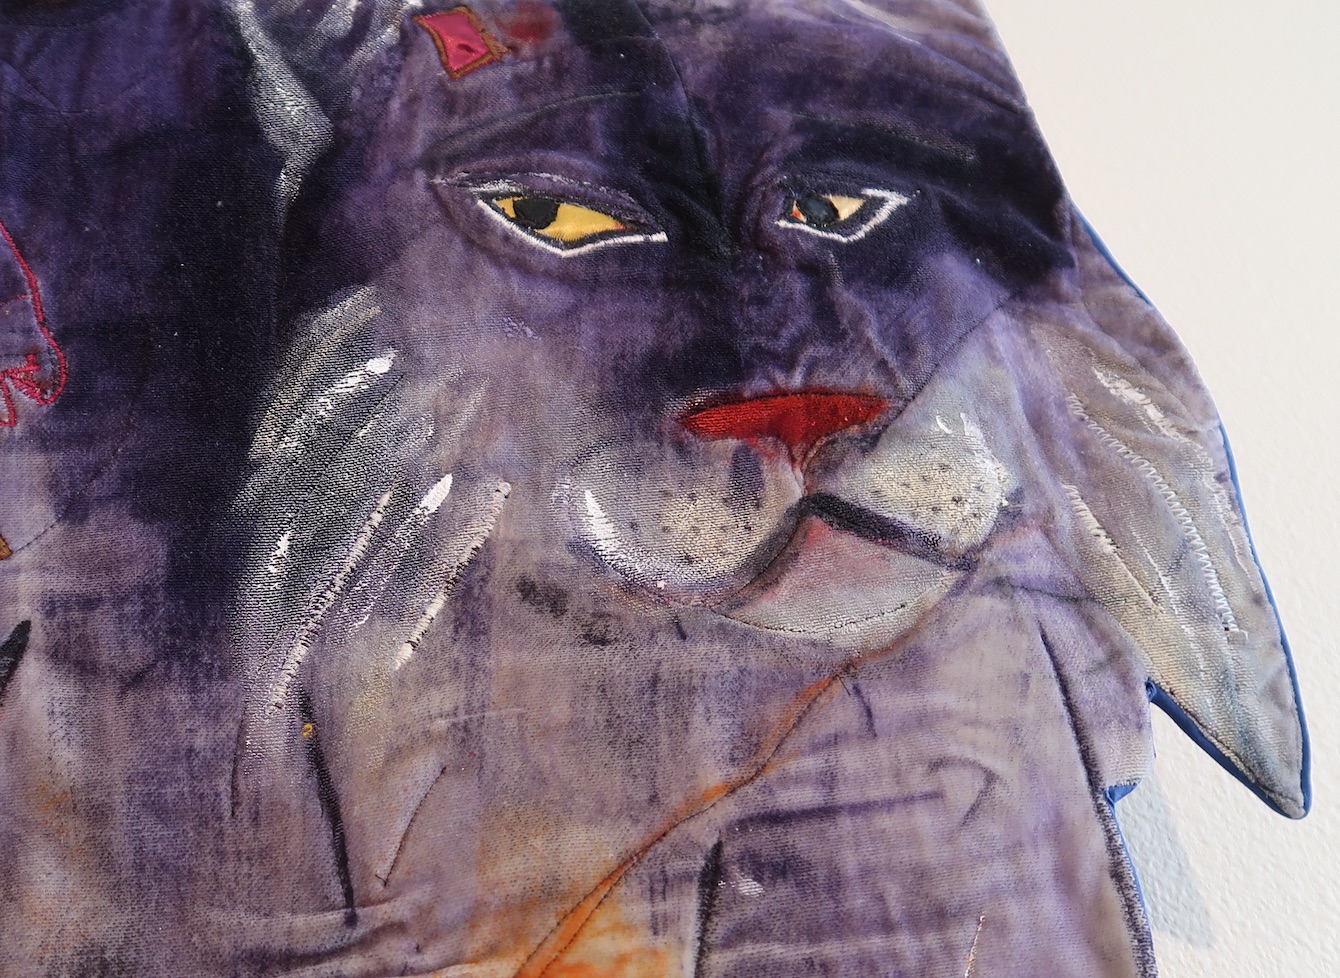
Title of Quilt: The Purple Lynx

Quilter's Name: Nancy Erickson

Photos by Mary Kay Davis

  9

We love how much fun Annie H. Hudnet had creating her improv quilt, Jazz Riffs. A pianist and former dancer, she combined her two loves into this playful quilt.

Jazz Riffs by Annie H. Hudnut was featured in the Improvisation category, sponsored by Gotham Quilts, at QuiltCon 2020.

Photos by Mary Kay Davis

  11

Seasons of Life by Sandra Mollon with Kris Spray had a back that could have won awards, but now you see why it won from the front. (See the back by clicking here.) It won Best Movable Machine Workmanship at Spring Paducah 2019. This 83" x 83" wonder has Hand Appliqué, Beading, Broiderie Perse, Couching, Hand Dyeing, Embellishments, Hand Embroidery, Silk Ribbon Embroidery, Inking, and Tsukineko Inks.

Seasons of Life was also the Outstanding Large Quilt winner at the Road to California show, January 2019. 

Watch Sandra in Show 2609.

SeasonsofLifebySandraMollon - 36 Pieces Non-Rotating

SeasonsofLifebySandraMollon - 100 Pieces Non-Rotating

SeasonsofLifebySandraMollon. -289 Pieces Non-Rotating

SeasonsofLifebySandraMollon - 36 Pieces Rotating

SeasonsofLifebySandraMollon - 100 Pieces Rotating

SeasonsofLifebySandraMollon - 289 Pieces Rotating

Original Photo From Sandra Mollon's Website

  2

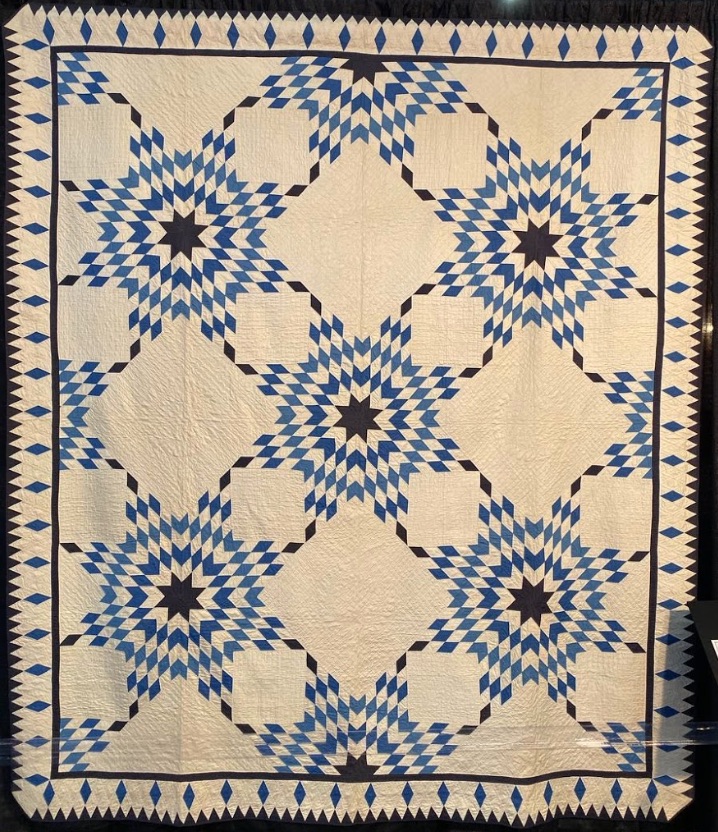
We continue our selection of quilts exhibited in 2019 at the Houston International Quilt Festival as part of their 45th Anniversary, the Sapphire Anniversary. The Sapphire Celebration exhibit is described as:

"Quilters have long used the color blue to symbolize trust, loyalty, wisdom, confidence, intelligence, faith, truth, and heaven. Sapphire is also the chosen gem to celebrate 45th anniversaries—which International Quilt Festival is doing this year (2019)! These new and antique blue and white quilts will be suspended from the ceiling in a spectacular and unforgettable display."

To be a part of the exhibit, quilts had to fit the following criteria:

  • Entries may be Traditional, Modern or Art.
  • Entries must have been made between 1974 and 2019.
  • The minimum size is 50” x 50”

Please enjoy the eleventh quilt from the exhibition by an unknown maker.

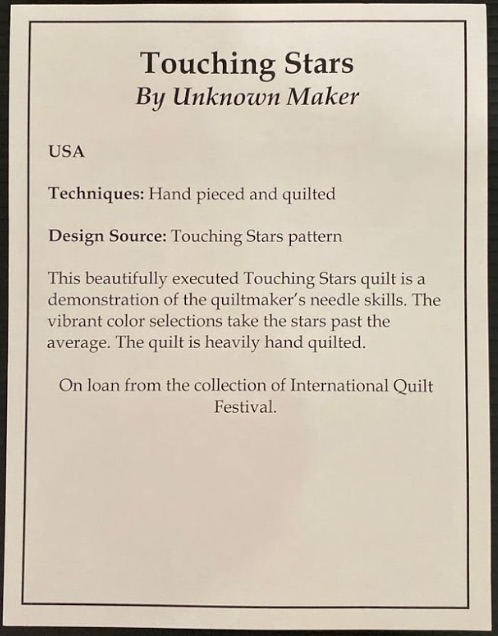
Title of Quilt: Touching Stars

Quilter's Name: Unknown Maker

  1

Alex and Ricky continue their trip in Sisters, Oregon and visit the home of June Jaeger. June is known for her fusible appliqué process which she uses to create pictorial quilts. In this show, she demonstrates that process and also shows you how to paint a Cascade Table Runner.

Need more techniques? Anna Bates is on hand to explain Sashiko and demonstrates how to trace the designs and make the stitches. 

Watch June and Anna in Show 2610, when it debuts Sunday, May 3, 2020.

  5

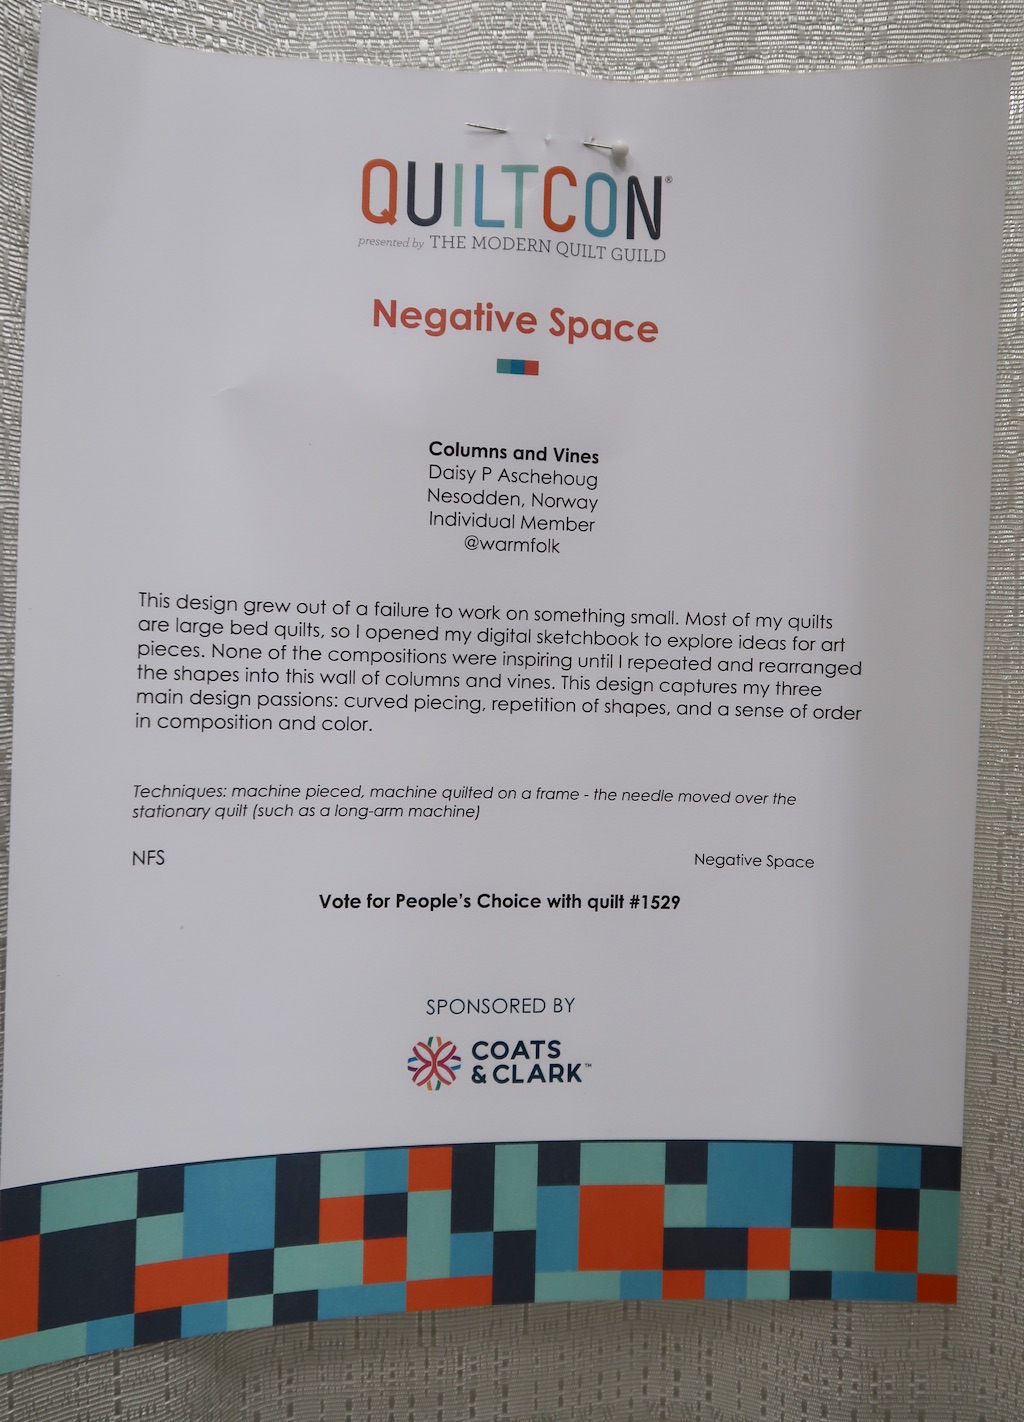
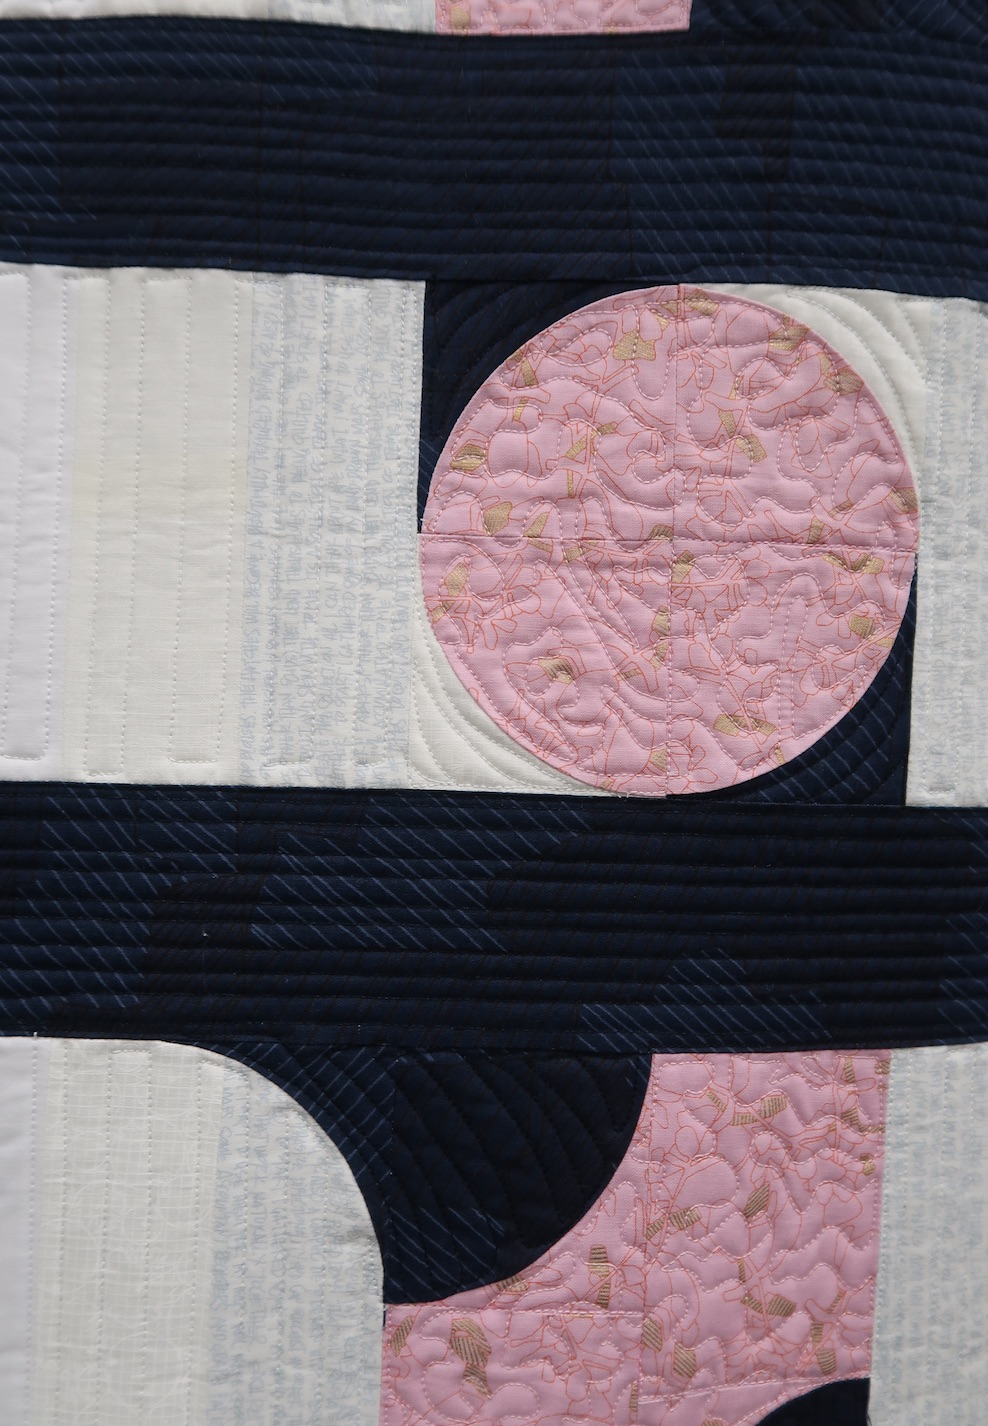
Daisy P. Aschehoug wasn't inspired by her quilt design until she began rearranging and repeating the main motif. She then called upon her other passions of curved piecing, a sense of order in composition, and color to pull the quilt together. 

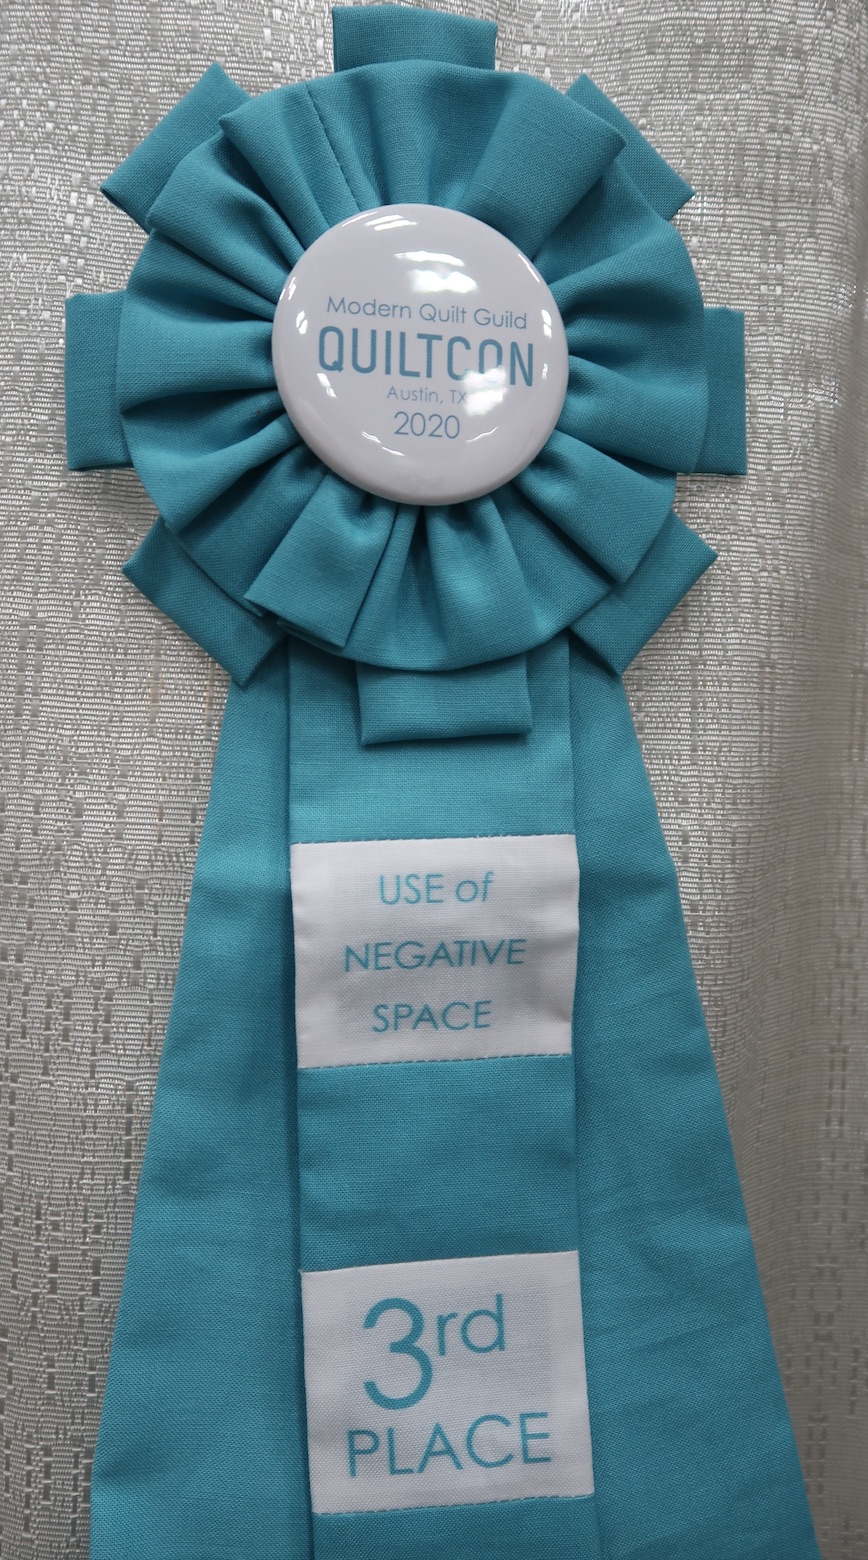
Daisy's quilt, Columns and Vines won Third PlaceNegative Space, sponsored by Coats & Clark, at QuiltCon 2020.

Photos by Mary Kay Davis

  4

Subject: Successful fabric combinations. This is for all quilters but is made as a help as a Pre-class for the Sew Along, Sequoia Sampler, starting Monday May 4. Alex is LIVE Friday at 10am PST, 1pm EST, and 6pm London time.

Buy the Instant PDF Download Sequoia pattern here  


  5

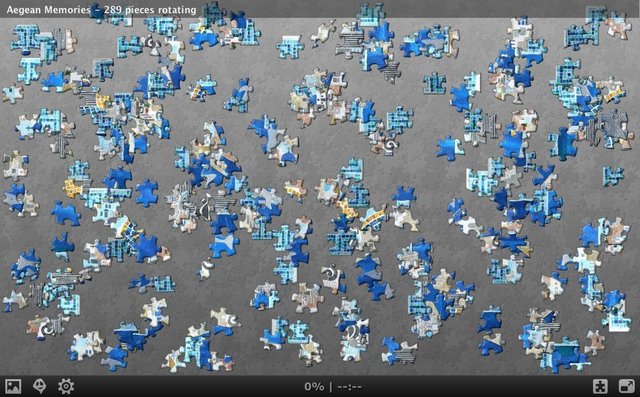
Aegean Memories by Karen Eckmeier was created using her raw-edge fabric collage process as described in her book, Happy Villages. The fabrics are lightly glue basted and then machine stitched with a layer of tulle. The quilt was created in 2010 and measures 43" x 43."

You can learn about Karen at her website, The Quilted Lizard. You can watch Karen build a Happy Village in Show 1109: Fabulous Fabric Landscapes...By Accident!

Click here to see the quilt.

Aegean Memories - 36 Pieces Non-Rotating

Aegean Memories - 100 Pieces Non-Rotating

Aegean Memories - 289 Pieces Non-Rotating

Aegean Memories - 100 Pieces Rotating

Aegean Memories - 289 Pieces Rotating

5171_jigsaw_planet_my_puzzles_album_1_aegean_memories_289_pieces_rotating_embed_puzzle.jpg

  13


Creating the illusion of depth and spatial reality in your work is not difficult, if you know and understand the magic that key players can perform. Think of depth in a quilt as the ingredient that makes a grilled cheese sandwich so delicious. What's not to love? The sandwich is crispy, chewy, creamy, and salty all in the first bite. The basic ingredients are white bread, a cheese that melts easily, and butter or margarine. This works and probably makes for a good sandwich. But, what if you swapped out the bread for a sourdough? What if you included a mixture of different types of cheeses? How about adding a piece or two of bacon to the mix? Now the sandwich is more interesting on a whole new level. It is still a grilled cheese, but something that stands out from 'the usual'.

By incorporating a variety of different key elements to create depth and space, your quilts will be both interesting and appealing to viewers. Let's use the familiar Hexie quilt shape to look at how you can create space on a quilt surface.
 

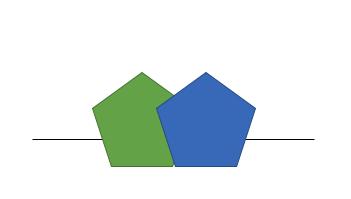
Overlapping - When the blue Hexie is placed over the green, that portion of the green Hexie will not visible.


Image by TheQuiltShow.com

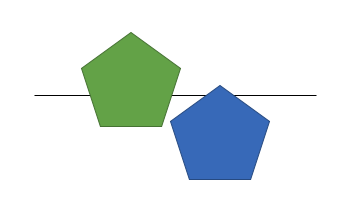
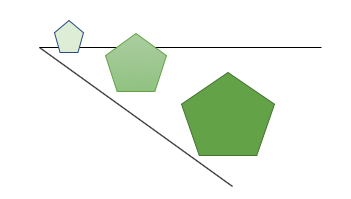
Placement - If you place the green Hexie higher within the picture plane it will appear to be further away.


Image by TheQuiltShow.com
 

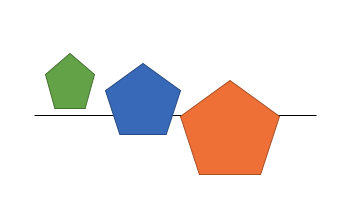
Size - If you place three different size Hexies in a line (from large to small), the smaller Hexies will appear further away.


Image by TheQuiltShow.com


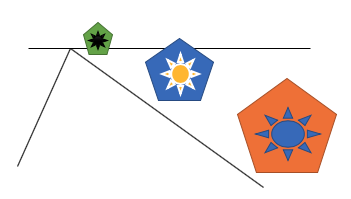
Detail - As the Hexies get smaller in size and are placed further away, the amount of detail (in each) should also be less and less.


Image by TheQuiltShow.com


Color and Value - Hexies that are smaller and farther away should appear cooler (lighter) in color. Hexies that are closer should appear warmer (darker) in color.


Image by TheQuiltShow.com


Now that you have seen and understand the graphic illustrations, let's look at examples in actual quilts:

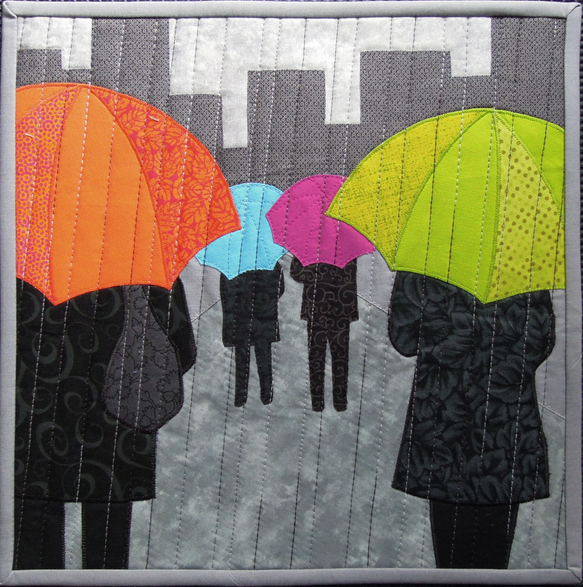
Maynard by David Taylor  Rainy Day People by Terry Aske
Placement - Maynard by David Taylor (Show 406 & Show 808)             Overlapping - Rainy Day People by Terry Aske


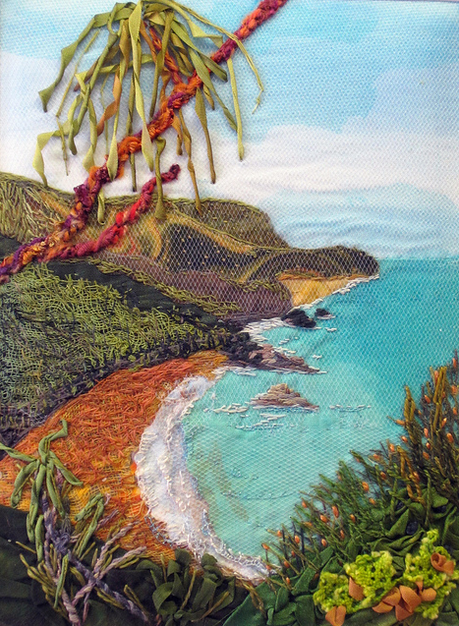
Pathways by Lyric Kinard Kauai, Hawaii by Judith Baker Montano
  Size - Pathways by Lyric Kinard (Show 1311 & Show 1710)     Detail - Kauai, Hawaii by Judith Baker Montano (Show 201, Show 507, and Show 1212)


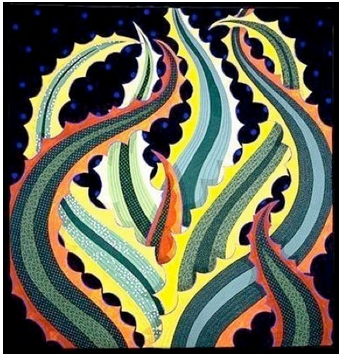
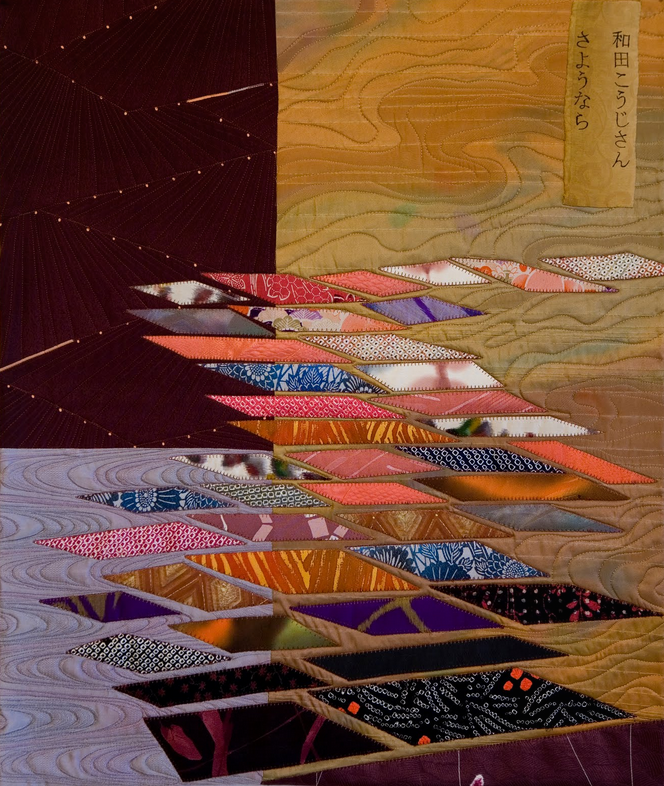
Century Plant by Jane Sassaman Sayonara, Koji Wada by Sara Kelly
Color and Value - Century Plant by Jane Sassaman [Left] (Show 301)    Sayonara, Koji Wada by Sara Kelly (Right)
 

Creating Space

By Ann P. Shaw (Show 2006)

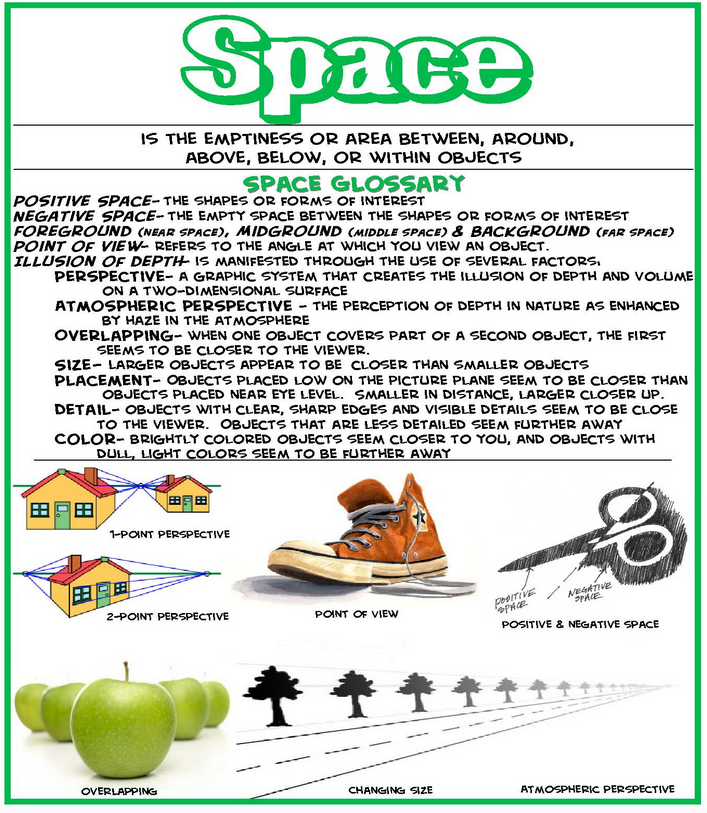
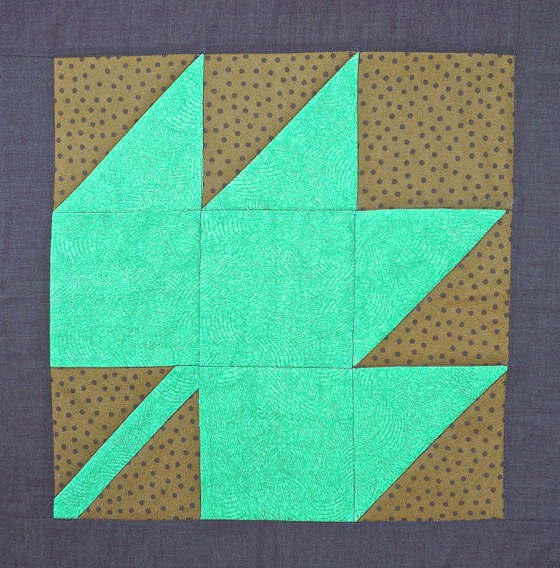
A typical traditional quilt block will feature a main pattern (such as the maple leaf pictured here) and the areas surrounding the pattern. Artists refer to the main subject (in this case the maple leaf) as “positive space” and the areas surrounding the main subject as “negative space” (in this case the background fabric).  The balance between positive and negative space in quilt blocks varies. As you can see, more than half the space in this Maple Leaf block contains the leaf shape, clearly distinguished by the fabric selected. However, a quilt block like Log Cabin typically features only the strips of the log cabin pattern with no background fabric at all.  In this case, the entire block is the subject. Traditional quilt blocks also tend to be symmetrical and are framed by a border fabric. This creates a visually stable design.

The Maple Leaf block with its surrounding border is also what artists call a “closed composition”. All of the elements of a closed composition are contained neatly within a border or frame. When viewed, your eye is immediately drawn to the main subject that is often centered. Most traditional quilt blocks make use of this idea of closed composition, either as individual blocks or sets of blocks arranged to form larger patterns. It is this quality of stable, consistent, static patterns that lend a visually pleasing and calm quality to traditional quilts.

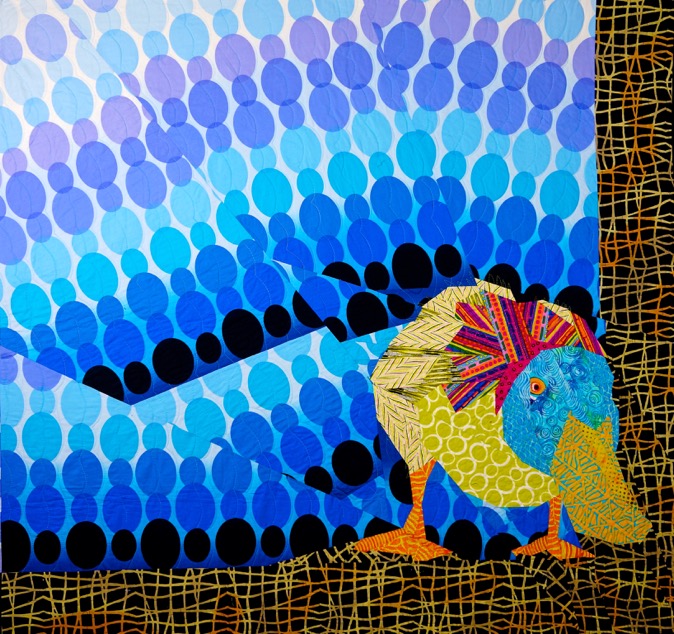
What happens when we start to create space in a quilt? By creating space I mean what happens when we increase the amount of negative space and place the subject off center? My quilt “Curious Duck” is a good example of what is called an “open composition”. In this case the asymmetrical placement of the duck and the angled placement of the blue ovals in the background lend a dynamic quality to the quilt. Notice there is a border only on the right side and bottom of the quilt, and Mr. Duck is playfully poking his beak beyond the background into the border. There is an implied movement in this quilt, almost as if the duck has waddled his way from the center, wondering what’s beyond the edge of the quilt. And look at the amount of negative space – it makes the duck seem much smaller relative the overall size of the quilt. The vibrant colors of the duck, the large scale and angled placement of the background print, the exaggerated amount of negative space, the asymmetrical placement of the duck in the lower corner, and the use of only two borders that are pieced as part of the overall design give this quilt a dynamic quality.

Open composition in quilts uses asymmetry, color and line placement to keep your eye moving from one element to the next.  Sometimes the subject will extend into the borders or even beyond the edge of the quilt.   In contrast to the calm, framed beauty of a closed composition quilt, an open composition quilt is visually active, inviting you to image what is beyond the edge of the quilt.

To create space in a quilt, try the following:   

·      Place the subject the quilt asymmetrically in the space.

·      Expand the amount of negative space in the design to change the proportions of subject and background.

·      Use color and pattern to create sharp contrasts between the subject and the background.

·      Use asymmetrical, partial or no borders.


Practice Exercise: Winter Tree Landscape

by Kathy Barbro

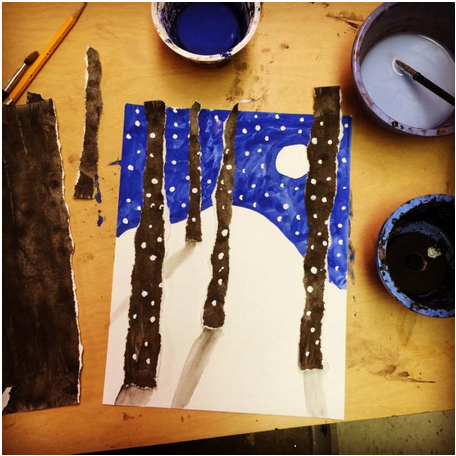
This winter tree landscape makes use of a simple idea, namely that torn paper looks a lot like the bark edges of a tree, but needs to be done neatly for maximum impact.

Materials:

  • Multi media paper (Two Sheets)
  • Tempera paint (Blue, Black, Brown, White) I like the cakes
  • Scissors
  • Glue Sticks
  • Pencil

1. Paint a full sheet of paper with the black or brown paint.  For maximum contrast, use black. Set this paper aside to dry.
2. On the second sheet of paper, lightly draw a snow line and moon in pencil.
3. Paint the sky blue around the moon and above the snow. Set this paper aside to dry.
4. Tear the painted black paper vertically so that you have a number of 11" strips of paper. Vary the thickness of the paper strips.
5. Arrange 4 or 5 of the black strips on the blue and white background. To create a little perspective, keep the wider strips long and near the front, and the skinnier strips short and near the back. Cut away any extended portions of the strips.
6. Glue strips in place with the glue stick.
7. Dilute the black paint to make a light gray. Paint in shadows in the snow that point away from the moon at each tree base.
8. Liberally add dots of thick white tempera to create falling snow to the scene.

Click here for more topics related to The Art of Quilt Design program.