Three Easy Steps To Save This Lesson As A Pdf:
-Make sure you are logged in.
-Click on the small triangle next to the tool wheel in the upper right hand corner of the page (you'll find it above the Like button).
-Select the pdf. option. Wait a few minutes. It's a large file due to the number of images.
-Your file should appear with the title of the lesson.
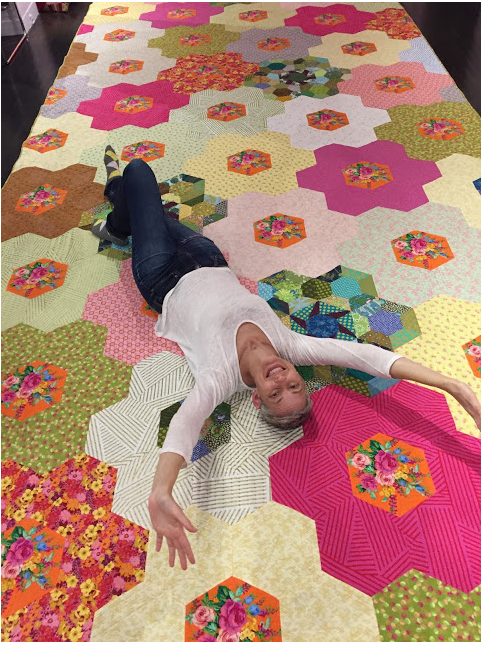
In this, our last lesson on Pattern/Repetition, which is the combining of elements or motif in an arranged and repeated manner, we want to narrow that focus on how the use of a single pattern/block can be used to push the resulting quilt to a whole new level. The idea for A Garden For All Seasons by Victoria Findlay Wolfe (Show 1404, Show 2002, Show 2611), came about after viewing empty public space at her newly renovated local bank. The thought that a public quilt would much improve the empty space led her to manipulate the hexagon block units of Grandmother's Flower Garden on a massive scale. The resulting quilt is 9' wide x 30' long and weighs an incredible 28 lbs.
Using just one element/block and pushing it can be a fun and exhilarating way to stretch yourself as a quilter. When deciding on an element/block, think of all of the ways you could change the original to something new and interesting:
+ Enlarge to an enormous scale
+ Cut the logs of a Log Cabin not all the same width
+ Build various sizes of just the one block unit
+ Use a group of orphan blocks as inspiration for an entirely new design
+ Build just one element of a traditional block, but exaggerate that element more with each additional block
+ Make a preliminary sketch on paper beforehand to determine a design
Remember that you as the quilter can play to your hearts content when it comes to building an entirely unique design. The quilt police are not looking over your shoulder. Think of it as exercising your mind. It all comes down to thinking outside of the box and just enjoying the process of trying something new and exciting. You never know where the journey will take you.
A Garden For All Seasons by Victoria Findlay Wolfe. (Image courtesy of Victoria Findlay Wolfe)
Feeling a bit nervous? Start small. Make a variety of pot holders or placemats using just the one element. As you begin working on the next one in line, try to find a way to make the second, third, etc. different from the one before. Do you need some inspiration? Let's examine a number of quilts where the quilter has taken one pattern and pushed it, as described above, with very effective results.
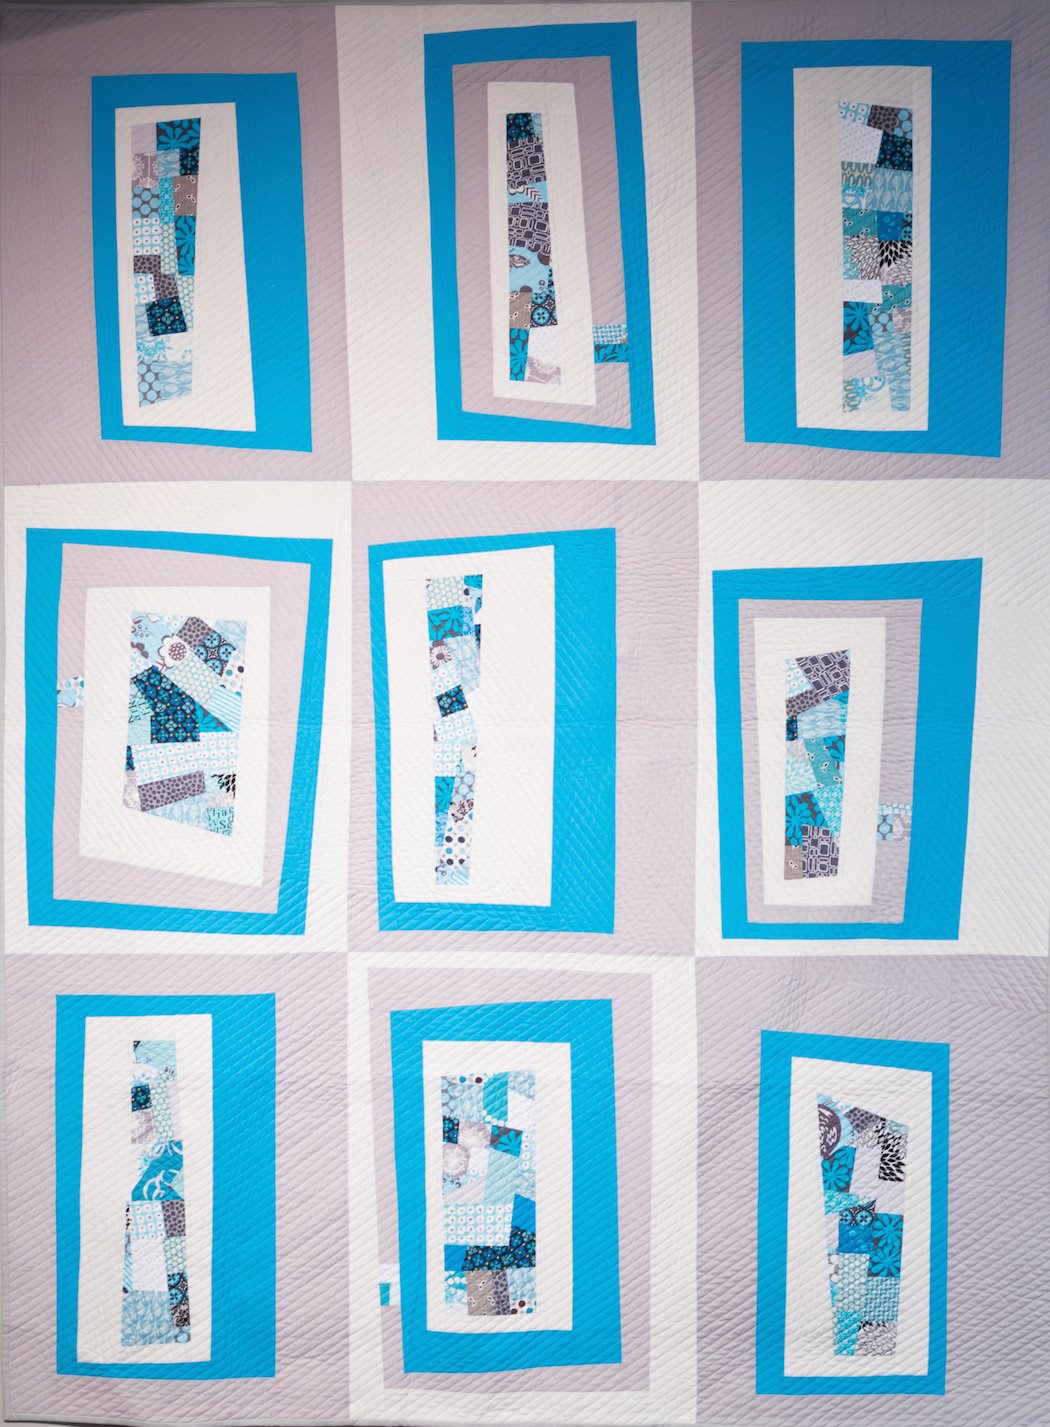
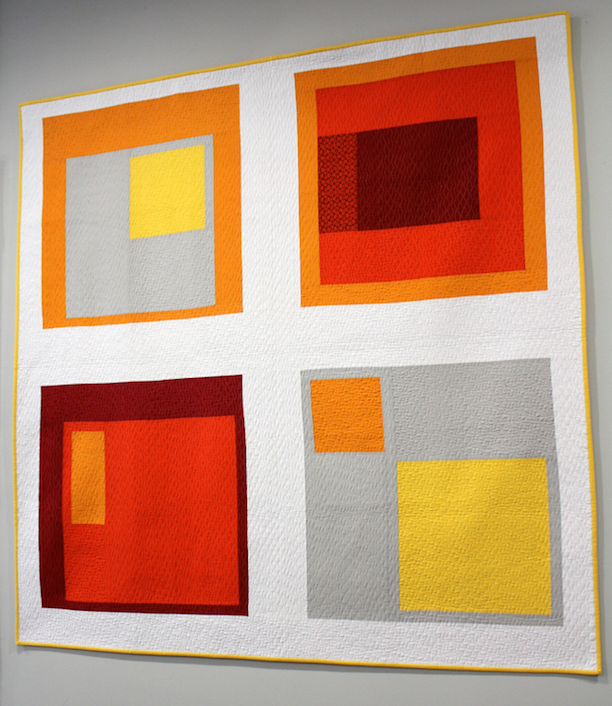
Blue Ice and Homage by Jacquie Gering (Show 1202). [Image by TheQuiltShow.com]
Jacquie pushes the traditional Log Cabin by using logs of different sizes and in different placements.
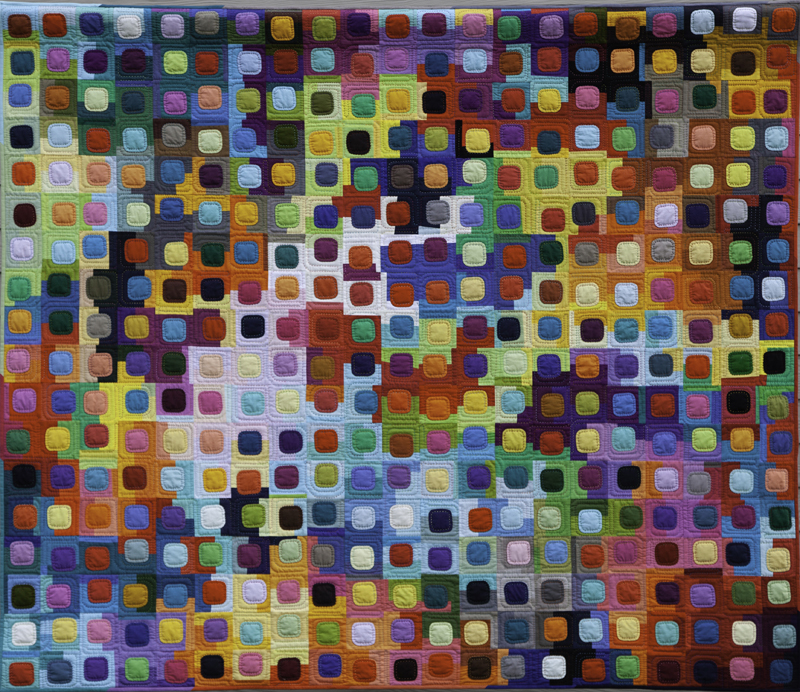
For The Love Of Squircles by Marla Varner. (Images courtesy of Marla Varner)
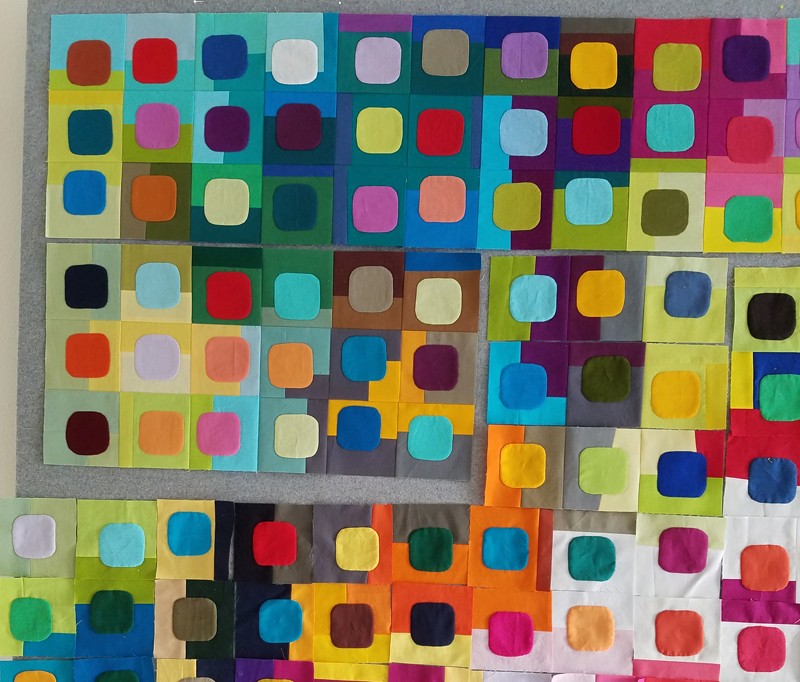
"The quilt began as a daily project in January of 2018. After piecing my first squircle quilt using print fabric in 2017, I decided to repeat the process with solid fabrics. This time I pieced the background of each block before using needle turn appliqeu to attach the squircle shapes. All of the fabrics came from my scrap bin, and were pieced and stictched randomly, with no particular design in mind. At the end of the year, I had 365 blocks plus the 13 extra to again bring my array to 18" x 21". Unlike the previous quilt that was assembled as I went along, this time I had 378 blocks to arrange on the design wall." - Marla Varner
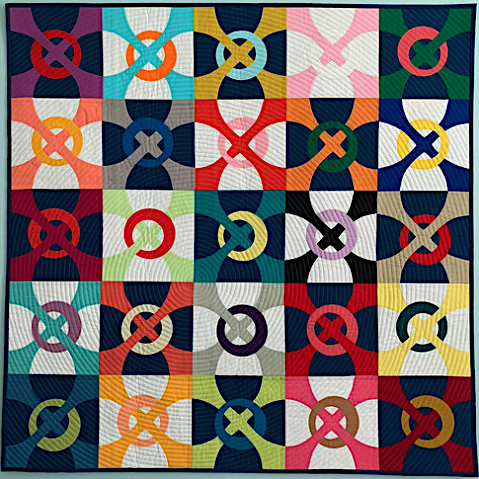
New Lover's Knot by Ginny Robinson. (Image courtesy of Ginny Robinson)
Ginny based New Lover's Knot on a traditional True Lover's Knot appliqué block. The ring within each block and at the juncture of four blocks is repeated in her quilting design.
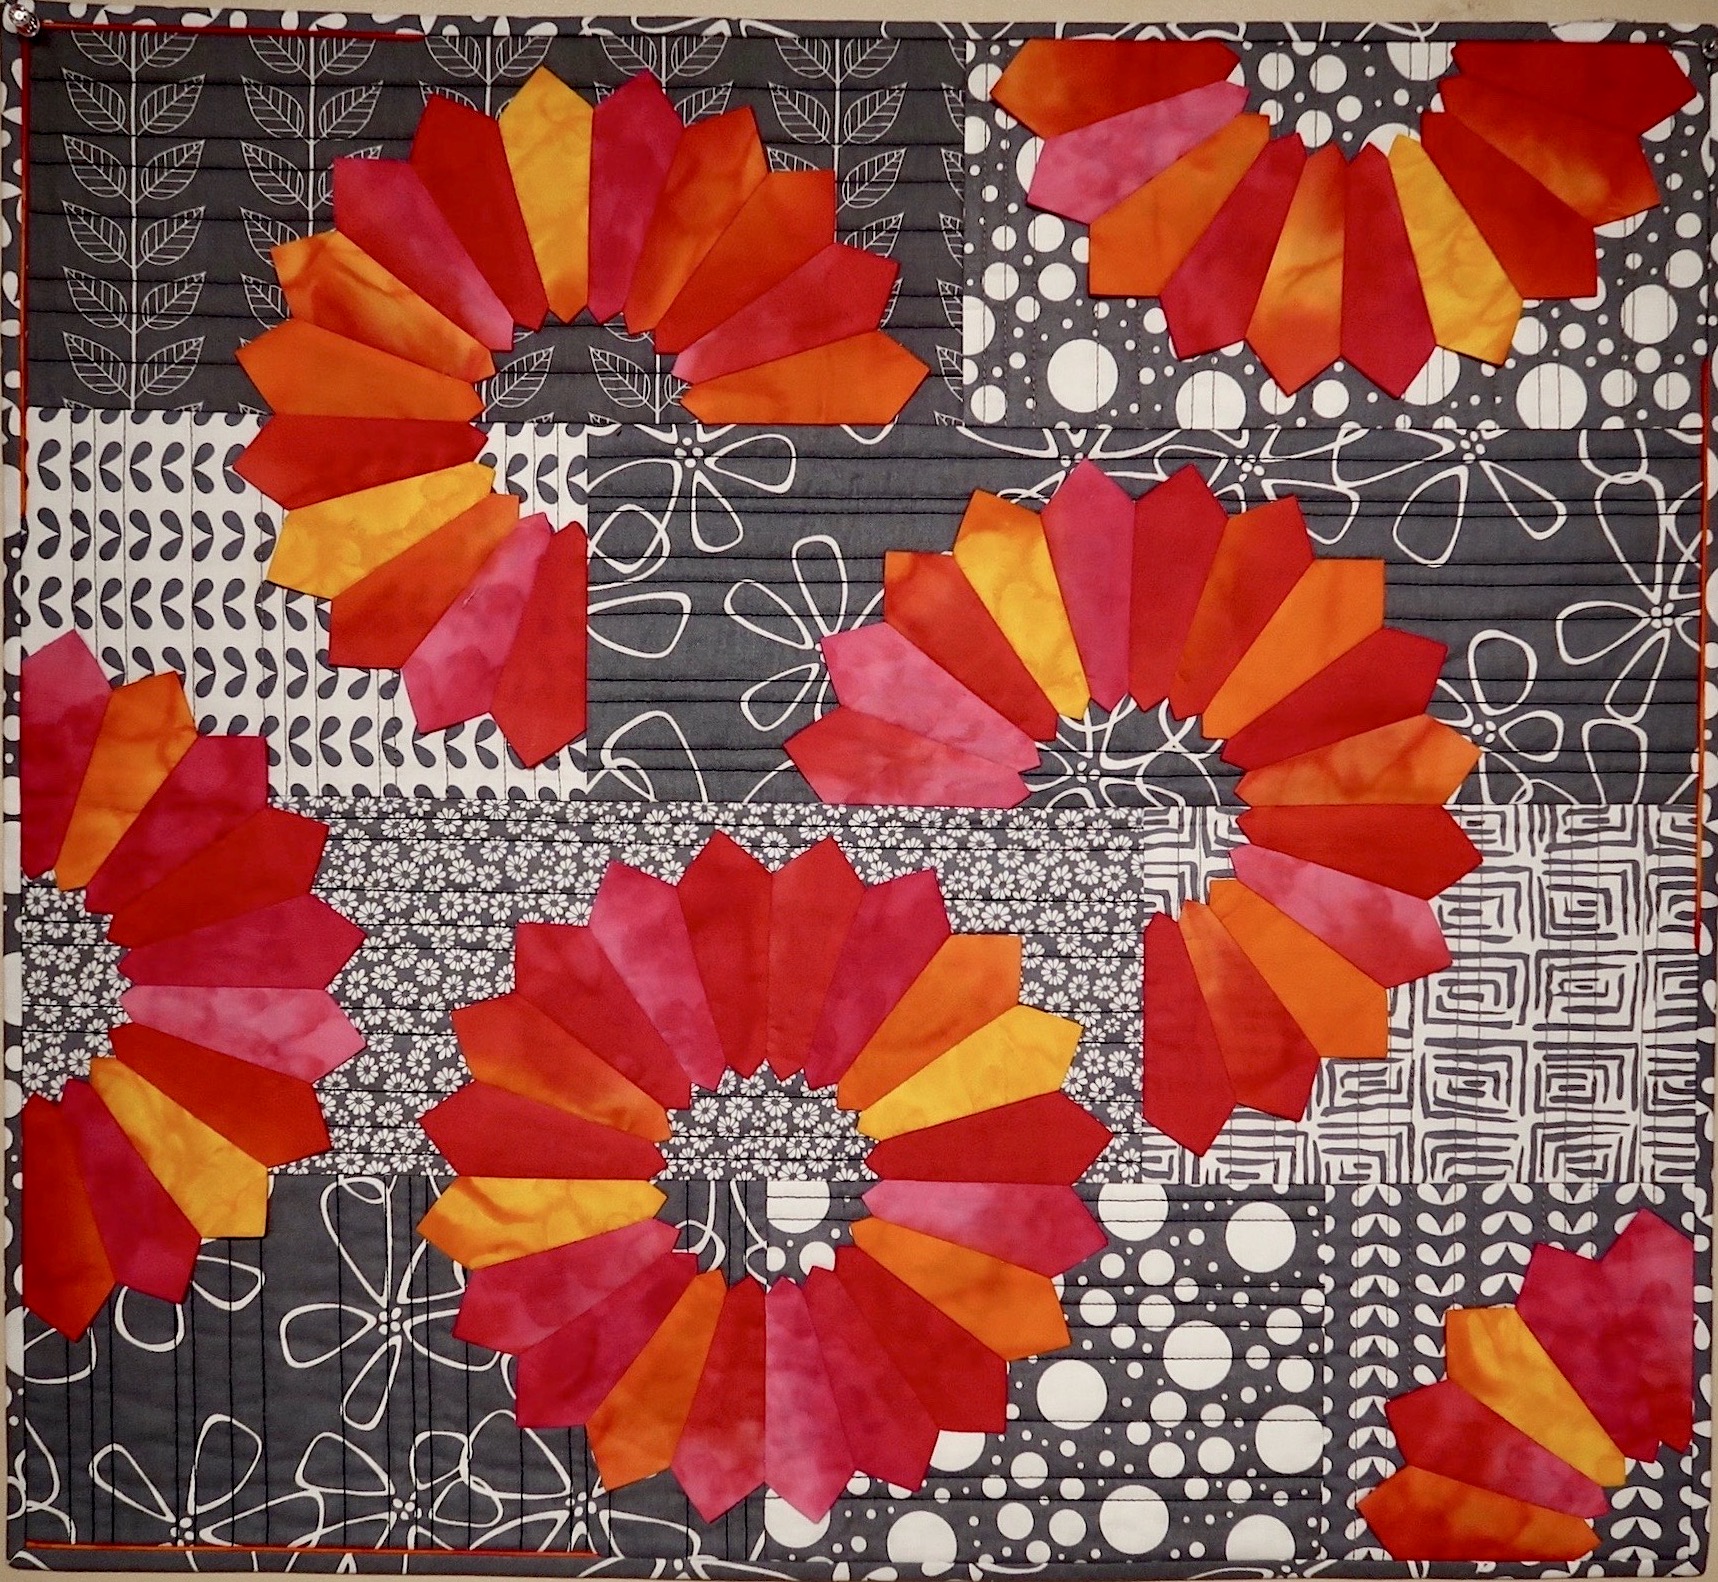
Disappearing Dresden by Susan K. Cleveland (Show 109, Show 1001, Show 2308, Show 2510)
Susan K. Cleveland's contemporary twist on the traditional Dresden Plate block.
Kathy Doughty has for many years pushed conventional boundaries, mixing colors and patterns with what appears to be wild abandon. She shares her thoughts on how a small traditional block and lack of dedicated sewing time pushed her to create a quilt with maximum impact.
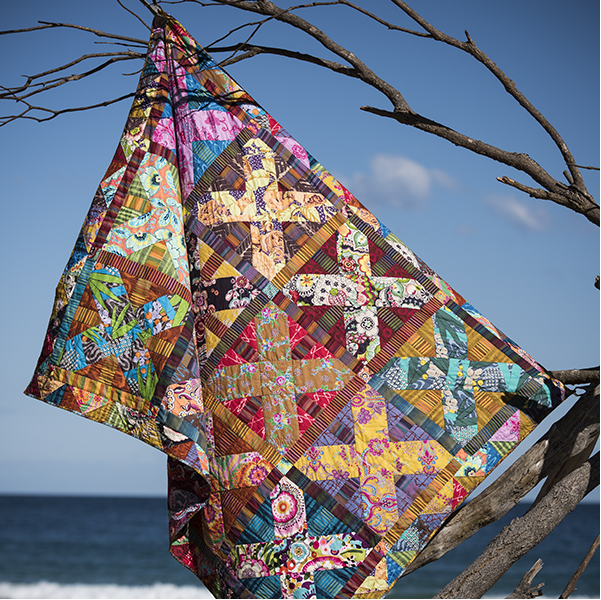
Hi, I am Kathy Doughty from Material Obsession in Sydney, Australia. I found quilting as a lonely immigrant 24 years ago! From the first stitch, I was keen to learn as much as possible and my only source was from library books. Eventually I found a quilt group and then suddenly became a shop owner in 2003. Becoming a shop owner has been a fantastic learning experience. From the day the shop opened my skills started to expand at warp speed as I learned from my teachers and customers. Now my shop, Material Obsession, is a place where people come to feel comfortable in creative situations. Its important to know that being creative can sometimes be scary so having the right tools to get us through a moment is important! I am passionate about teaching, I have never forgotten what it was like to be a beginner!

I have always thought of myself as an accidental designer basically because I couldn’t follow directions! I would find a photograph of an antique quilt and decipher how it was made. The easier the better so squares were my thing! Often times I would select my fabric and get started only to find that my quilt didn’t look anything like the photo! The surprise ending offered up a sample for understanding what works and what doesn’t! An important lesson from those days was that by letting go of exacting expectations in the creative process I was able to study my project freely and then make the right choices.
One day I was looking at a photograph of a lovely antique basket block quilt. I felt a yearning to make the tiny 6” blocks and was dismayed by the reality that my schedule doesn’t allow for the tiny piecing typical in the traditional style basket quilts with lots of tiny blocks in straight rows. As I held my head in my hands in despair it suddenly occurred to me that I could enlarge the blocks in relative scale to make each basket 60” instead of 6”!!!
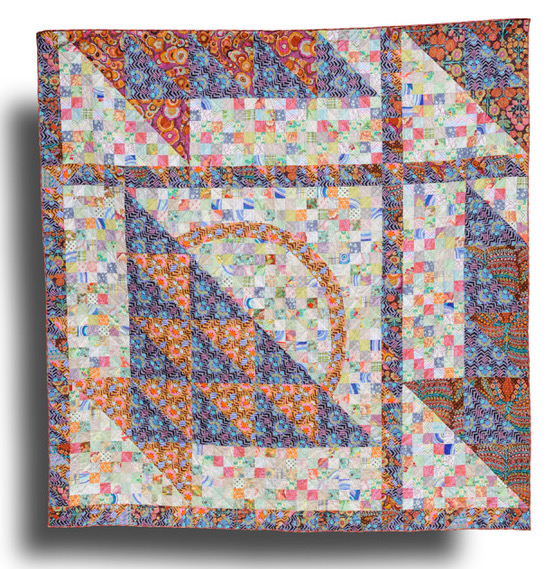
I like my quilts to have visual impact but to be easy to construct so that I can concentrate on my fabric choices. The key to the process of maintaining interest in big blocks is to play with the fabric options. Be aware of where fabrics need to blend to hold a big space and where they need to contrast to make a line. Once these decisions are made, select fabrics for each space. Basket Case has equal value fabrics for the baskets and the background 2” squares.
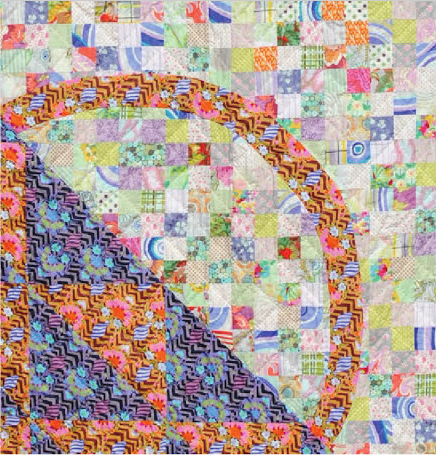 This is one of my favourite quilts. I love the way that the partial baskets engage the viewer in imagining the rest of the baskets…the parts unseen. In selecting the background I only wanted light versions of the fabrics used in the baskets. I was searching my stash for “pretty” fabrics that were light value. The large squares were one base print, the blue Kaffe and the other prints were “equal value” choices. I wanted the alternate blocks to have the same overall impact in each section. This was a stash quilt so some choices were made on how much fabric I actually had on hand. The lines indicating blocks used the remaining fabrics from the baskets. They also indicate the scale of the block layout. I also got a first place ribbon in the Quilt NSW show for Interpretation of a Traditional block for this quilt!
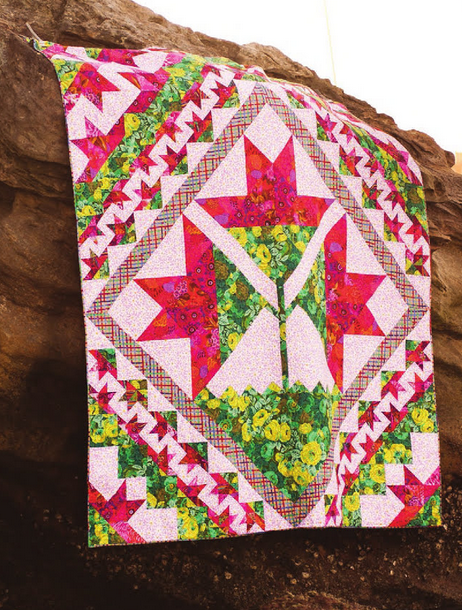
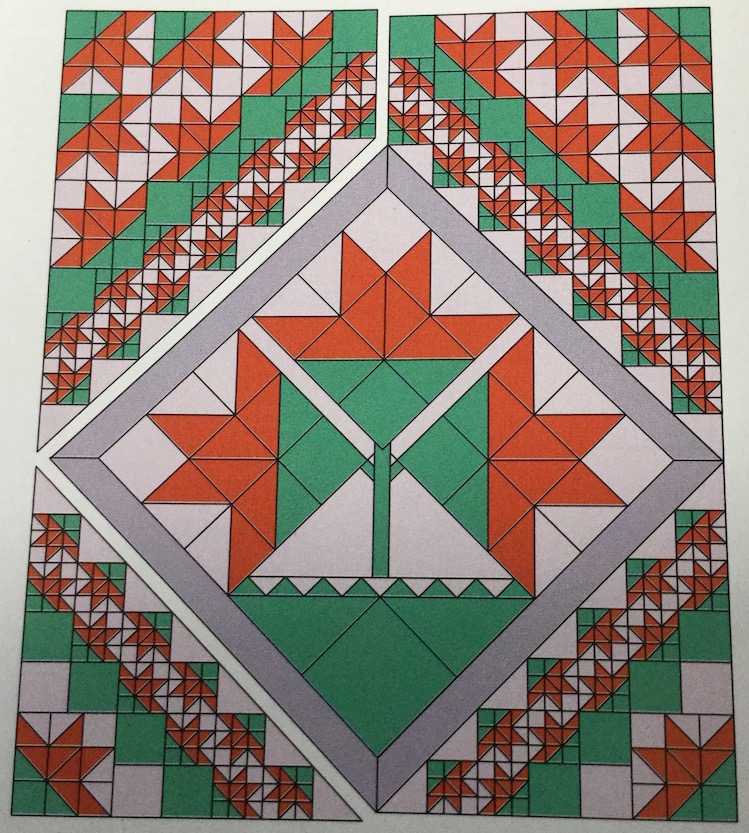
The process of playing the scale card was fun! Other block possibilities were exciting so I devoted an entire chapter in my book Adding Layers to the idea of exploring baskets, wedges, stars using the Carolina Lily block. The resulting Lily Field quilt (on the left) features one enormous center block surrounded by two smaller version of the same block.
Getting Started:
As a self-taught quilter I initially skipped the skill of learning to draft a block. My learning process was all trial and error with some success and some failure. Using acrylic templates and rulers was a big help as it standardised cutting which made sewing more accurate. However, eventually I learned how to draft blocks using graph paper. Drafting a block involves drawing the lines of the block to scale on the paper and then adding the appropriate seam allowance to cut.
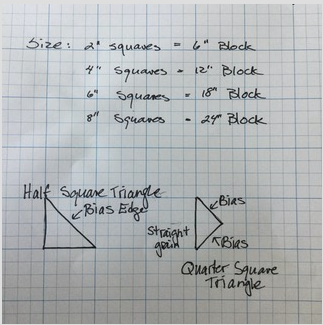
Selecting grid blocks that are divisible by 2” squares is a great place to start. This simple building block makes enlarging or reducing a simple task. I use 1” square graph paper so that each square can be whatever size I need.
Examine the block, in this case the Carolina Lily to identify the lines that make the block. The first thing we see is a 9-patch. Within the 9-patch are a six half square triangles. Seeing the block in black and white line form simplifies what we are looking at and makes way for color placement. The color and value of the fabric will define the finished block.
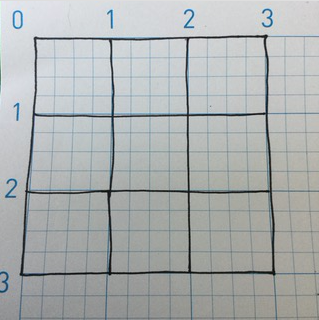
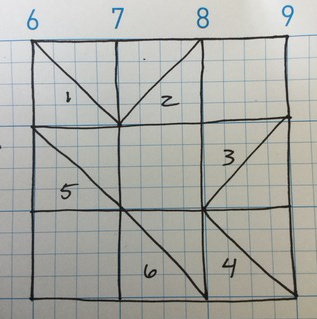
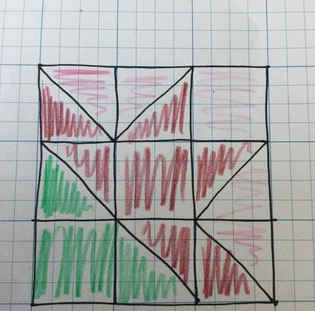
Refer to the graph paper to decide what size block you would like to make. For example, if the drawn block has 1” squares it makes a 3” finished (sewn) square. Change the square size to 2” and the block size doubles to 6” and if the square unit jumps to 8” the block is 24”. Using 2” increments makes it easy to grow the block and then can be arranged to fit together as a quilt easily.
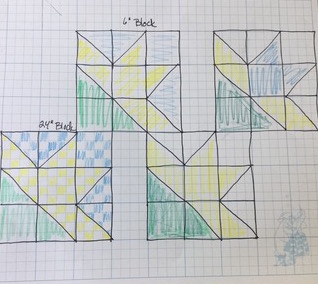
There are endless options for setting the blocks to create the quilt top. It is possible to choose a traditional grid layout that may or may not have sashing, a centre medallion or strips of blocks. It may be that the blocks are set with a modern slant allowing for negative space, off grid work or simply a variety of scales randomly set. It is of course an easy option to draw up the full quilt design on the graph paper and to follow the path set on paper.
When making a quilt like this I generally make a few blocks and position them on a design wall. I like to look at them and examine how they relate to each other. I find that interesting relationships often appear on the design wall that I never could have imagined. I like the feeling of going with the flow of the design. If my blocks are drawn up with a variety of scales I can easily refer to my notes and map out the size of each section of the quilt. It then becomes a balancing act of how hard I want to work!
Designing the quilt organically allows for shifts and changes as things develop. I like hearing the story that develops in my head as the blocks start to take on shapes. For example, with Lily Field the image of the flower brings to mind fields of lilies blowing in the breeze or basking in sunshine. With that in mind there are two sections in the quilt…one that focuses on three large potted lilies. Here I used the large scale blocks…as big as I could make them. Then the outer corners are made of paths through the flowers in the fields! Each decision made presents new options to be considered.
To be honest, there is often a moment when an opportunity appears and it may be just out of reach technically, restricted by fabric requirements or limited time. This is always part of a quilt but each junction allows for a moment to consider what is working and what isn’t. Or in other words, each junction is an opportunity to get creative and make a new path!
Fabric selection plays an important part of the design. Sometimes we are inspired by a collection of fabric or a desire to use our stash!! Other times we want to explore a technique. Then there is always the motivation to make a gift. All of these starting points will affect where the quilt goes. The important decisions may be determined by what purpose the fabric will play in the quilt.
Selecting fabric for Lily Field was the range of fabrics by Kaffe Fassett and Brandon Mably. I loved the daisy field feeling of the background and the rich saturated reds read well as flowers. The green is one of my all time favourites! I selected a variety of red fabrics that had the same value and would blend to make the flowers. It is often said that color gets the credit but value does the work. Be aware of where the dark, medium and light fabrics need to be positioned so that the lines are maintained.
The flowers all sit on the background which is always an important decision. It used to be that backgrounds were mostly white, bone or off white but not any more! Now it is fashionable to use spots, stripes, plaids or small prints for backgrounds as long as the block lines are maintained. Consider the amount of contrast in your feature prints against the background carefully. Audition options that allow your flowers and stems to stand out. It may be that the flowers are dark and the background light or that the flowers are cool and the background warm.
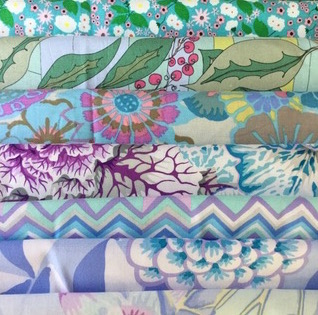
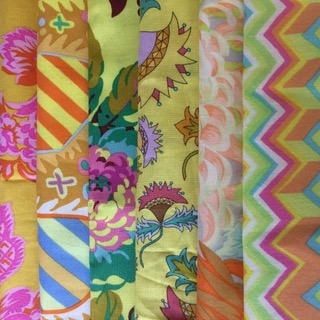
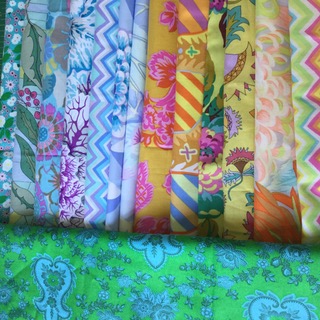
Cool Colors (blue, green or purple) create a feeling of the sky or sea, while warm colors (red, orange, yellow) create a feeling of the sun or fire. By placing the two groups of fabrics next to each other a line is create a line of light and dark.
To recreate Lily Field as a scrap quilt would be fun! The flowers could be all different fabrics tied together by one green fabric for the base and stems or even a variety of leaf options. Even thinking about it makes me want to get cutting!
As I start to sketch up color placement options several questions come to mind:
1. Yellow Lilies with blue sky?
2. Mix the yellow and blue in the flowers and find a background option?
3. Is each flower one fabric or a variety of the fabrics?
Sketches allow me to get a bit closer to what the blocks will look like and when I decide which way to go they give me a solid foundation from which to work. Starting out with a variety of fabrics from my stash means I can add other fabrics later if the quilt grows or if I run out of the originals. I can see from the drawings that each block has 7 different spaces for the flower so I want to have seven different fabrics.
When putting the quilt together it is important to constantly review the contrast to be sure it is working. When I start cutting them I’ll use a small design wall to position the fabrics to see how the block works and then to adjust the fabrics as required. Design walls are fantastic for allowing us to get a broader view of how the fabrics are working together. Up close we see them with intensity but when we step away we get the dramatic effect…or not. Sometimes when we look at the work up close we see stronger lines so looking at it from a distance allows us to judge if it works when the quilt is finished.
The design wall also helps me to work out design challenges that may occur in the process. I can make a large number of blocks and lay them out in several ways until I find the one that I like the most. Sometimes the first time works and other times I work and work and work to get it right.
We are giving you a little break. There is no Practice Exercise for this lesson.
Click here for more topics related to The Art of Quilt Design program



.jpg)
