Three Easy Steps To Save This Lesson As A Pdf:
-Make sure you are logged in.
-Click on the small triangle next to the tool wheel in the upper right hand corner of the page (you'll find it above the Like button).
-Select the pdf. option. Wait a few minutes. It's a large file due to the number of images.
-Your file should appear with the title of the lesson.
Making An Impact With Line
In this lesson let's look at how using line to create maximum effect does not have to be complicated. Deborah Boschert (Show 2108: Surface Design Simplified & Vintage Quilt Bed Turning) shares how she uses the elements of line to 'captivate the viewer' by examining two of her quilts. Through the use of subtle, but effective lines, Deborah shows how she holds the viewer's attention as they are guided along the journey around the quilt.
Line by Deborah Boschert
(All images provided by Deborah Boschert unless otherwise noted)
When designing a quilt, all the elements are carefully chosen to work together to create the over all visual impact. Line is one of the elements that can be a part of the design. A line can define a shape, suggest movement, add texture or fill a space. It can be thick or thin, straight or curvy, controlled or random. It can be created with fabric, stitching, or surface design.
It’s helpful to embrace these different ways to describe and understand line. Then when you are designing a quilt, you can think clearly about the different ways line can be used to maximum effect.
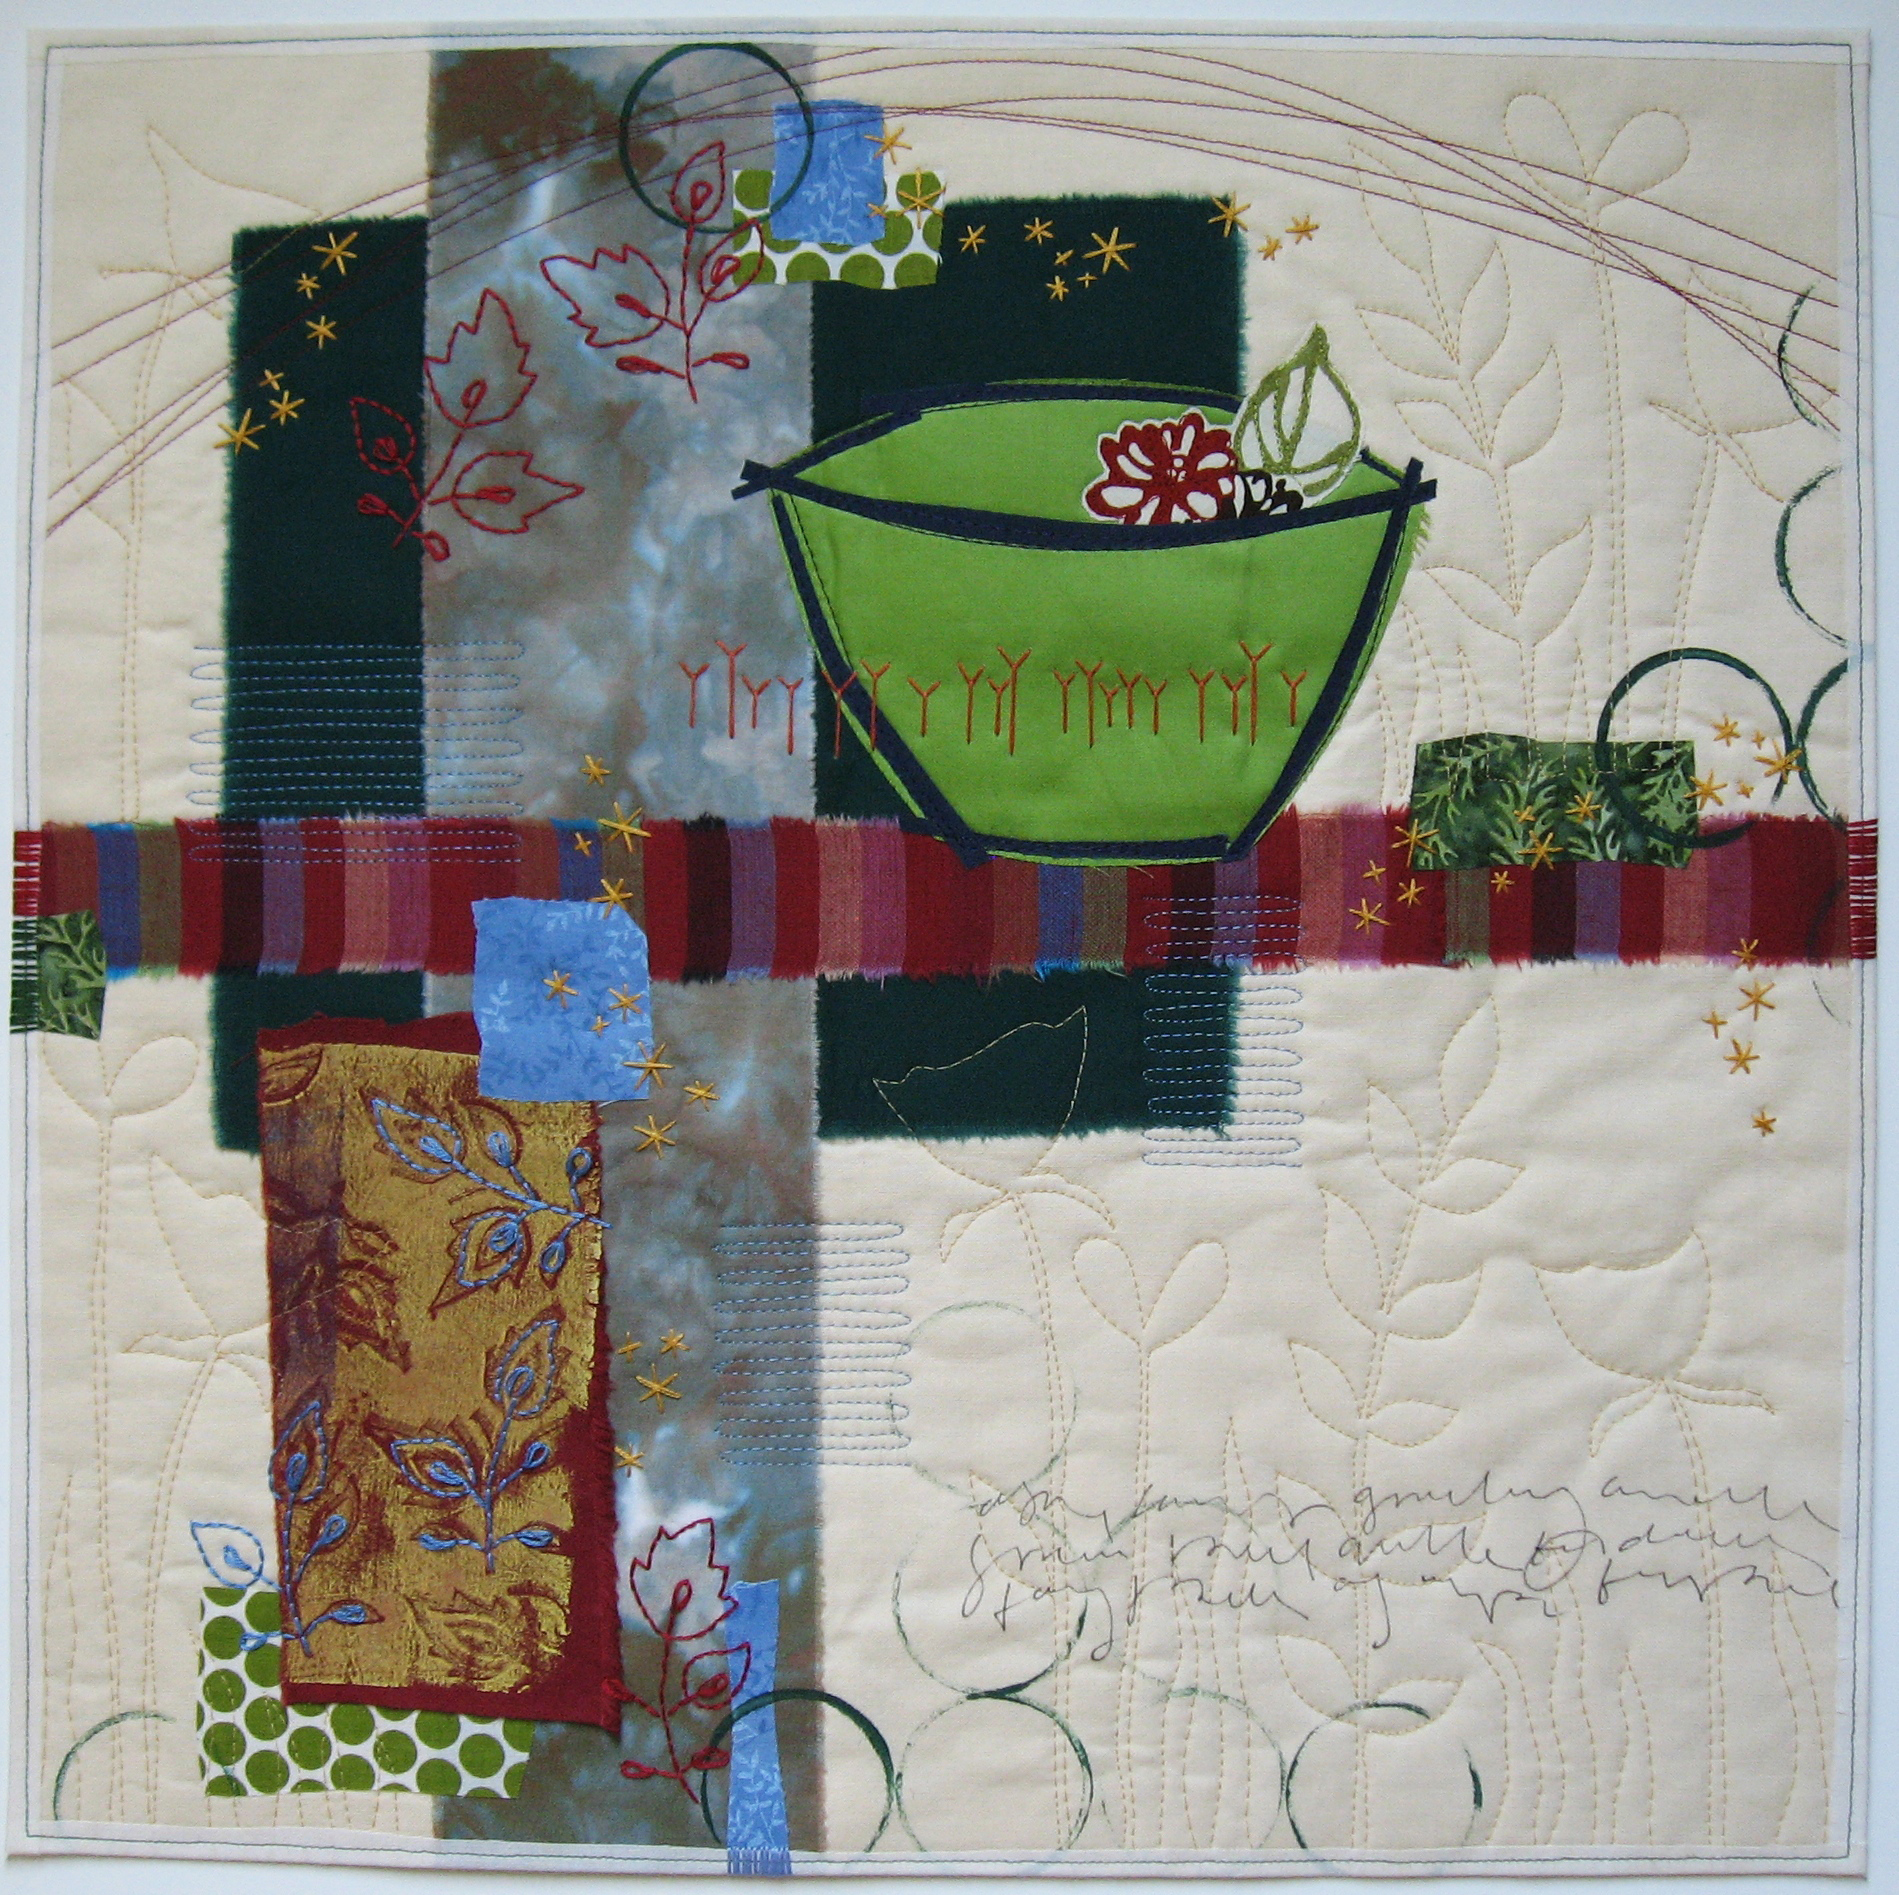
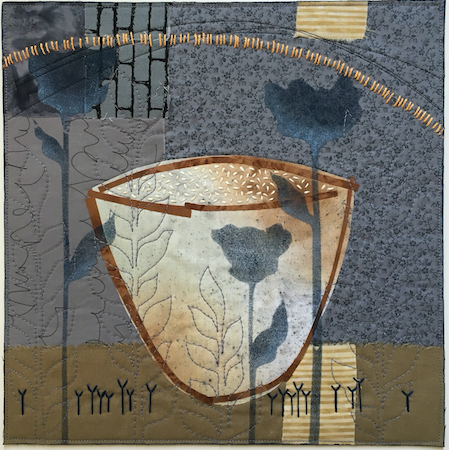
Green Bowl Gathering Small Multitudes
In quilting, a line can be created in so many ways! Let’s look at some examples. In Small Multitudes and Green Bowl Gathering, we can deconstruct the art quilts and pick out different ways I’ve used line.
In both, I’ve outlined the bowls using strips of fabric fused over the bowl shapes. I chose to make the lines relatively chunky and irregular. These lines remind me of thick magic marker sketches. Imagine how different it would look if I’d placed the outline precisely along the edge of the bowl shapes with no breaks or overlapping.
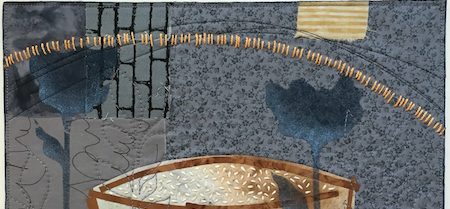
Detail Small Multitudes by Deborah Boschert.
Both art quilts also have arched lines at the top. In Small Multitudes, the line is hand-stitched in yellow. In fact, each stitch is a tiny line and they work together to visually create the arched line. Additional arches are machine stitched in black thread. Those are much thinner, more subtle lines. In Green Bowl Gathering, I machine stitched similar lines in red. Making several lines of stitching over lapping each other and in slightly different shapes creates the overall effect of an arched line, but the multiple lines give it variety, movement and interest.
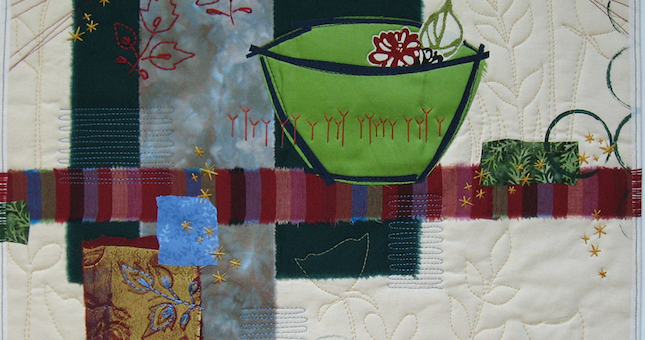
Maybe the most dramatic line in Green Bowl Gathering is the strong, horizontal strip that goes all the way from the left to the right. Everything else is built up around that line. (This horizontal line is made up of the shorter vertical lines of the striped fabric. Think about how different it would look if I’d used that same fabric with the stripes running horizontally.
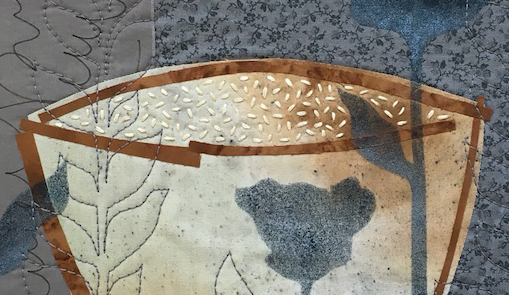
Small Multitudes by Deborah Boschert.
There are several other small details incorporating lines in these two quilts. The tiny seed stitches that appear to fill the bowl are lines. The free motion quilted leafy shapes in the background are also lines.
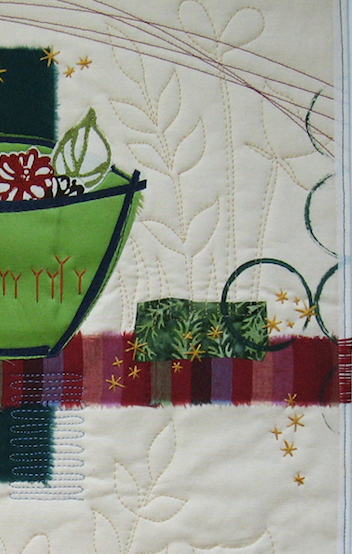
The green circles in Green Bowl Gathering are printed with paint — some thick and blobbly, others thin and faint. When you consider the possibilities of each individual line, you can really take control of the design of a quilt.
As you’re designing your own original art quilt, zero in on the idea of how you can use lines to maximum effect. Will the lines be made from fabric? Or stitched with thread? Or created with paint, ink or dye? Think about how the design would change if a line were thinner or thicker. Are you most comfortable making controlled straight lines? What would happen if you tried something loose and gestural?
There’s no right or wrong way to think about all these details. But, giving them some close consideration may open up new possibilities in the creative process.
To learn more about Deborah Boschert, visit her website, follow her blog, or sign up for her newsletter.
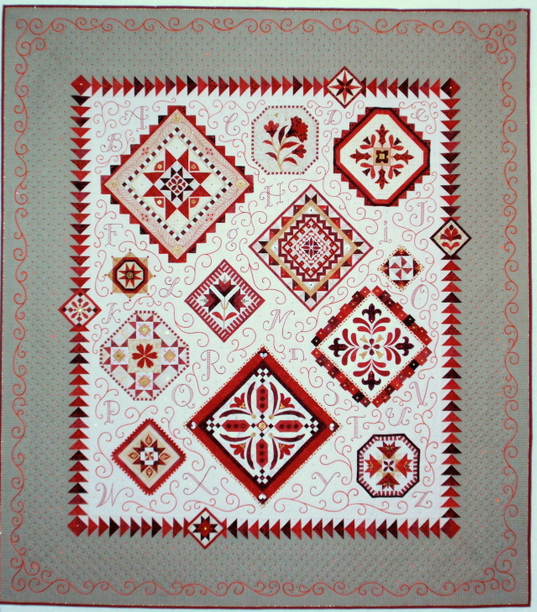
Looking for ways to use line when it comes to a traditional design? Let's look at Janet Stone's Red Letter Daze. Janet (Show 1401: From ABC to BOM - Tips and Techniques Just for "Ewe") loves to take the viewer on a journey around, across and into her quilts. A huge fan of over the top details, see if you can spot how many ways Janet has included line in her 2012 NQA Masterpiece Award Winner.
Red Letter Daze a quilt by Janet Stone. Photo by Gregory Case Photograpy for TheQuiltShow.
Here are a few examples of Janet's masterful use of line:
Notice (left image) how the curved red lines flow along the edge of the outside border, while Flying Geese (and an occasional small block) take the eye journey around the central creamy field.
Notice (right image ) how the letters of the alphabet and the repeated curved lines flow around each of various block designs. The gentle curves of the letters and undulating lines help to soften the more angular Flying Geese and blocks in the center field.
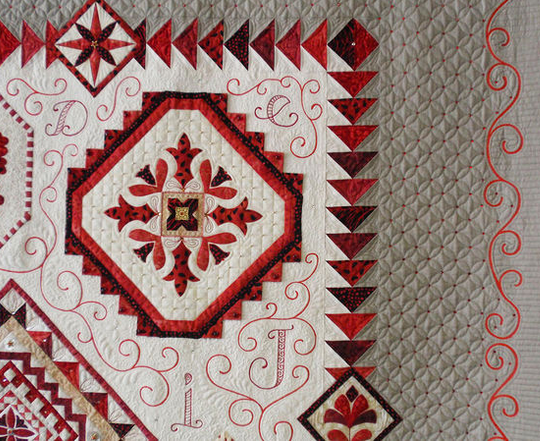
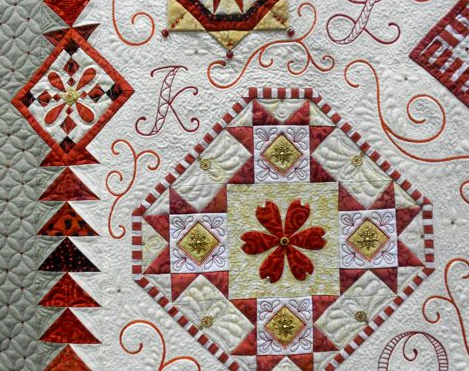
Detail of Red Letter Daze. Photos by Gregory Case Photography for TheQuiltShow.
See the entire quilt in our zoom format here.
Worksheet excercise: Using Line to Create the Illusion of Form
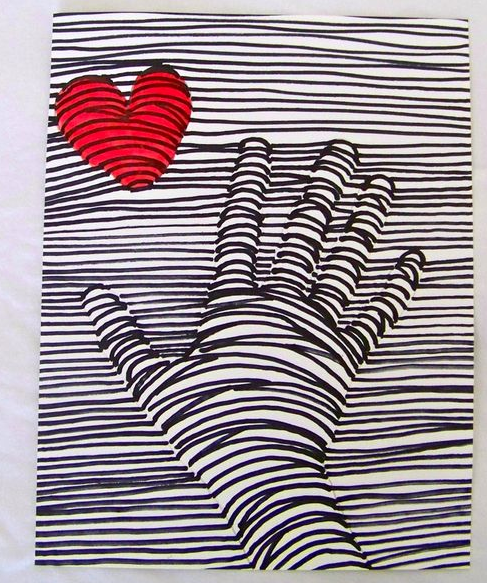
Adaptation of hand drawing exercise from Art is Every Day by Eileen S. Prince
Option 1:
Place your non-dominant hand and bare forearm in a pleasing manner on a piece of white paper. Splay your fingers slightly, but keep your thumb as vertical as possilble. Using a pencil, lightly trace around your arm and hand. Place or draw another object, such as a heart, near your hand tracing. Trace this item lightly as well.
Using a dark marker, begin drawing a straight line (from the left side of the page) parallel to the lower edge. When you come to your pencil line, curve the line up slightly. Curve back down to the pencil line on the other side, and continue across the page. Repeat with each new line being about 1/4" above the previous. Try to keep your lines as straight and horizontal as possible. Repeat the process for the heart.
Option 2:
On a piece of plain fabric trace your hand and the heart in the same manner as Option 1. Make a quilt sandwich and machine quilt with a thread of your choosing using the same method of curving slightly when you reach a traced line.
Notice how in both options the curved lines make the hand and heart appear to be raised.
The hand is also drawing the eye towards the red heart.
Click here for more topics related to The Art of Quilt Design program.


.jpg)
