Linda demonstrates using stitch in the ditch with her extended base to stabilize the quilt before beginning her freehand border.

Linda completes the wall hanging by using the motif in the border to decide her quilting pattern. She also demonstrates a horizontal "stipple-like" stitch which helps to highlight the embroidery.

In Part 2 of the Fairy Wall Hanging project, Linda demonstrates a fabulous feathered leaf design for filling in the background. She also talks about using the stitch regulator.

In this lesson, Linda demonstrates two different border designs on a small Fairy Wall Hanging. First up is a tear drop design followed by a beautiful feather design with stems.

Linda continues working on the Princess Wall Hanging and shows a different technique for background filler using pinwheel and "C" designs.

Linda continues working on the Princess Wall Hanging demoing a 'stacked' feather design to highlight one of the princesses.

Linda demonstrates free-from feathers in the sashing and shares a tip on how to "not" quilt into the binding area. Linda also demonstrates how to use patterned meandering to highlight part of a block.

Linda begins work on a Disney Princess wallhanging. She begins by stitching the wallhanging directly to the batting and lining (backing). Then she uses stitch in the ditch to stabilize the wallhanging. She follows up with stitching around the embroidery with her "applique" helper.

Linda demonstrates a feathered wreath which she begins with a circle template. She also shows her method for quickly unpinning the quilt from the canvas.

In this class you'll learn how to do tessellating hearts in the border. You'll also learn to use the Workstation Heart Template to quilt hearts into the center of the quilt.

Linda continues to stabilize the quilt by stitching in the ditch throughout its center.

Linda demonstrates using a reference line to line up the quilt top as she gets ready to secure the top, batting, and lining (backing) together. After stitching down the left side and basting the right, she adds the clamps and is ready to quilt.

In this class, Linda demonstrates how to load the lining (backing) and the batting onto the machine by pin-basting to the canvas.

In this lesson you'll learn how to load your quilt top and the proper technique for pinning the top to the canvas.

Linda shows you some of the tools you'll need to begin Longarm quilting. Everything from batting scissors to q-tips will help get you started on your way.

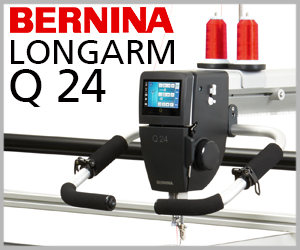
Linda Taylor introduces us to this fun new series of lessons on Longarm Quilting. She begins with an overview of the Longarm machine.

Gift Memberships
Give a Full Year of Quilting
.jpg)
Learn about
Apliquick appliqué tools!
Watch Show 1912
with Rosa Rojas (free!)
Apliquick - 3 Holes Microserrated Scissors


