Featuring: Sarah Vedeler
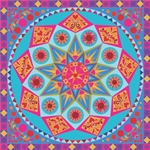
Posts On: January 2, 2012Sarah Vedeler-Sarah gives you great tips and information so you can create your own Sedona Star BOM 2012.

Featuring: Sarah Vedeler
Posts On: February 1, 2012Sarah Vedeler-Sarah gives you great tips and information so you can create your own Sedona Star BOM 2012.

Featuring: Sarah Vedeler
Posts On: March 1, 2012This month you will make the first of 3 paper pieced star blocks. There are 3 copies of this block in the quilt. If you are using the Buttons and Blooms fabrics to make your quilt, you will see that the fabrics used for the star points have a stripe on them. The instructions for this month (and the video too!) show you how to align the stripe so that it is centered through the star points.

Featuring: Sarah Vedeler
Posts On: April 1, 2012This month you will make the second set of paper pieced stars (3 copies again). Whereas the star in Month 3 was created as a ring, the star this month is created in sections that are then stitched together. Watch the video this month to see some tips for sewing the circular stars into the background hole.

Featuring: Sarah Vedeler
Posts On: May 1, 2012This month you will create the last set of paper pieced stars (3 copies). You will also set the star blocks into the quilt top. The video for this month will give you some tips on how to create perfect Y seams – it’s really quite easy to do!

Featuring: Sarah Vedeler
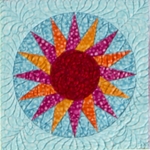
Posts On: June 1, 2012This month changes the pace with the first of 3 appliquéd blocks. You will be making 3 copies of this block. If you’ve never used the AccuQuilt GO! Cutter before, check out the video this month to see why I love to use it for cutting all of my appliqué shapes. It makes your cutting very fast and accurate.

Featuring: Sarah Vedeler
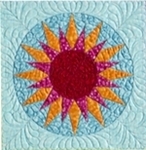
Posts On: July 1, 2012This month you will work on the second of the appliquéd blocks. You will be making 3 copies of this block.

Featuring: Sarah Vedeler
Posts On: August 1, 2012This month you will work on the third of the appliqued blocks, 3 copies of it. You will also set the appliqué blocks into the quilt top. Check out the video for this month for a refresher on how to make perfect Y seams.

Featuring: Sarah Vedeler
Posts On: September 1, 2012This month you will add the setting “triangles” to create a big circle, and then add a paper pieced circular border. The setting “triangles” are a great place to feature some really cool quilting or trapunto. Check out the video for some ideas. You’ll find a few templates for quilting included in the instructions.

Featuring: Sarah Vedeler
Posts On: October 1, 2012This month you will work on two of the large corner pieces. There’s lots of appliqué to be placed, and these are large quilt pieces, so be sure to check out the video for a refresher on how to get those appliqué shapes exactly where you want them.

Featuring: Sarah Vedeler
Posts On: November 1, 2012This month you will complete the appliqué for the 4 corners of the quilt.

Featuring: Sarah Vedeler
Posts On: December 1, 2012This month you'll be adding the outside border. The outside border consists of 84 diamond in a square blocks that finish at 4" x 4." Two different constructions methods are offered.