 0
0
Our featured artist today is Linda French, Gammill longarm quilter extraordinaire. Linda's quilts have taken Best of Show in Knoxville, the Midatlantic Quilt Festival, and the Machine Quilters Showcase as well as many other awards. For TQS she is sharing the story of how she became a quilter and also gives insight into her process for designing one of her most celebrated quilts, Circles of Life. You'll want to read every word and examine every stitch, as TQS features, Linda French.
You can visit Linda's website at Longarm Finishing Touches. Thank you Linda for sharing your story.
Linda French
I was born and raised in a NJ suburb, traveling south to the University of North Carolina where I graduated in Nursing. I worked in Intensive Care and Pediatric Emergency Services for the next 30 years.
I married in 1978, and to get to know my mother-in-law better, I visited her every Wednesday morning for coffee. During these visits, she pulled out a box of quilt blocks she was working on in a beginning sampler class. She had such enthusiasm while showing me the blocks, that I thought I would give it a try. I signed up for a class at a technical institute in NC (all handwork).
In 1981, after our 1st daughter was born, we moved to Dayton, OH where I started teaching beginner quilt classes. I went to the charter meeting of the Creative Quilters Guild where I am still a member today. In 1983, we were transferred to Melbourne, Australia for 3 years, where our youngest daughter was born. While living in Australia, I taught quilt classes and joined the Waverly Guild. I made wonderful friends there. The first quilt that I took graph paper out and designed myself was for Susan, as I was preparing to leave the country and say goodbye.
Upon returning to the USA, with 2 little ones in tow, we moved to Centerville OH where we still are today. While working in pediatrics and raising two girls, I quilted every opportunity I could. At this point, almost all my work was done by hand, even the piecing. Then I suffered an arm injury that put my arm (thumb to shoulder) in a cast for 2 months. I had no use of my hand, and this total withdrawal from quilting was unacceptable. So I called a group of my quilting friends, and they came over armed with rotary boards and cutters. They cut squares (a lot of them) from a pile of fabric I provided. I spent the next couple of months as I went tough Physical Therapy to get the use of my arm and hand back, working with those squares, learning about gradation, watercolors, and just playing with color. As miserable as my recovery was, it was also a blessing in disguise, for it started my transformation into design, color and as quilters say “jumping out of your box”!
A couple of years later, a new neighbor moved in. Margaret is a mural artist who has done murals on the walls of homes. We became good friends and she would frequently visit, look at my neutral walls, and comment, “you need more color in your life”. A
fter painting all my walls, I had an even greater respect for how color changes everything. I have, and will always love traditional quilting, adding color and design to give it more excitement.
I am currently retired from Nursing (and from helping my husband run a corporation). Both of my daughters are married (no grandchildren yet!).
After retiring, I met Doug and Martha from A Touch of Thread at a quilt show and purchased my longarm. I fell in love with machine quilting. I spent most of the first year doodling and playing with feathers. The freedom of freehand was addicting.
I started Longarm Finishing Touches LLC after purchasing the Gammill (Statler) and began doing quilting for customers. Most of my customers came to me for custom work and my freehand feathers. So, most of the quilts I did had more freehand on them than computerized quilting. My specialties are feathers and background filler designs. I love doing tiny feathers. My key to success – Play a Lot.
I don’t feel I have a particular style to my work. I find inspiration from anywhere. A photograph from a trip to Hawaii was the inspiration for the Penguin quilt. Yes, the penguins are a warm water species from Hawaii. (That was why I put the flowers in the sky, but most people believe it looks like snow!)
Marblemania’s inspiration moment was a TV commercial. Our guild challenge was “lesser known holidays”. Members drew their holiday out of a basket, and had to make a wallhanging about it. I drew “Knuckles Down Month-In Celebration of the Game of Marbles”. I admit I was stumped for a while, until I saw an M&M commercial one evening and got the idea. I didn’t know how to do perspective, so I went to the library and took out a couple of books – drew the room, then added the marbles. It was my first comical quilt I have done and it was a lot of fun (once I got the idea!)
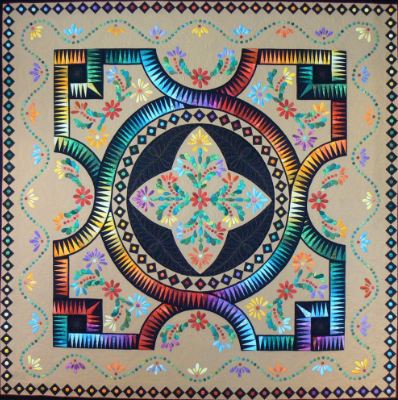 “Circles of Life” started before I owned a longarm. After seeing a black and white picture of an old window from a historical source, I was intrigued by the way the curves came together to form a circle. So I drafted one quarter of the basic outline (took all day) and decided to make a quilt with it. When designing the quilt, I used a design as you go methodology. When I started sewing, I had NO idea what the finished quilt would look like. I started with the space creating the circle and decided to use a sawtooth pattern. After drafting the sawtooth I couldn’t make a decision on the color, so I thought I would try using all of them. I took my stash one evening and put all of it on the living room floor. Sitting in the middle, I started laying out all the fabric into a color wheel. Then I started pulling towards me the colors that I liked until I had a circle that graduated around the color wheel. I will admit, I was up late that night and my husband would walk by shaking his head. After the fabrics were chosen, I had to number them to keep them in order. On the quilt it is not a circle, but a series of arcs that come together to make the circle, so there are a lot of separate pieces. Keeping the colors in order was a challenge. The biggest OH NO moment I had was while constructing this part. I didn’t stop to think that the colors had to meet at the correct color to complete the circle. With ¼ to go, I did a lot of manipulating of the colors to get them to match (if that didn’t work, I was starting over!). Today I can’t find which area was the problem. After finishing the sawtooth areas, I planned to appliqué the pieces to a background (which I hadn’t picked out yet). To make this more stable, I applied bias to the edges of the pieces in black, which outlined the colors nicely. The next few weeks were spent trying to find a background color. After accomplishing that; I appliquéd the body of the quilt. It was a challenge keeping it square. Once this was done I tackled the center. I sketched a lot of options and threw a lot of basketball shots into the trash can. After the center appliqué was completed, the rest of the quilt design became easier, for the designs primarily came from what was already done.
Then came the border. Most people (including instructors) that saw the quilt at this point told me to quilt and bind it, that it didn’t need a border. But I just felt it needed more. I did not like the look of a vine around the quilt, so I changed it to the small circles. It created the same effect, without the harsh line. Adding the circles in the black squares was last – and the difference before and after even surprised me. It was worth all the stitching to add them.
For me, design as you go gives you the flexibility to allow the quilt to develop. It is more exciting as you go to watch it grow, and encourages you to play with options which is not only the fun part, but you learn a lot along the way.
In the entire process of making this quilt, I only had to purchase one piece of fabric (other than the backing). All of the fabrics in the color wheel were from my stash. I purchased the background, a Kona Cotton. I keep in my sewing room a bolt of black and white, so I had enough of the black to complete the project.
I had only owned my longarm about 1 year when I loaded this quilt. I disconnected the Statler for I wanted every stitch on this quilt to come from me. I started with the feathers, and thought it would be fun to feather them too. Although I did test a couple of options on a practice piece one afternoon, did not decide what went into the space until I reached it. I still work that way today.
The background filler in the corners, the swirls, was created while doodling one evening. I do use a stitch regulator and for detailed swirls, circles, etc, I increase the stitches per inch for a smoother curve.
Very little marking was done on this quilt. I used a purple air erasable marker in the small designs in the center and four corners area as I reached them. I did not need to mark the vine of the feather border, except where it curved over a flower, which I marked with the air erasable as I reached it. No feather was ever marked on the quilt. For the feathers in the small triangles, I marked the vine by using a circle template.
The entire process for making this quilt took 2 ½ to 3 yrs. Most of this time was spent looking at what I’d accomplished so far and deciding what to do next. For me, the joy was in the process. I enjoyed creating this quilt so much, that I was sorry to see it completed.
For myself and others, I recommend creating a quilt for yourself, based on your likes, strengths and willingness to experiment and play. If you do this, your end result will be what you like. Do what you love, please yourself first, then share the results with the world. Enter a show.
Awards for Circles of Life:
Best of Show: AQS Knoxville 2009
Best of Show: Midatlantic Quilt Festival 2010
First Place Solo Artist: MQX Rhode Island 2010
Best of Show: Machine Quilters Showcase 2010
Second Place Mixed Techniques: Quilt Odyssey 2010
First Place Mixed Techniques: NQA 2010
Best Machine Quilting, track mounted: NQA 2010
Awards for Marblemania:
Honorable mention: NQA 2010


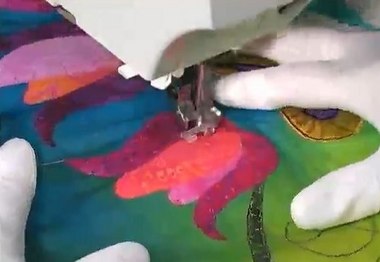
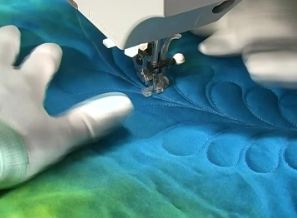 Okay the title above is not just a Fancy alliteration but the fun you have coming up this weekend with Patsy Thompson's Free Motion Video.


 “Circles of Life” started before I owned a longarm. After seeing a black and white picture of an old window from a historical source, I was intrigued by the way the curves came together to form a circle. So I drafted one quarter of the basic outline (took all day) and decided to make a quilt with it. When designing the quilt, I used a design as you go methodology. When I started sewing, I had NO idea what the finished quilt would look like. I started with the space creating the circle and decided to use a sawtooth pattern. After drafting the sawtooth I couldn’t make a decision on the color, so I thought I would try using all of them. I took my stash one evening and put all of it on the living room floor. Sitting in the middle, I started laying out all the fabric into a color wheel. Then I started pulling towards me the colors that I liked until I had a circle that graduated around the color wheel. I will admit, I was up late that night and my husband would walk by shaking his head. After the fabrics were chosen, I had to number them to keep them in order. On the quilt it is not a circle, but a series of arcs that come together to make the circle, so there are a lot of separate pieces. Keeping the colors in order was a challenge. The biggest OH NO moment I had was while constructing this part. I didn’t stop to think that the colors had to meet at the correct color to complete the circle. With ¼ to go, I did a lot of manipulating of the colors to get them to match (if that didn’t work, I was starting over!). Today I can’t find which area was the problem. After finishing the sawtooth areas, I planned to appliqué the pieces to a background (which I hadn’t picked out yet). To make this more stable, I applied bias to the edges of the pieces in black, which outlined the colors nicely. The next few weeks were spent trying to find a background color. After accomplishing that; I appliquéd the body of the quilt. It was a challenge keeping it square. Once this was done I tackled the center. I sketched a lot of options and threw a lot of basketball shots into the trash can. After the center appliqué was completed, the rest of the quilt design became easier, for the designs primarily came from what was already done.
.jpg)
