0

3307_month_12p1040678.jpg 3307_sc12.jpg

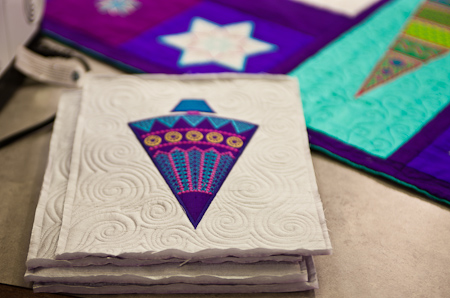
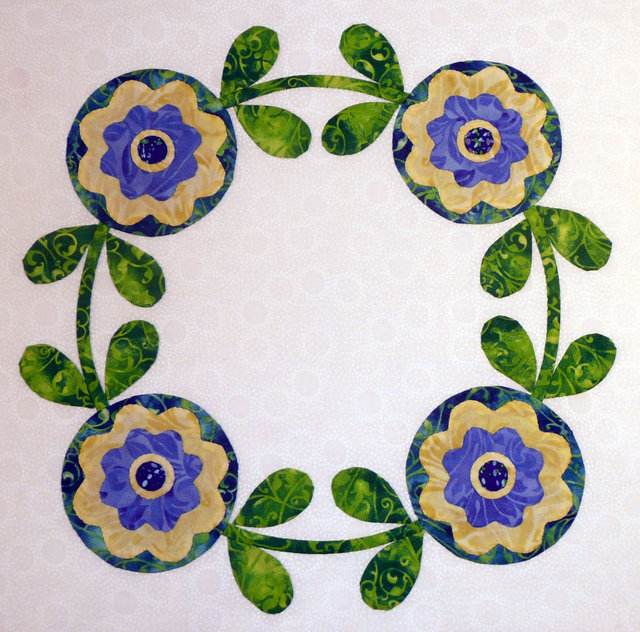
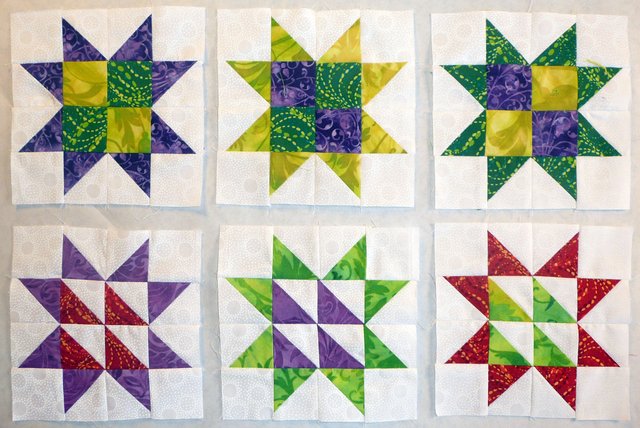
Here it is the final month of your quilt journey. This month you will be making the final blocks and assembling your masterpiece. If you're working on Hugs and Kisses, this month's final "assignment" is the Ring around the Roses block (above left). If you're working on Star Crazy, you'll be working on "Four-Patch and Quad Stars" (above right). 

No matter which BOM you've chosen, you're sure to pick up lots of useful info and tips from Sue Garman's great instruction.

To download the December BOM pattern for Hugs and Kisses, click here.  To download the December patterns for Star Crazy, click here.  And be sure to catch Alex's new classroom lesson's here on Piecing 101 featuring our Star Crazy BOM.  Alex helps you work to improve your skills.

In the meantime, for surefire inspiration,  visit the BOM section of Show and Tell (be sure to click "Show BOM ONLY" view) to view the beautiful blocks already posted by fellow TQS members.

  0

3289_binding.jpg
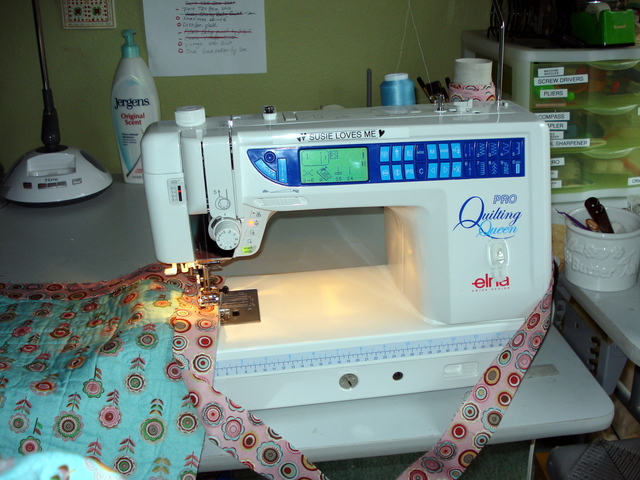
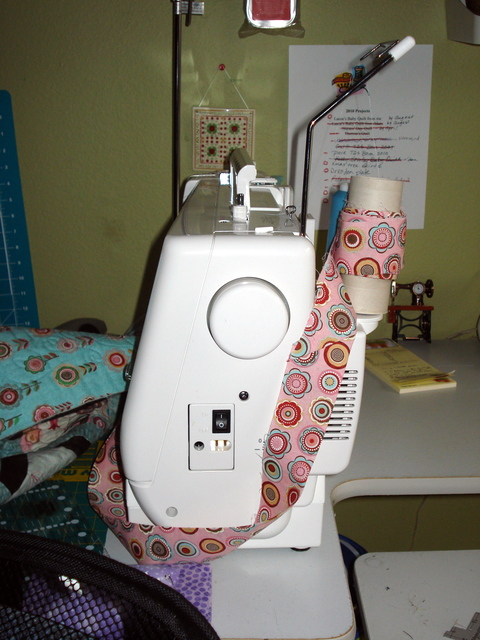
The next time you are in a wrestling match with the binding for a quilt project, try this handy tip sent to us from TQS member SusieQMcF. Wind the binding around an empty toilet-paper roll, and then place the roll on the extra spool holder at the back of your machine. No more tangled binding!

If you have a great tip to share, please send it to us here.

3289_binding2.jpg

  0

3286_img_0220.jpg 3286_img_0224.jpg
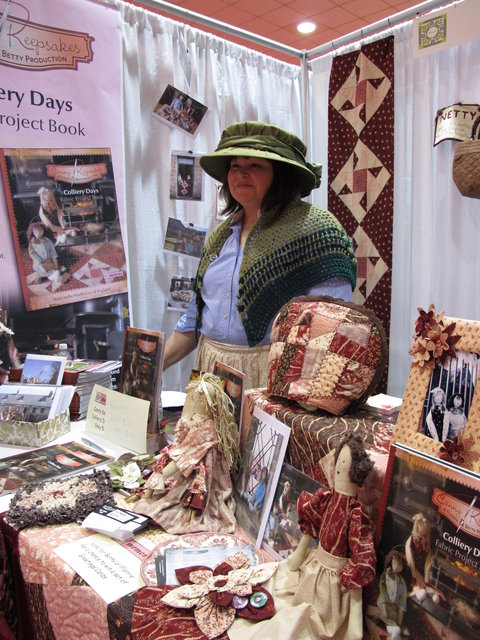
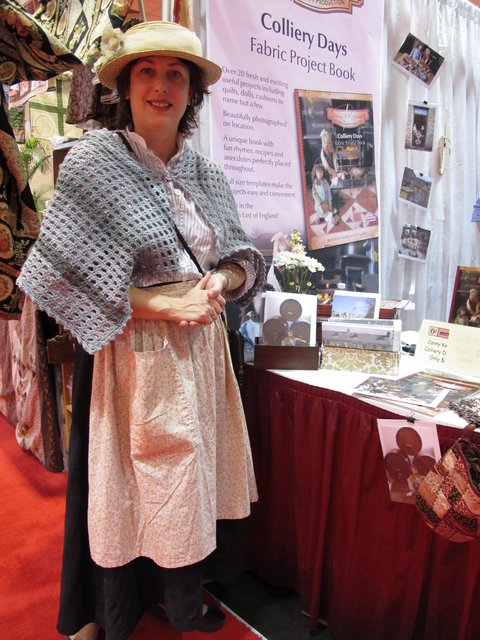
Debbie Johnson (left) and Kim Suleman (right) dressed in their shawl and hat 'for out in town'.

The first visit in our Around the Globe tour is with co-authors Debbie Johnson and Kim Suleman (writing as "Betty" and "Florrie"), who charmed everyone at the show in Houston with their warm personalities and their dress, typical of the clothing worn by middle-class women from a colliery village in the North East of England during the early 1900s.

Debbie and Kim's book, Colliery Days: A Fabric Project Book, includes beautiful photography shot in miners' cottages, and features old patterns inspired by the Beamish Open Air Museum interpreted in updated designs.

The book also includes childhood memories, recipes, and poems shared by "Betty" and "Florrie," who grew up in a nearby colliery.--Lilo Bowman

To read more visit our Articles page here.

  0

3272__22t6717.jpg
Photo by Gregory Case Photography

Before you dive into quilting that masterpiece you've labored over for months, take a tip from award- winning quilt artist David Taylor (Episode 406). 

Make a few small quilt sandwiches using the same top and backing fabrics and the same batting as you've used in your quilt.

 Experiment with these samples to determine the appropriate tension and to audition thread and quilt patterns before you begin stitching on the actual quilt.

By duplicating the materials, you've insured that the stitching conditions will be the same. 

If you have a tip you'd like to share, please send it to us here.

  1

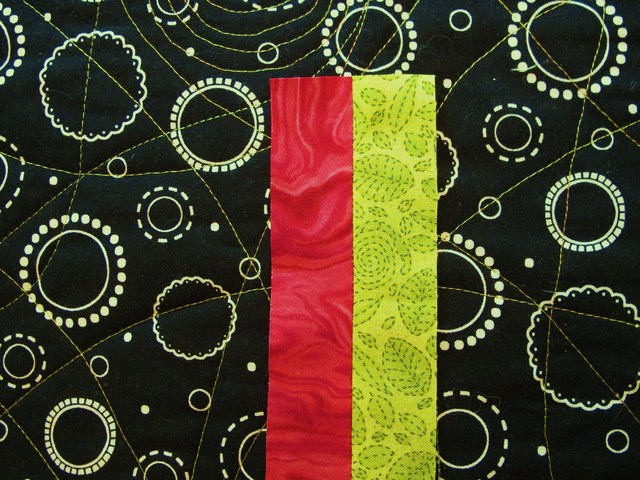
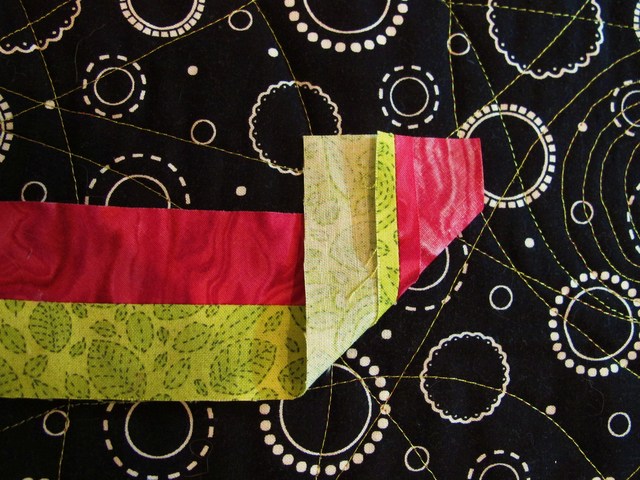
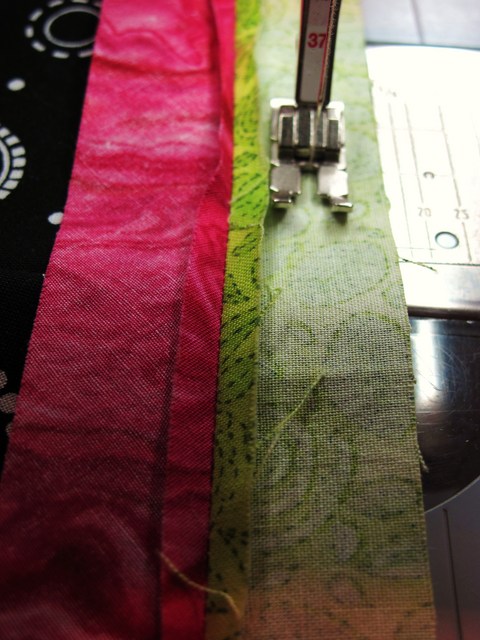
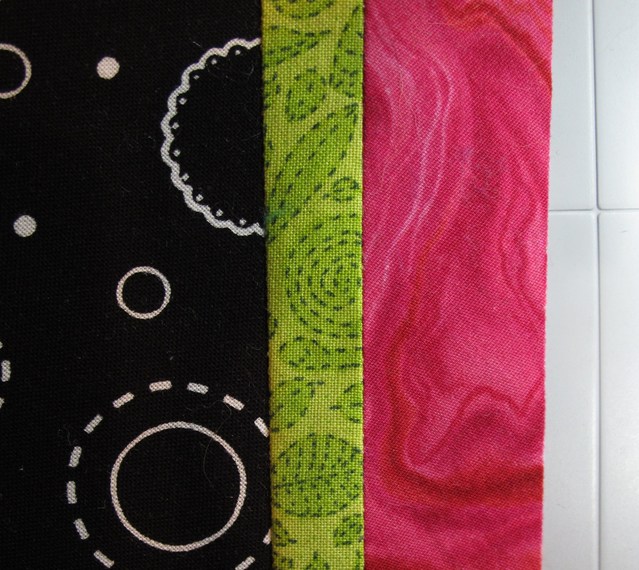
Sometimes a quilt just calls for a bit of something extra when it comes to binding.  If your quilt is reversible, why not make a two-sided binding using Bonnie Browning's tip from her book, Borders & Finishing Touches 2.

3260_img_0079.jpg 3260_img_0081.jpg 3260_img_0082.jpg
Cut strips from two different fabrics. To determine the cut width of the strips, add the width of the required seam allowances to the desired width of the finished binding. For example, a 1/2" finished binding will require strips cut 1 1/4" wide: 1/2" for the finished binding + 1/4" for the seam allowance needed to join the two strips + 1/2" for the seam allowances needed to apply the binding to the quilt.

Sew the two contrasting strips together lengthwise using a 1/4" seam. Press the seam allowance open. Sew to the front of quilt using a 1/2" seam. Fold the binding to the back of the quilt, turn under 1/2" to cover the stitching line, and use matching thread to blindstitch or hand stitch the turned edge.

3260_img_0085.jpg

See more great binding ideas in Episode 609 with Bonnie Browning here.

  0

3207_img_0075.jpg

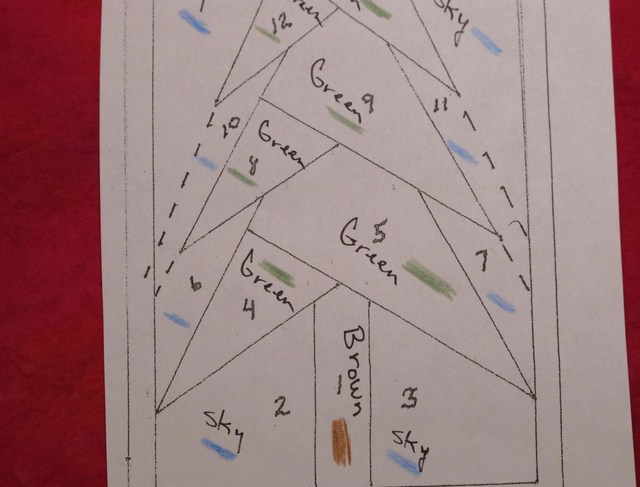
Paper piecing works wonders when when your goal is to achieve perfect points; however, the process can be frustrating when you sew a fabric of the wrong color in the wrong position. Avoid "reverse stitching" by coding your master pattern with colored pencils or the written word. Color coding allows you to relax, enjoy, and stitch with confidence. If you have a great tip to share, send it to us here.

  0

Here is a chance to get an extra $100 off that amazing Bernina you have been saving for.  As part of Bernina's support of Breast Cancer Research, you can click on the coupon below and get this special discount.


3198_sewpink_coupons_100.jpg

  0

3153_marseille1.jpg 3153_marseille3.jpg

Textiles, by their very nature, tend to be delicate objects, so that--when exposed to light and repeated washings, as well as general wear and tear--only a fraction survive for any extended length of time. Only through careful and loving preservation, do we have these fragile artifacts to view and study. 

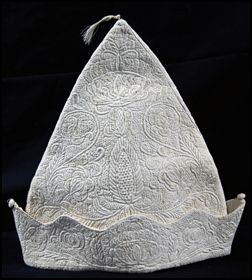
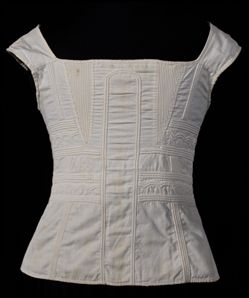
So it is with great excitement that the International Quilt Study Center & Museum, in Lincoln, NE, is featuring--for the first time ever--an exhibit of the white corded work known around the world as Broderie de Marseille. The exhibit runs from November 13, 2010 through May 8, 2011, and will include all manner of this unique whitework, including bedcoverings, wedding quilts, petticoats, corsets, and caps from the fashion conscious of the 17th century. 

The signature three-dimensional effect of these coveted textiles was achieved by only the most skilled needleworkers. A pattern was marked on the top fabric, generally a finely woven cotton or linen. A more loosely woven fabric was placed behind, and then the two fabrics were stretched in a frame.The needleworker followed the pre-marked design with small running stitches to form narrow channels and openings. Once the entire design was stitched, the frame was turned over for next step in the process.  

Once the piece was turned, the weave of the more loosely woven backing fabric would be manuevered to create holes for the insertion of a fine cotton cording. The cording would be pulled through the various channels, or pushed into the small openings to produce an elaborate, three-dimensional, raised effect. Folk legends, flowers, monograms, or sentimental messages were often the themes of these wildly popular textiles; h
owever, due to the very nature of the work involved, only those with status and income could afford such a luxury item.   

To learn more about the upcoming show, click here.

  0

3152_2871_houstonbooth.jpg
Photo by TQS member dlquilter

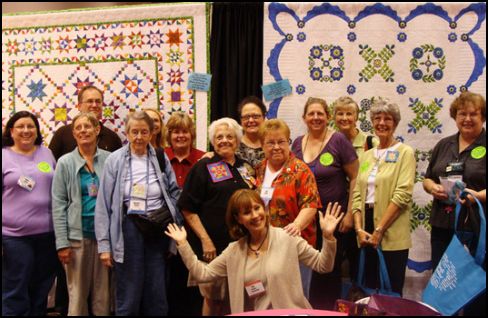
It's almost that time of the year, and TQS is gearing up for a great time at the International Quilt Festival in Houston later this month! We will be there with lots of fun and excitement (as usual) in booth 627/629, and--of course--we want to meet all our members who are attending the show. 

Speaking of fun, don't forget to drop by every day at 1 p.m. for the TQS member Meet and Greet. It's a great way to catch up, as well as get to know your online quilting buddies...AND, because it was such a huge hit last year, we're thrilled to let you know that TQS guest artists (past AND future) will be in the booth sharing their work and chatting. It's a great opportunity to get a sneak peek at what we have coming up on TQS in future episodes. So, c'mon by and see us. We promise you'll be pleased.

  0

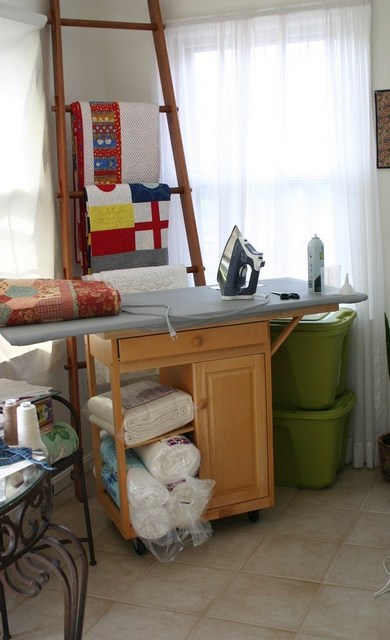
3142_1478_kellycunninghamboard.jpgFollowing last week's tip, we received a number of additional great ideas for creating your own custom ironing board. From suggestions for adapting kitchen and office furniture, to a quick and portable ironing surface for workshops, the variety of ideas was astounding.

  • Using last week's instructions for a custom board design, make a board that measures 24" x 60". Place the board on the floor, padded side down.  Center a commercial ironing board, face down and with legs folded in, on the prepared board. Trace around the commercial board. Remove the commercial board, and use wood glue (or screws if you are handy) to attach two scraps of wood on each side and one scrap of wood on each end of the ironing-board outline (just outside the traced drawing). Secure with wood clamps until the glue is dry. When dry, place your custom board on top of the commercial board. The wood scraps will hold the custom board in place, and you now have a large, stable ironing surface.  (Submitted byJo Ann Cross)
  • Place your custom board on top of a small 3-drawer dresser. "I bought the dresser at a thrift store. I got it for a steal because the top was dented." (Submitted by Sue Singer)
  • "I made my custom board out of MDF, placed a layer of heat reflective film (silver batting used in cooking pads) on top and covered the whole thing in canvas."  (Submitted by Julia Grigsby)
  • Place the custom board on top of an inexpensive, but sturdy, kitchen cart with locking wheels. The ironing board can be rolled to wherever it is needed. (Submitted by Kelley Cunningham)
  • Ask for an empty fabric bolt at your local quilt store. Fold a 24"x16" piece of 100%-cotton flannel  in half to make a 24"x 8" sleeve. Pin and stitch across one short end. Insert the cardboard bolt inside the sleeve and pin up the long side as tightly as possible. Remove the cardboard bolt and stitch up the pinned side.Turn inside out. Slide the cardboard bolt into the sleeve opening; it should be a nice tight fit. ***Please note that this is meant to be a temporary ironing surface for workshops or retreats, not a primary ironing surface*** (Submitted by Kandy Newton)